Deploying the WSUS Code Signing Certificate Within Configuration Manager Using a CI
In this article, we will cover how a WSUS signing certificate, or other code-signing certificates can be deployed to your Configuration Manager clients by using a Configuration Item. A code-signing certificate is a core component in Third-Party Patching. The certificates private key is used to sign the CAB files that will be published to WSUS, and ultimately installed on clients. The client must trust this certificate and the certificate chain.
There are use cases where deploying this certificate can be useful via Configuration Item as opposed to something like GPO, or the built-in Client Settings. One that comes to mind is wanting the monitoring that a Configuration Item provides. Below is a step by step showing how a Configuration Item can be created using the script attached here. Additionally, there are steps to help gather the required information.
Article Outline:
- Gathering Info
- Step 1: Create a New Configuration Item
- Step 2: Create the Associated Compliance Rule
- Step 3: Associate the CI with a Configuration Baseline
- Step 4: Deploy the Configuration Baseline
Gathering Info
The script itself will need to be edited with your specific Thumbprint and Base64 encoded certificate string. The function contained within the script discusses how to gather these values, but I’ll also note them below. Also, if you are comfortable with Configuration Items within Configuration Manager, you can simply grab the script, adjust for your environment, and deploy away!
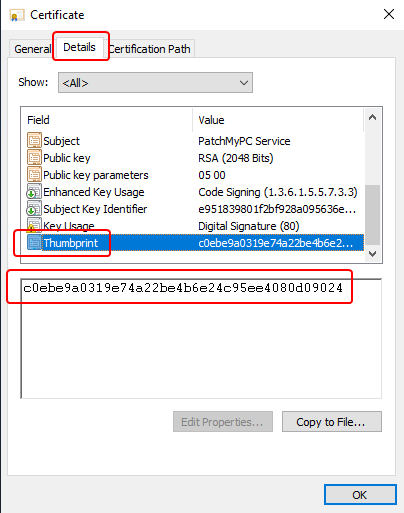
- Certificate Thumbprint:
- Within the properties of your Code Signing certificate, go to the Details tab and scroll to down to the thumbnail area. This thumbprint will help us uniquely identify the certificate.
-
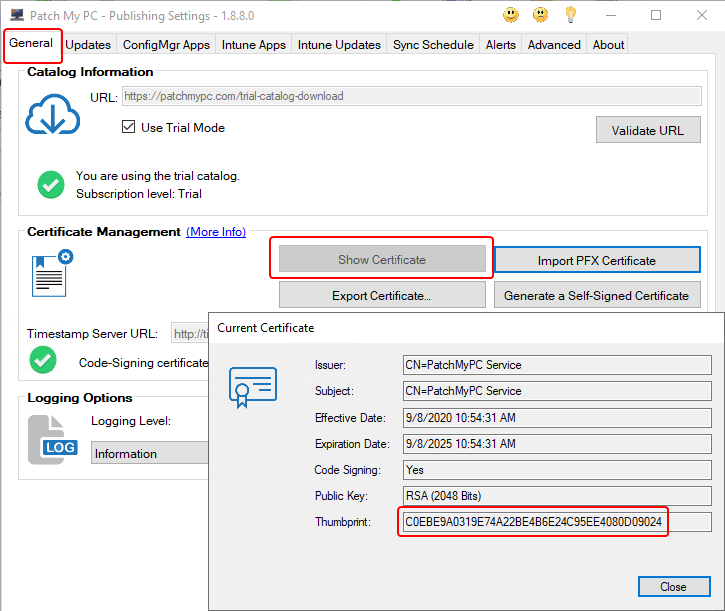
- This can also be copied out of the Patch My PC Publisher, as shown below.
- Within the properties of your Code Signing certificate, go to the Details tab and scroll to down to the thumbnail area. This thumbprint will help us uniquely identify the certificate.
- Base64 Encoded Certificate String: This can be acquired a handful of ways, but a simple way is to get a copy of the certificate as a file and run a PowerShell command similar to the below
-
Set-Clipboard -Value ([System.Convert]::ToBase64String((Get-Content -Path .\ExportedCert.cer -Encoding Byte)))
-
Step 1: Create a New Configuration Item
This process will require creating a new Configuration Item, which can be accessed in the context menu as shown below, or within the ribbon when in the node shown.

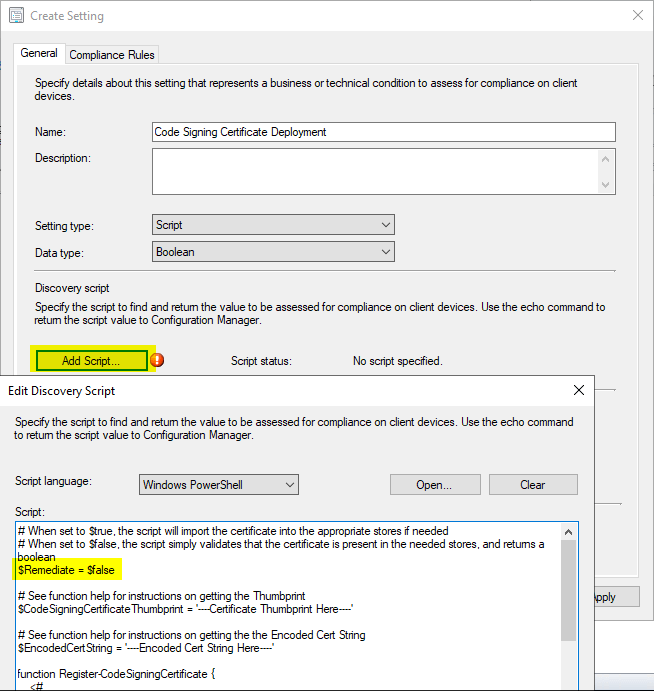
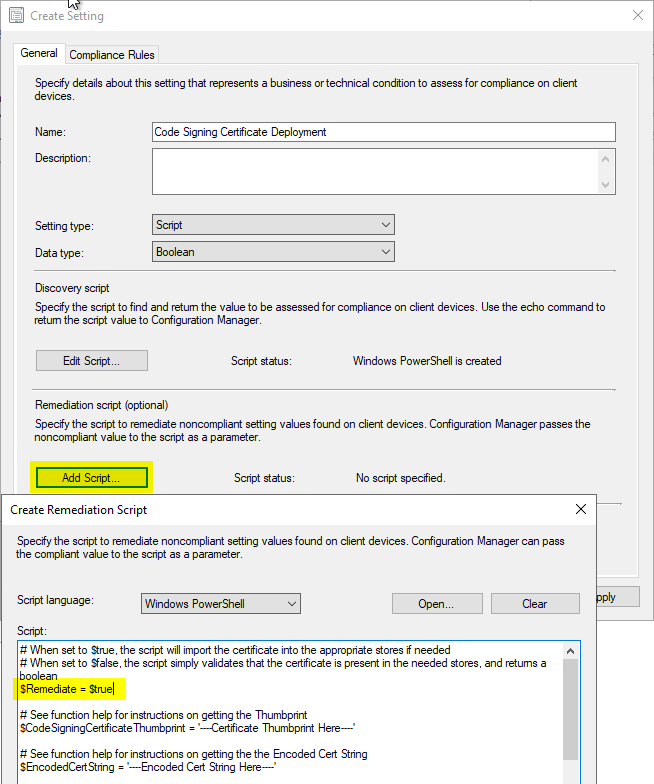
The CI will return a Boolean value, either $true or $false based on the presence of the specified certificate thumbprint. See below, for example, Discovery, and Remediation implementation.
Note Data Type is set to Boolean, and the script is modified between Detection and Remediation. A $Remediate variable is changed based on the purpose of the script. The $CodeSigningCertificateThumbprint and $EncodedCertString variables will also need to be populated and should be the same in both scripts. The below screenshots simply show placeholder text.
Step 2: Create the Associate Compliance Rule
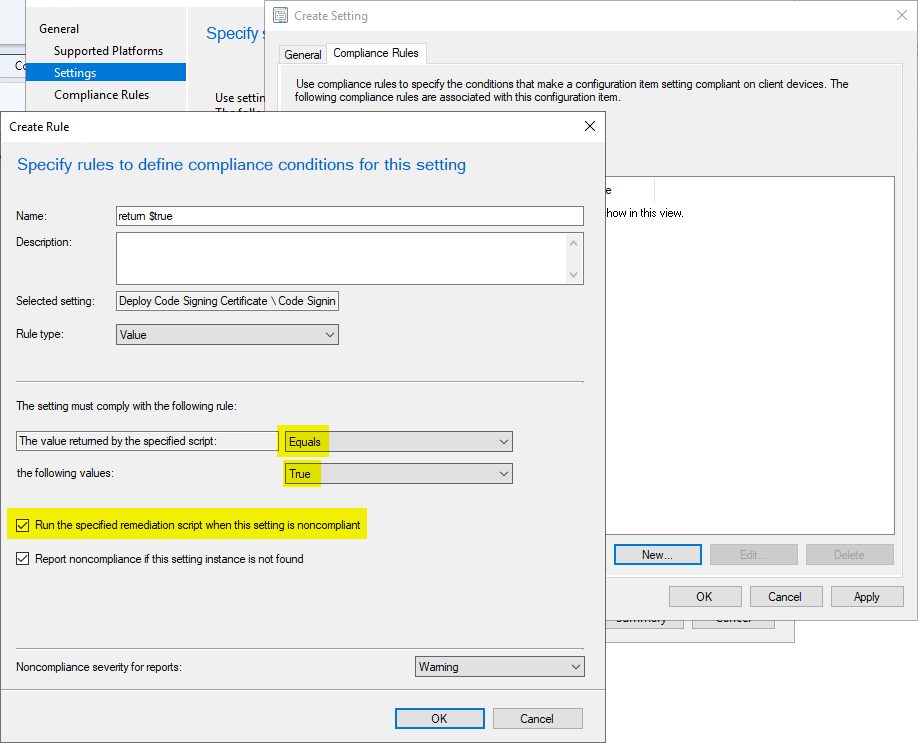
When creating the Configuration Item, you will also configure a Compliance Rule. The compliance rule is the logic that dictates if the remediation script should run, or if the Configuration Item should return compliant or not.
Note that we check the box for “Run the specified remediation script when this setting is noncompliant.” This option is needed to ensure we can perform remediation.
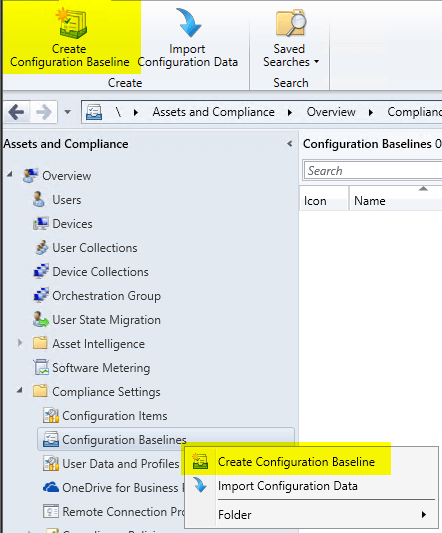
Step 3: Associate the CI with a Configuration Baseline
With the CI created, we need to create a Configuration Baseline, which can be accessed in the context menu as shown below, or within the ribbon when in the node shown.
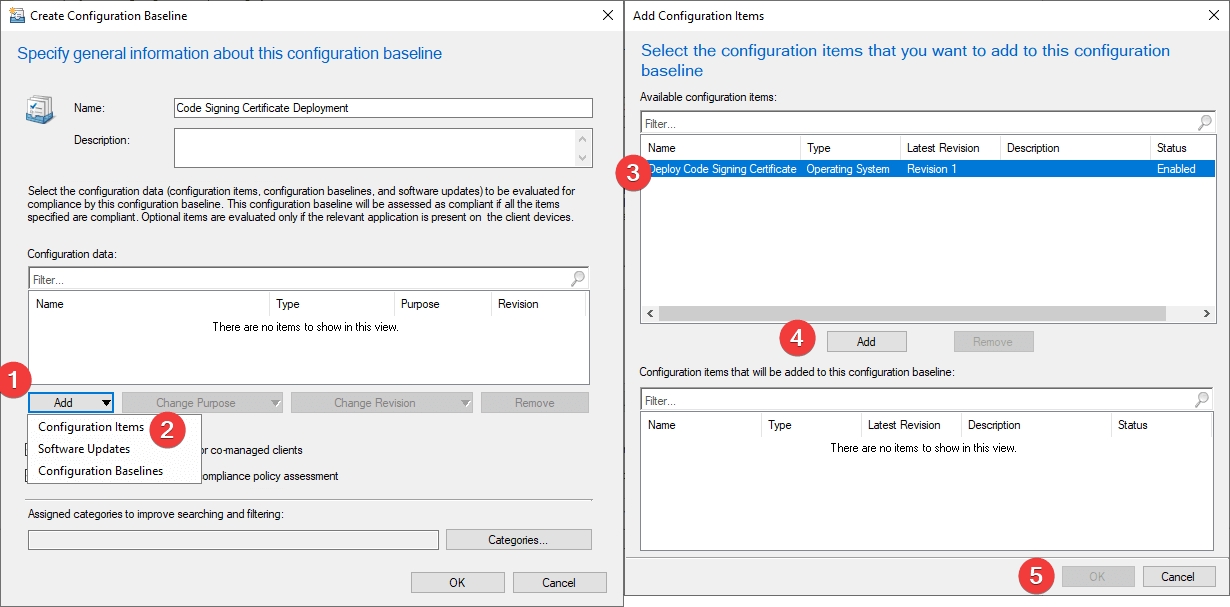
Alternatively, you could add this CI to an existing baseline you have in place.
See the below wizard for an example of the wizard for creating a Configuration Baseline where we are adding our previously created Configuration Item.
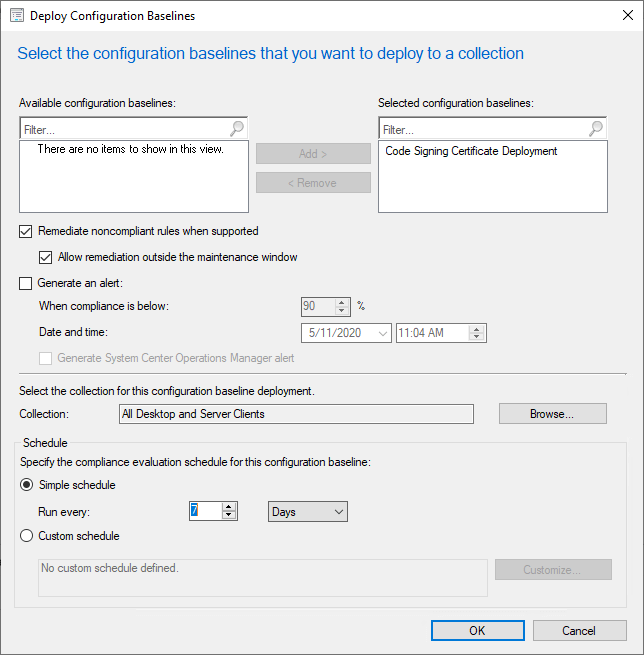
Step 4: Deploy the Configuration Baseline
Finally! The entire point of this article.
What you select within this wizard is ultimately up to you. If you want the action to happen, you, at a minimum, need the check the “Remediate noncompliant rules when supported” checkbox. Whether you allow this outside maintenance windows, and on what schedule, targeting which devices etc. are all decisions that will be specific to your organization.
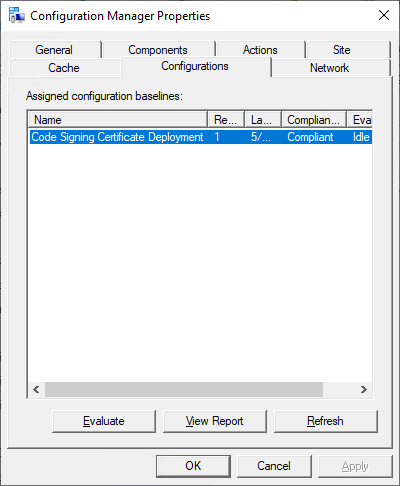
Assuming all steps were followed, and the values for the base64 string and thumbprint are valid, you should be able to perform a Machine Policy Evaluation Cycle on a client that is targeted with the deployment, and check the Configurations tab as shown below. Once the Configuration Baseline has evaluated as compliant, the certificate should show in the Trusted Root Certificate Authorities certificate store and the Trusted Publishers certificate store and with no ‘content’ needed! We can store the certificate as a string, very cool!