Are you a sysadmin looking for a better solution for managing your organization’s Windows Updates and M365 apps? Are you finally looking to embrace more cloud technologies to better service remote clients and ensure your updates are vetted and deployed across your estate? Then look no further than Microsoft’s Windows Autopatch!
In this blog post, we will cover everything you need to know to get started with Windows Autopatch, including how to set up and configure It and how to verify that clients are receiving their scheduled updates. Once you understand how this works, you will be able to set and forget all about your Windows and Microsoft 365 updates!
What is Windows Autopatch?
Windows Autopatch is a cloud service that automates the update process for Windows (Feature and Quality), Microsoft 365 Apps for Enterprise, Microsoft Edge, and Microsoft Teams. It is available to organizations that have a subscription to Windows 10/11 Enterprise E3 (or higher), AAD Premium, and Intune.
Windows Autopatch allows the admin to manually assign or automate the process of creating testing rings of devices and then deploying updates to those devices. If no issues are found, the updates are then deployed to all eligible devices in the organization. This allows for proper vetting of updates to small “testing groups” before deploying updates to the entire estate.
What is the ROI of Windows Autopatch?
So why should I spend the time implementing Windows Autopatch?
Keeping devices up to date with the latest Windows security patches
Windows Autopatch can help organizations keep their devices up to date with the latest security patches which can help to protect them from malware and other security threats.
Improving productivity
By automating the update process, Windows Autopatch can free IT professionals to focus on other tasks, which can improve productivity.
Reducing costs
Windows Autopatch can help organizations to reduce the costs associated with managing updates, such as the cost of labor and the cost of software licenses.
What are the prerequisites and limitations?
If you want to take advantage of the Windows Autopilot service, you must first consider the following and ensure you meet all of the prerequisites before enabling the service.
Licensing
Windows Autopatch is available to organizations with Windows 10/11 Enterprise E3 or higher, AAD Premium, and Intune.
Azure Active Directory MUST be used as the primary authentication source either configured as Cloud Only or through Hybrid.
Connectivity
Devices enrolled in with Windows Autopatch must be connected to the internet and be able to access Microsoft Service Endpoints.
- For a complete list of Service Endpoints visit Microsoft Documentation: Configure your network – Windows Deployment | Microsoft Learn
Device Management
Devices must be managed with Intune as the primary MDM authority or via co-management.
- In a co-management scenario, the following workloads must be switched over to either Pilot Intune or Intune.
- Windows Update
- Device Configuration
- Office Click-to-Run apps
- Only “Corporate-Owned” devices will be eligible for enrollment. Microsoft policy blocks BYOD devices from enrolling in Windows Autopatch.
- Devices must have checked in with Intune in the last 28 days to be eligible for enrollment.
- Physical and Virtual devices are supported, but they must have a Serial Number, Model, and Manufacturer specified in Intune for the device to be eligible.
Windows Licensing Requirements
Windows operating system must have one of the following versions as a minimum OS requirement.
- Windows 10 (1809+)/11 Pro
- Windows 10 (1809+)/11 Enterprise
- Windows 10 (1809+)/11 Pro for Workstations
Note: Any devices registered with Windows Autopatch that do not meet minimum OS requirements will automatically be upgraded to the minimum currently supported version of Windows (Windows 10 20H2).
Verify GPOs and CSPs
Ensure you are not deploying policies that will conflict with the Autopatch policies that will be deployed. GPOs will take precedence over MDM issued CSPs. The following Update Policy CSPs are allowed:
| Allowed Policy | Policy CSP | Description |
|---|---|---|
| Active hours start | Update/ActiveHoursStart | This policy controls the end of the protected window where devices won’t restart. Supported values are from zero through to 23, where zero is 12:00 AM, representing the hours of the day in local time on that device. This value can be no more than 12 hours after the time set in active hours starts. |
| Active hours end | Update/ActiveHoursEnd | This policy controls the end of the protected window where devices won’t restart. Supported values are from zero through to 23, where zero is 12:00 AM, representing the hours of the day in local time on that device. This value can be no more than 12 hours after the time set in active hours starts. |
| Active hours max range | Update/ActiveHoursMaxRange | Allows the IT admin to specify the max active hours range. This value sets the maximum number of active hours from the start time. Supported values are from eight through to 18. |
Ensure the following policies are not enabled. Otherwise, the devices will not be eligible:
- HKLM\SOFTWARE\Microsoft\WindowsUpdate\UpdatePolicy\PolicyState
- HKLM\SOFTWARE\Policies\Microsoft\Windows\WindowsUpdate
Windows Autopatch Enrollment
To enable Windows Autopatch for your tenant, log in to the Intune Endpoint Manager portal. Navigate to Tenant Administration > (Windows Autopatch) Tenant Enrollment. You must have Global Admin permissions to enable the service. Read and agree to allow Microsoft to run the Windows Autopatch Readiness Assessment Tool and assess/store the data.
The Readiness Assessment Tool will check Intune and Azure Active Directory settings to ensure you meet all the prerequisites needed to enable Windows Autopatch. This will not check for the Configuration Manager Workloads mentioned above.
Note: If you do not see the Windows Autopatch blade under Tenant Administration, then verify you meet all the prerequisites needed to enable the service. Most importantly, licensing would be the most probable cause.

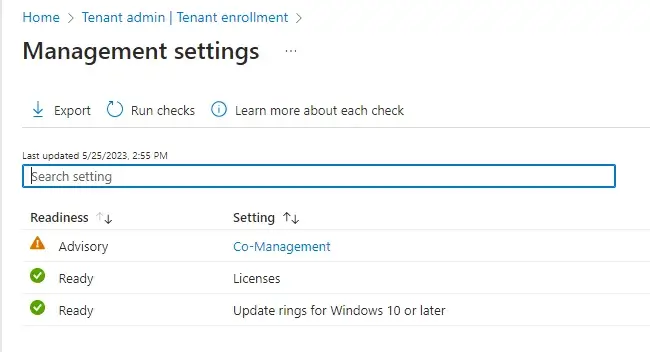
Once you agree and continue, the Windows Autopatch Readiness Assessment Tool will run and examine your tenant settings. Allow this process to complete and collect the results. You may see some warnings and advisories that must be addressed before enabling the service.

Clicking on the View Details button will show you the results in more detail.

As you can see from the results above, Licenses are labeled as Not Ready. Clicking on the Licenses setting will provide more details on that result.
This will indicate that I need to check my Windows OS and M365 Licensing to ensure I meet the suggested minimum requirements.
Note: This was done on a free Microsoft Developer tenant. Licensing provided by the developer tenants does not include Windows 10/11 licensing.
For a full list of issues and possible resolutions, please refer to Microsoft Documentation here.

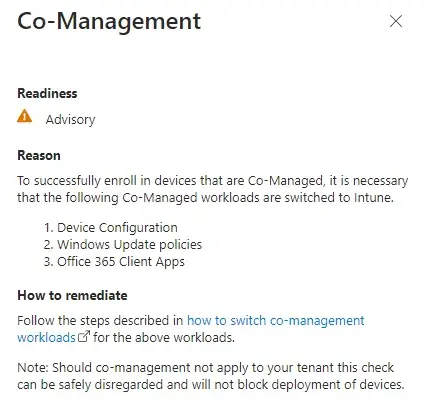
Lastly, Co-Management is labeled as an Advisory, letting us know to check our Co-management settings. This check will always be present to ensure the co-management workloads have been moved over.
The Assessment Readiness Tool will not check for Co-Management workloads, so skip this Advisory if you have confirmed those workloads have been moved over. If you are in a cloud-only configuration, you can also disregard this advisory.
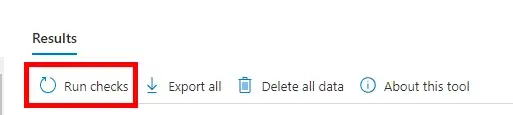
Once you have addressed the Not Ready errors listed in the Results page you can re-run the Windows Autopatch Readiness Assessment Tool again to verify the status.
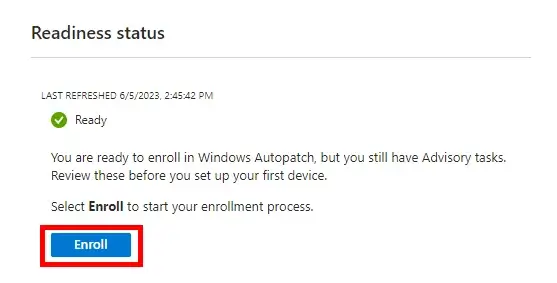
You should see the Readiness Status change to Ready once you have completed all the requirements. Click the Enroll button to continue the enrollment process and activate the service
Note: If you cannot resolve issues and require support from Microsoft, please reference Microsoft’s Documentation here.
On the next screen, you will be prompted to allow Microsoft to make changes to your tenant. This includes setting up all policies, groups, and scripts needed to allow devices to enroll with the service.
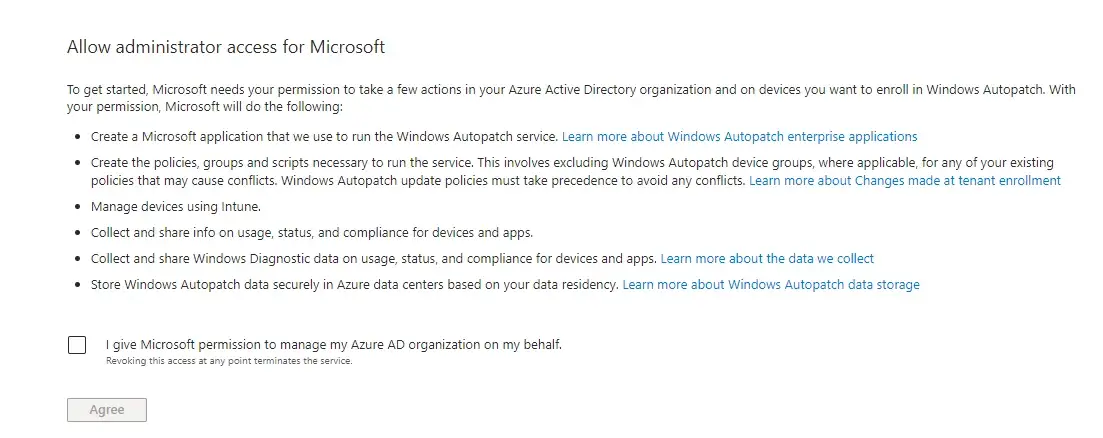
Note: For a complete list of changes, please reference Microsoft Documentation found here.
On the next screen, you will be prompted to provide contact information for the Primary and Secondary Admins. Microsoft will contact these admins if there are any issues regarding Windows Autopatch that your internal IT teams cannot resolve.
Once completed, the Windows Autopatch Service will begin setting up and initializing your tenant’s configuration. Allow some time for this process to finish, and grab a coffee since you are now one step closer to never having to worry about Windows or M365 updates again!
You should be prompted to continue within 5 minutes. However, please note that setup is still occurring in the background, as shown in the Notification panel for your tenant.
Once the configuration has been completed, you will see the notification below to continue registering your devices.

1. Register Devices with Windows Autopatch
Now that your tenant has been enrolled with Windows Autopatch, it is time to register your devices! Admins can easily register devices with Windows Autopatch using the two methods provided:
Classic Device Registration
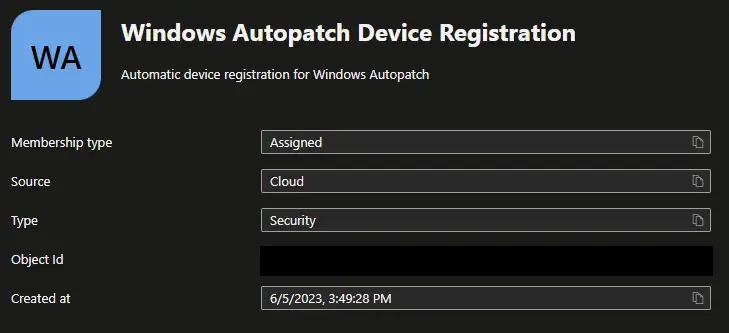
This registration process involves adding devices you would like managed by Windows Autopatch to the Windows Autopatch Device Registration group. This group was created during the setup process and is used by the service to register devices.
- Devices can be directly added to this group or nested in other Azure AD assigned or dynamic groups.
- Windows Autopatch will perform a device check every hour to try and find and register any new devices assigned to this group.

Autopatch Groups (Preview)
Autopatch Groups is another way admins can register devices using the Default or Custom Autopatch groups. These groups are logical containers composed of 5 (default) up to 15 (custom) groups that make up the deployment rings.
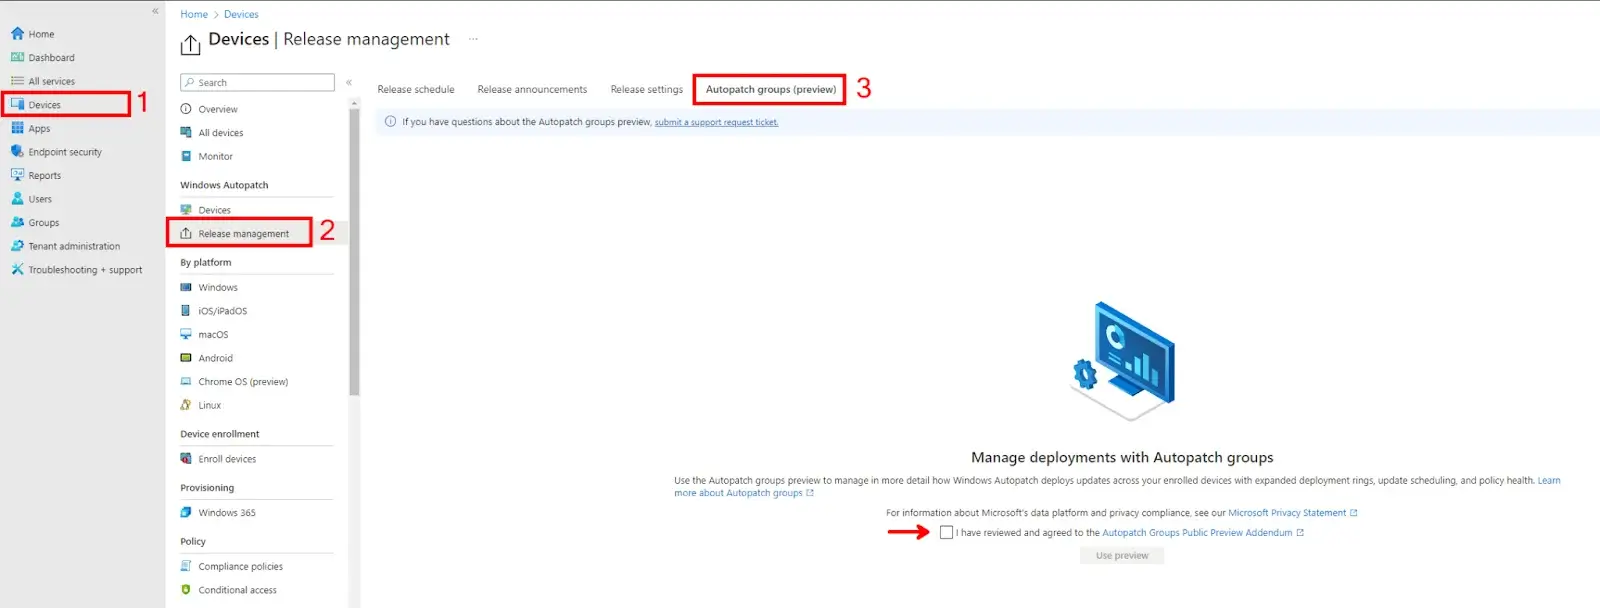
To enable Autopatch Groups (Preview), log in to the Endpoint Manager Portal and click the Devices blade. From there, click on Release Management > Autopatch Group (Preview) and agree to the preview terms and conditions.
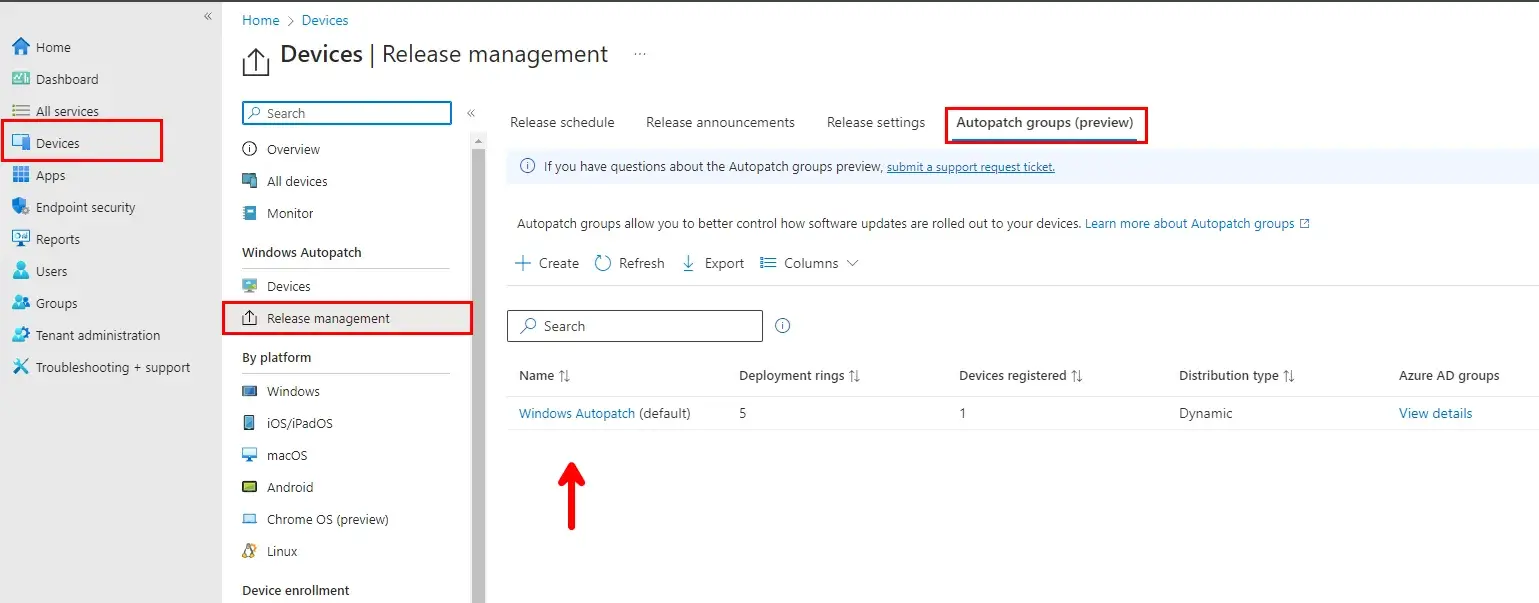
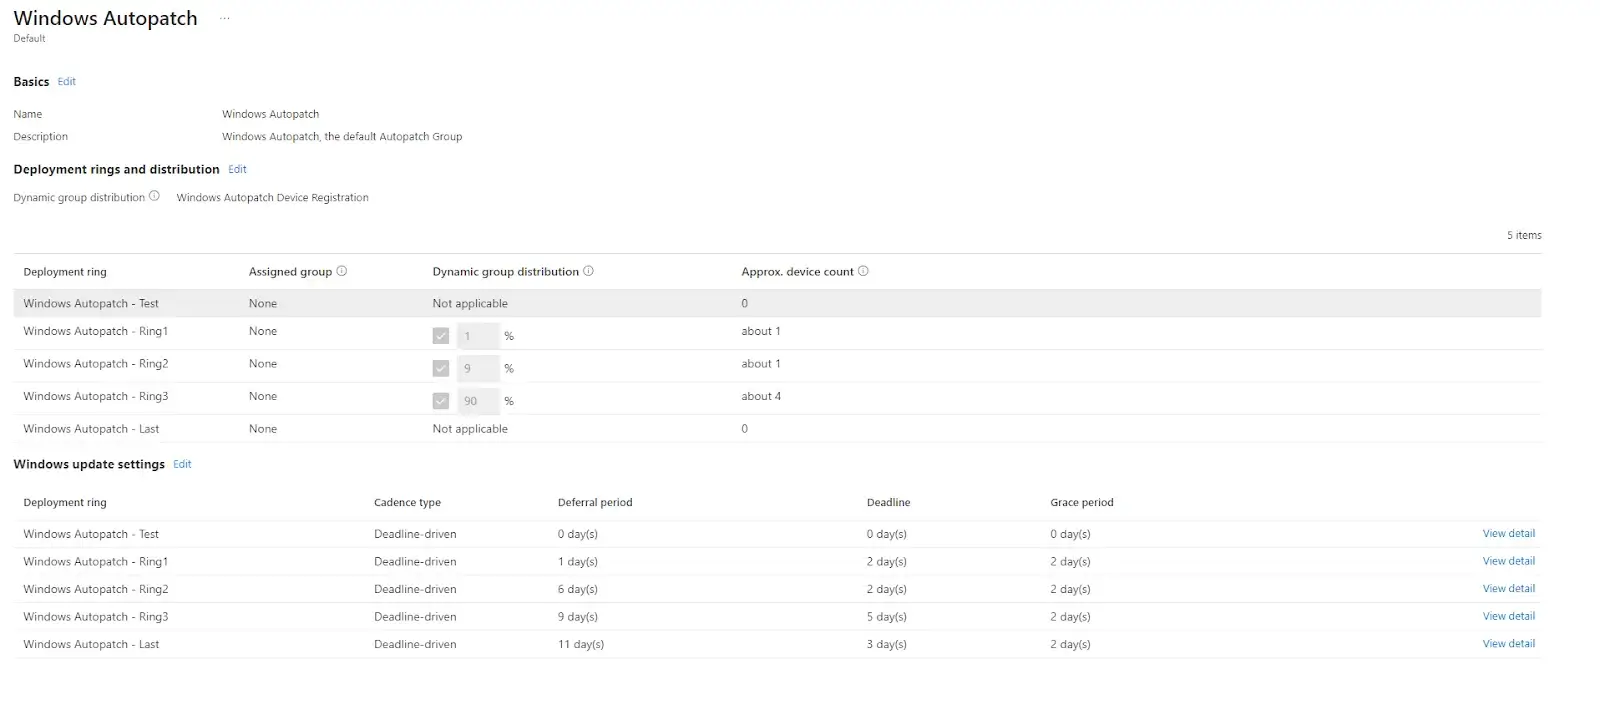
When you enable Autopatch Groups, the service will create a Windows Autopatch (Default) group, as shown below. By default, this group comprises five deployment rings and will try to pull in all devices from either the Classic registration group or any of your Device based dynamic or assigned security groups specified in the deployment rings. They are also configured with default deployment cadences for Windows quality and Feature Updates. The defaults can be customized by adding more deployment rings and Windows Update settings such as Deferrals and Deadlines.
Note: User-based groups are not supported in Autopatch Groups. The group MUST be a device-based assigned or dynamic group. Device-based groups can only be associated with one Autopatch group and deployment ring at a time. This also applies across different Autopatch groups and deployment rings within the tenant.
The defaults can be customized by adding/removing deployment rings and configuring the Windows Update settings, such as Deferrals and Deadlines. You cannot rename or delete the default group. Devices can be assigned either dynamically, manually, or both to the five deployment rings.
Custom Autopatch groups can be created if the defaults do not meet the organization’s requirements for update deployments. For more information on configuring a custom autopatch group, please reference Microsoft’s Documentation here.
By default, the following rings will dynamically assign devices from the Classic Registration group or any device-based Security group. Rings 1-3 are dynamically assigned; however, you can assign device-based groups to those rings. The Test and Last rings must have groups assigned and do not support dynamic assignments.
- The Test Ring is reserved for IT Admins who want to test the update releases as soon as they are available from Microsoft. This can also be used as a pilot group if Deployment Rings 1–3 are removed from the default group.
- The Last Ring is reserved for VIP or C-Suite level management. This ring is intended as the final deployment after Ring 3 (Broad) has been deployed to most devices and has a deferral period of 11 days. This group can be used as a PROD deployment ring if Rings 1-3 have been removed.
You can see the groups created during the Autopatch Groups setup process; if you navigate to the Groups blade in the Endpoint Manager portal and search for Autopatch, you will see that the service has created ten groups.
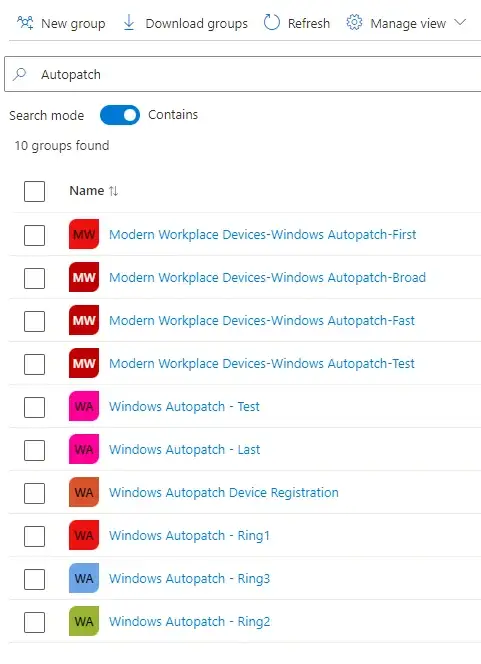
These groups are divided into two sections: the default security groups used by the service to deploy Windows Feature and Quality updates. Autopatch Groups cannot be used to manage M365 Apps, Teams, and Edge updates. Those products are managed through the Classic Experience at this time.
Note: Do not modify the Azure AD groups membership types (Assigned or Dynamic). Otherwise, Windows Autopatch will not be able to read the device memberships of those groups. If the ownership is modified, you must add the Modern Workplace Management Service Principal as the owner of these groups.
2. Service-Based Deployment Rings
The Service-Based deployment rings are explicitly used for updating the Autopatch service, device-level configuration policies, apps, and APIs needed for the core functions of the service. These groups can not be deleted or renamed.
- Modern Workplace Devices-Windows Autopatch-Test
- Modern Workplace Devices-Windows Autopatch-First
- Modern Workplace Devices-Windows Autopatch-Fast
- Modern Workplace Devices-Windows Autopatch-Broad
3. Software-based Deployment Rings
The Software-based deployment rings are used solely for software update management policies, such as Windows update rings and feature update policies being used in the default Windows Autopatch Group. These are the default rings that devices will be assigned too once registered to the service.
- Windows Autopatch – Test
- Windows Autopatch – Ring1
- Windows Autopatch – Ring2
- Windows Autopatch – Ring3
- Windows Autopatch – Last
| Ring | Quality Deferral | Feature Deferral | Quality Deadline | Feature Deadline | Grace Period |
|---|---|---|---|---|---|
| Windows Autopatch – Test | 0 | 0 | 0 | 5 | 0 |
| Windows Autopatch – Ring1 | 1 | 0 | 2 | 5 | 2 |
| Windows Autopatch – Ring2 | 6 | 0 | 2 | 5 | 2 |
| Windows Autopatch – Ring3 | 9 | 0 | 5 | 5 | 2 |
| Windows Autopilot – Last | 11 | 0 | 3 | 5 | 2 |
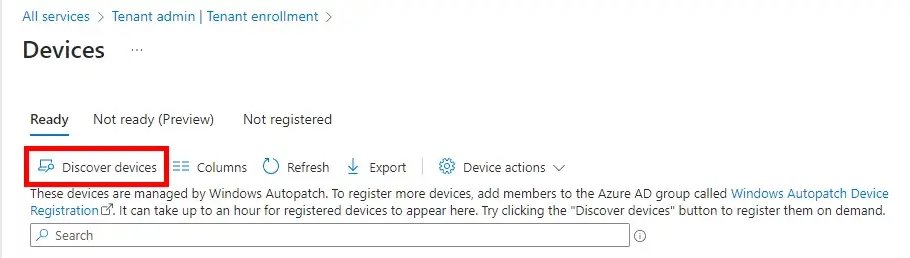
You can also manually check for devices that fall in either the Classic or Autopatch Groups by clicking on the Discover Devices button in the Tenant Admin >Tenant Enrollment blade.
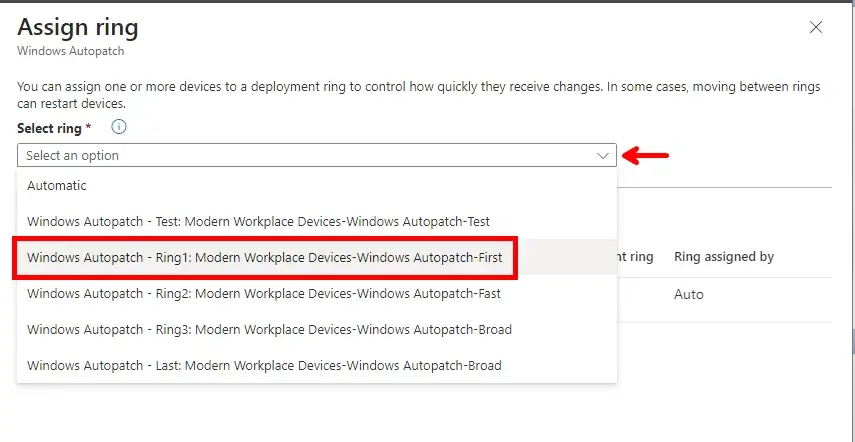
If you need to manually re-assign a device to a specific ring you can select the device and click on the Device Actions drop-down menu. Select Assign Ring to specify the ring you want to move that device too.
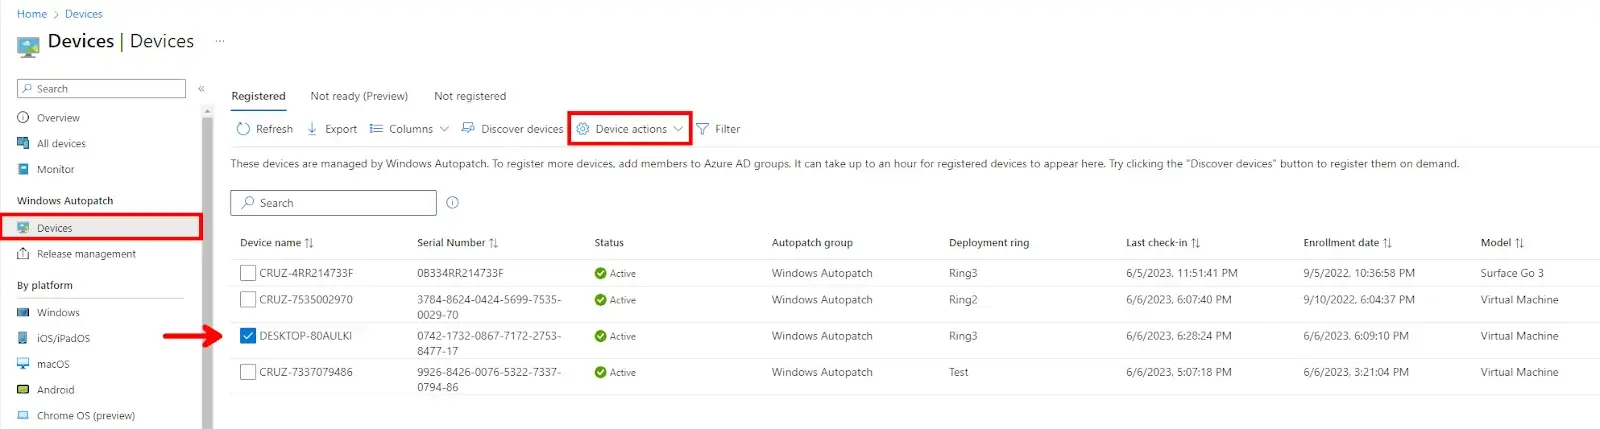
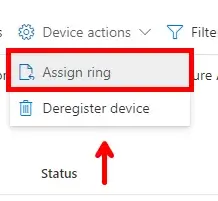
Note: You can also Deregister Devices in this drop-down as well. This will remove the device from Windows Autopatch. The device must then be removed from the default Windows Autopatch Device Registration group or other assigned/dynamic-based groups.
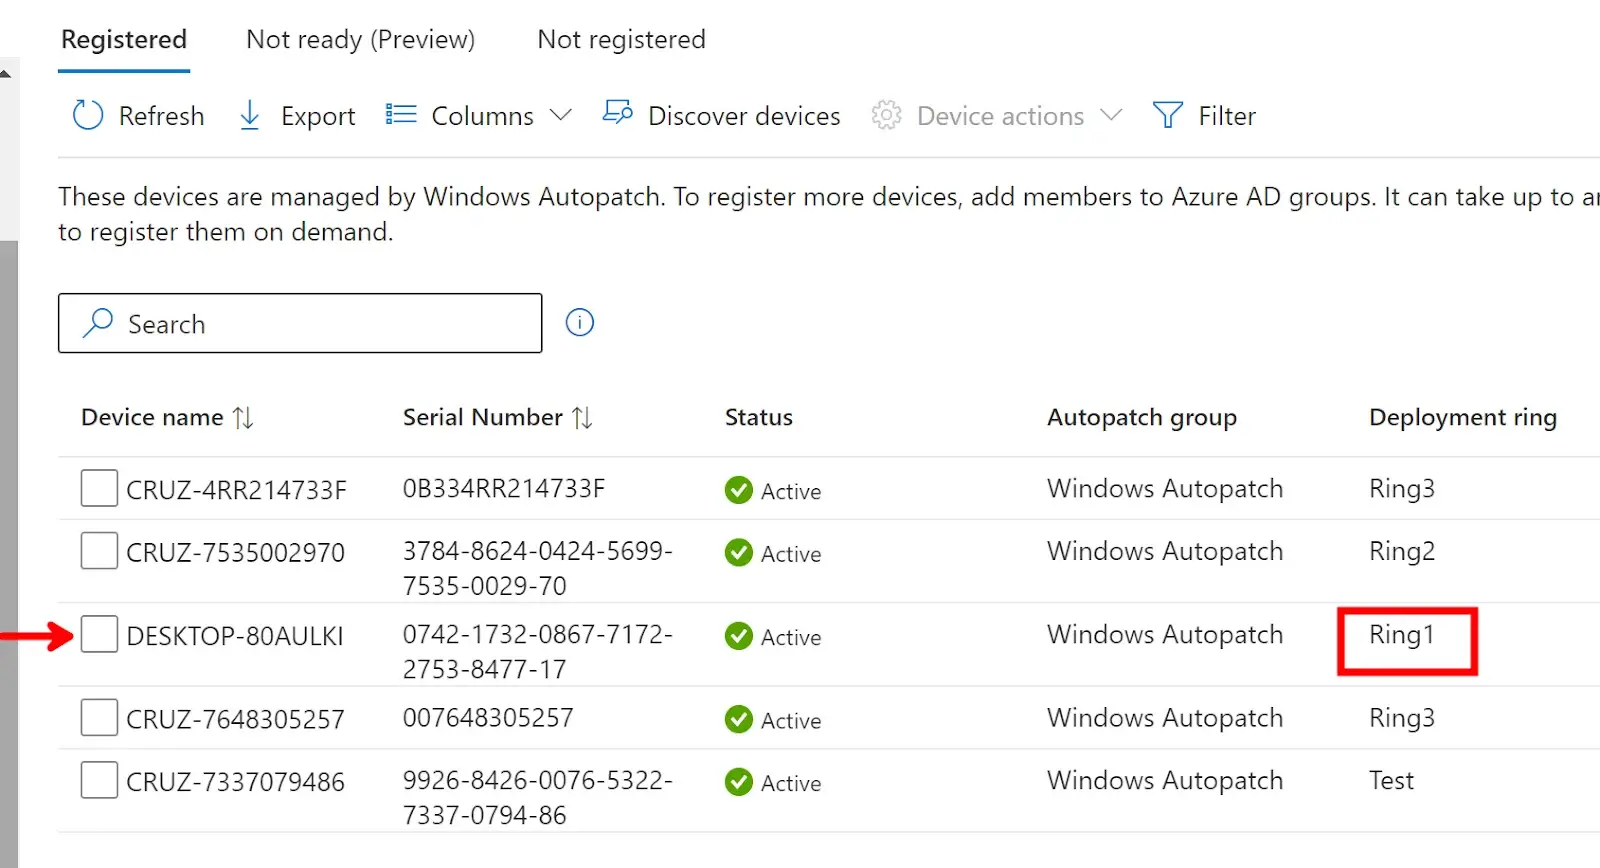
We can see that the selected device has been moved to Ring1 from Ring3. Moving your devices using this method is recommended instead of deleting the device from the deployment ring security group and re-adding it to a different group/ring.
Monitoring and Reporting
Once you have your devices registered and assigned to their deployment rings, you can now sit back and relax until Patch Tuesday!
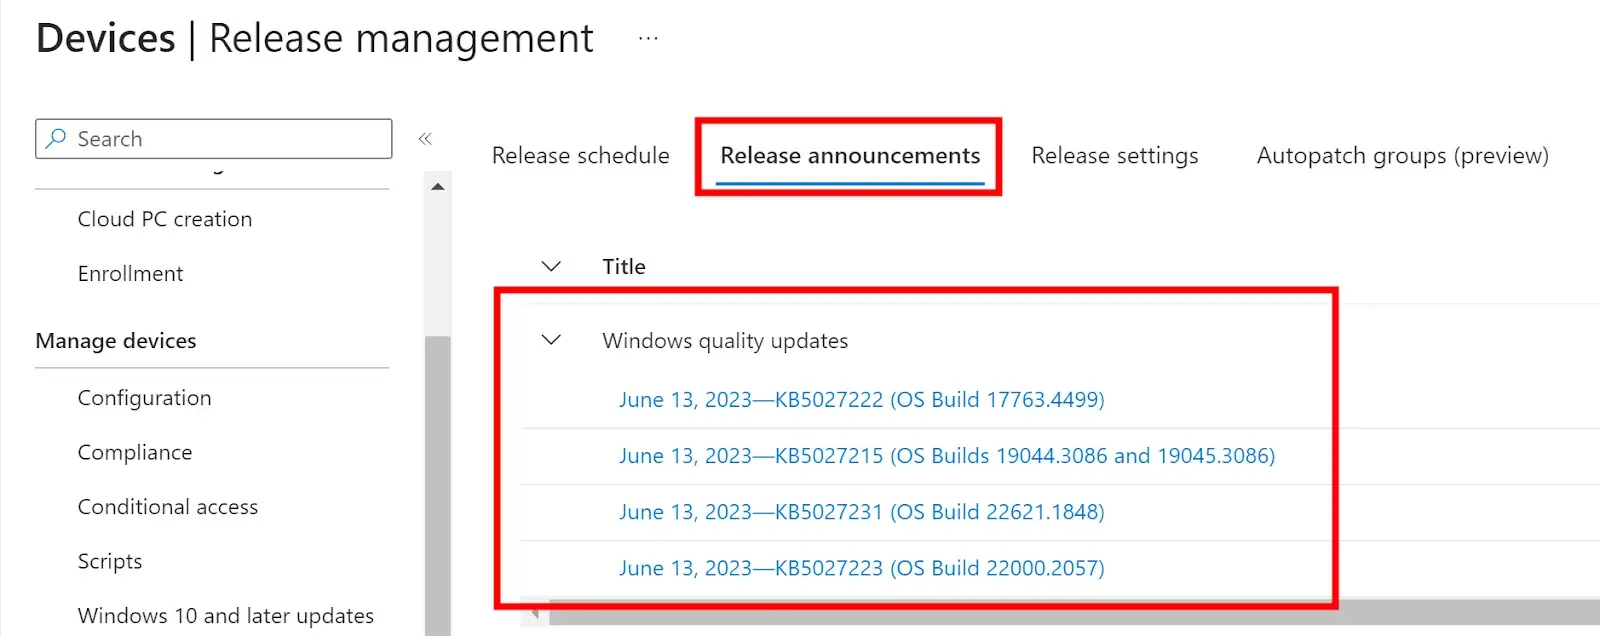
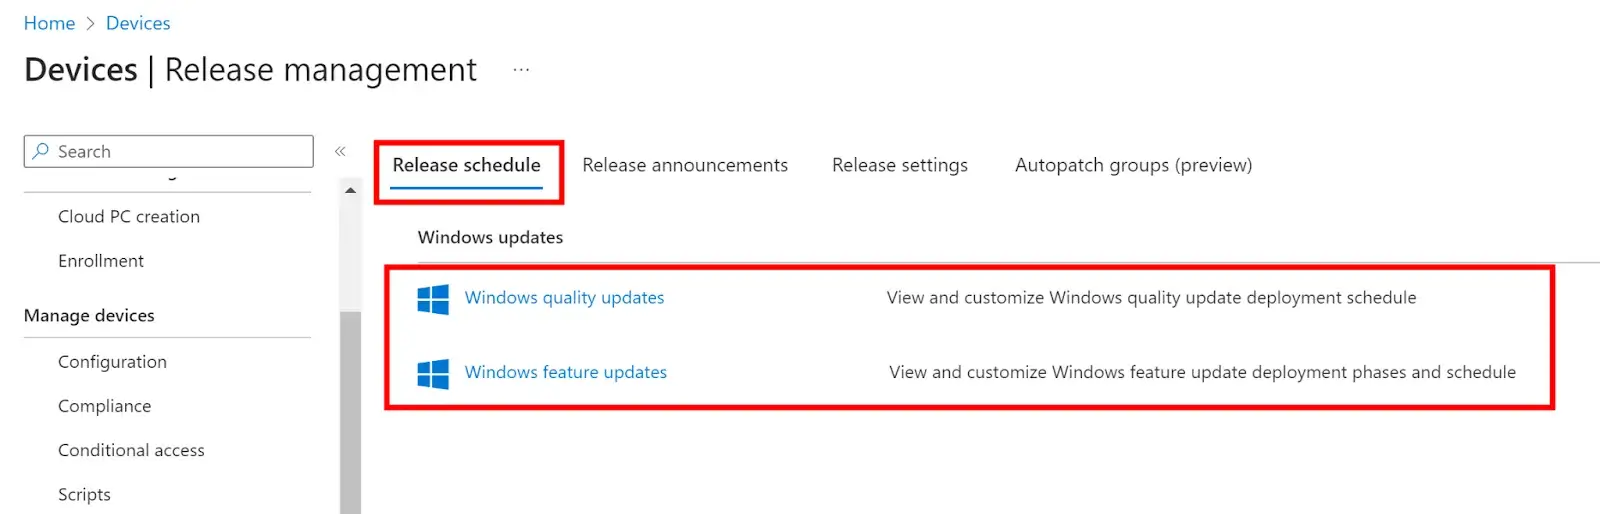
Microsoft offers various ways to stay informed regarding all Windows Features and Quality updates. To view the release announcements, login to the Endpoint Manager console, navigate to the Devices blade, and then Release Management under the Windows Autopatch blade. Here, you will see when Windows feature and quality updates will be available for the first rings (testing rings). For more information, you can click on any of those links to view the KB article related to that update.
To view your Release Schedule based on your deployment rings, click on the Release Schedule tab. Here you can view, customize, and pause your deployments for both Feature and Quality updates.
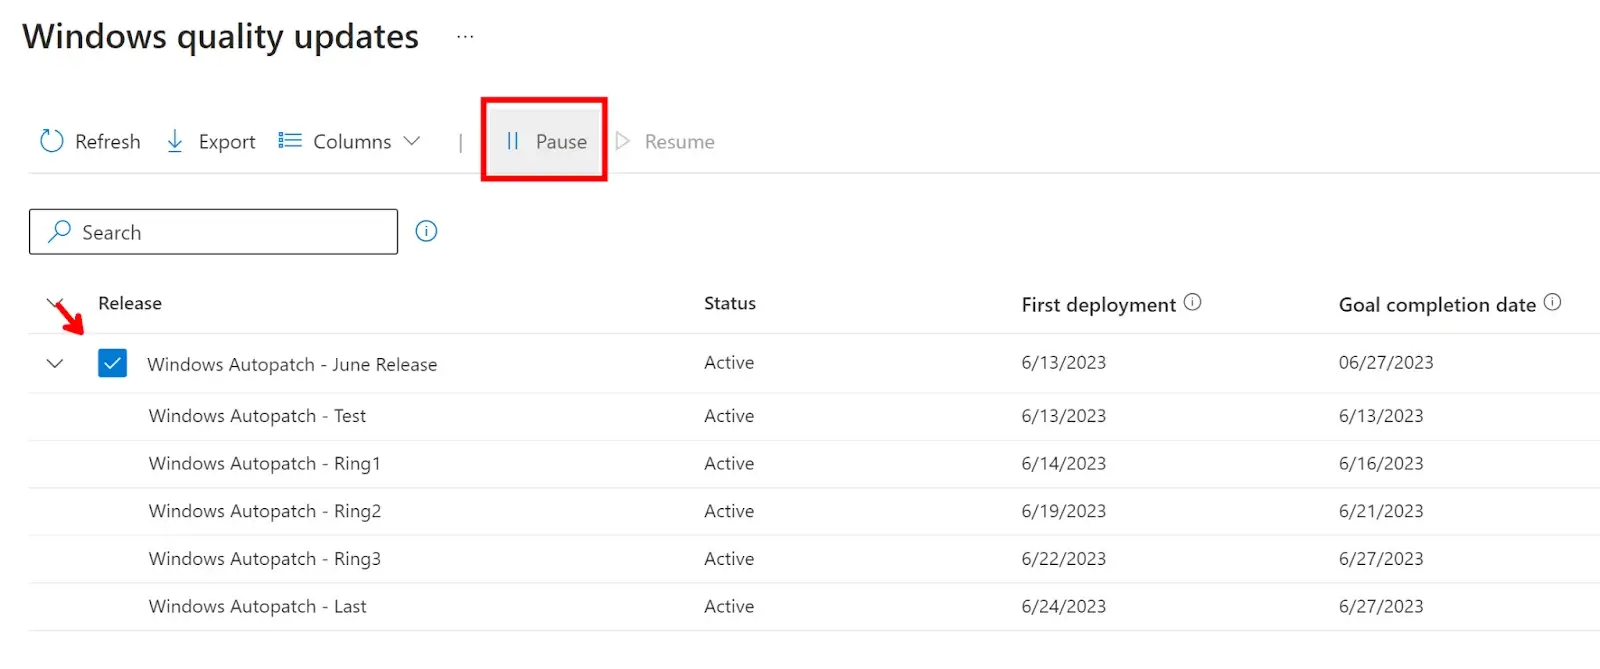
Here you can see when your deployment rings will be available to download the updates and when the deadlines will be met. You can pause either Quality or Feature update deployments by checking the Windows Autopatch release group and selecting pause.
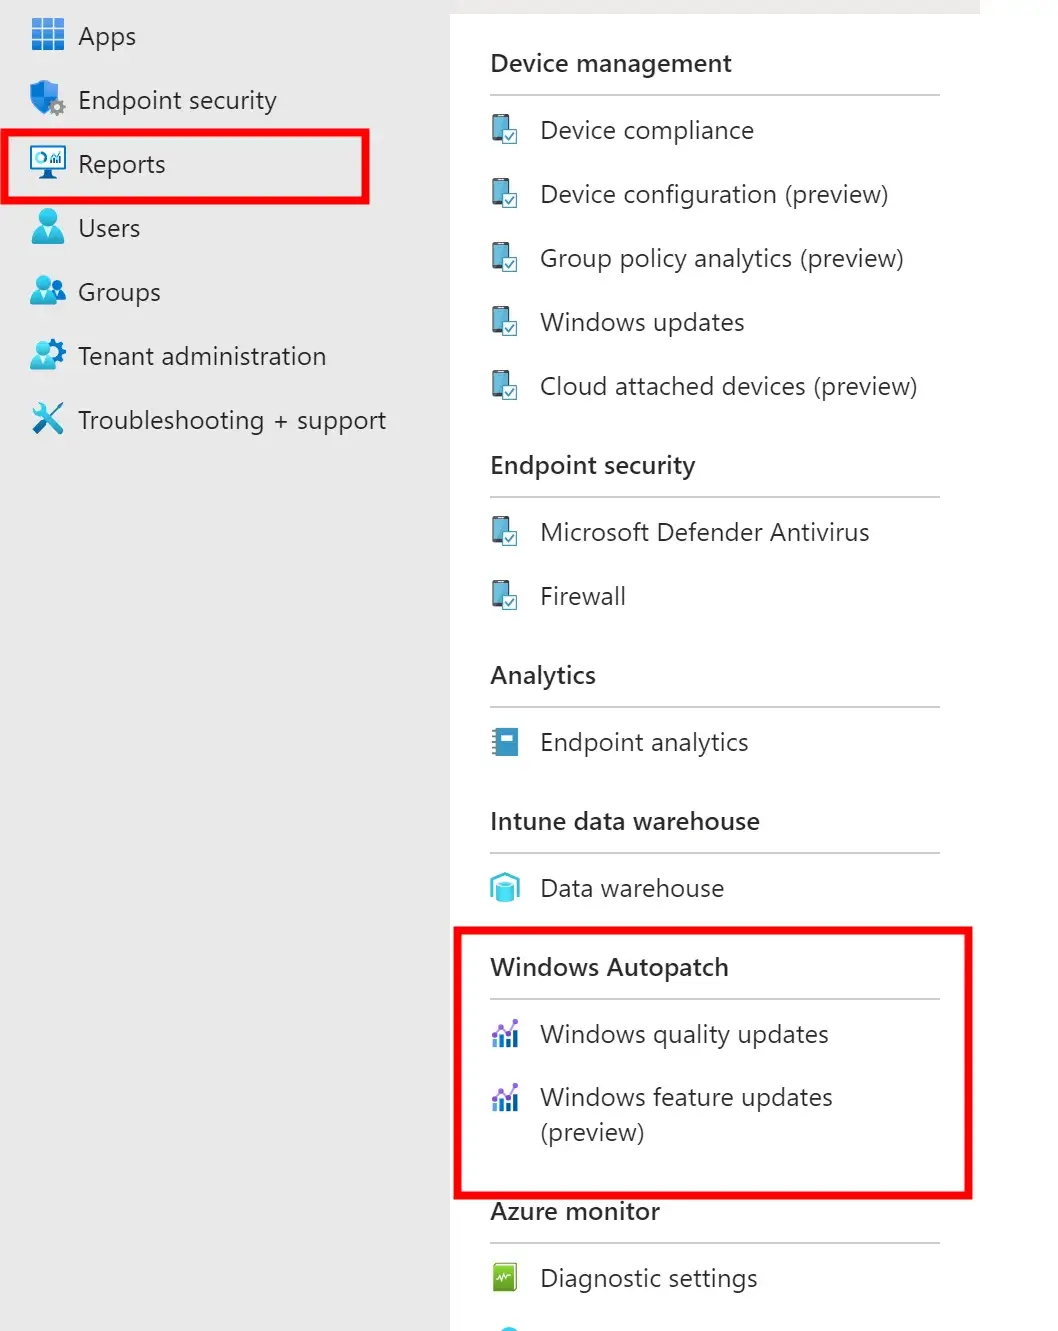
To view more detailed reports, go to the Reports blade under Windows Autopatch and you’ll find reports for both your Windows Quality and Feature (Preview) updates.
Windows Quality Updates Reporting
On the report’s homepage, you can view a complete summary of all your WIndows Autopatch-managed devices. You can easily view how many devices are healthy with the service and have/are receiving updates. You can also see how many devices have not been updated and which party (Microsoft or Customer) is responsible for acting on that device.
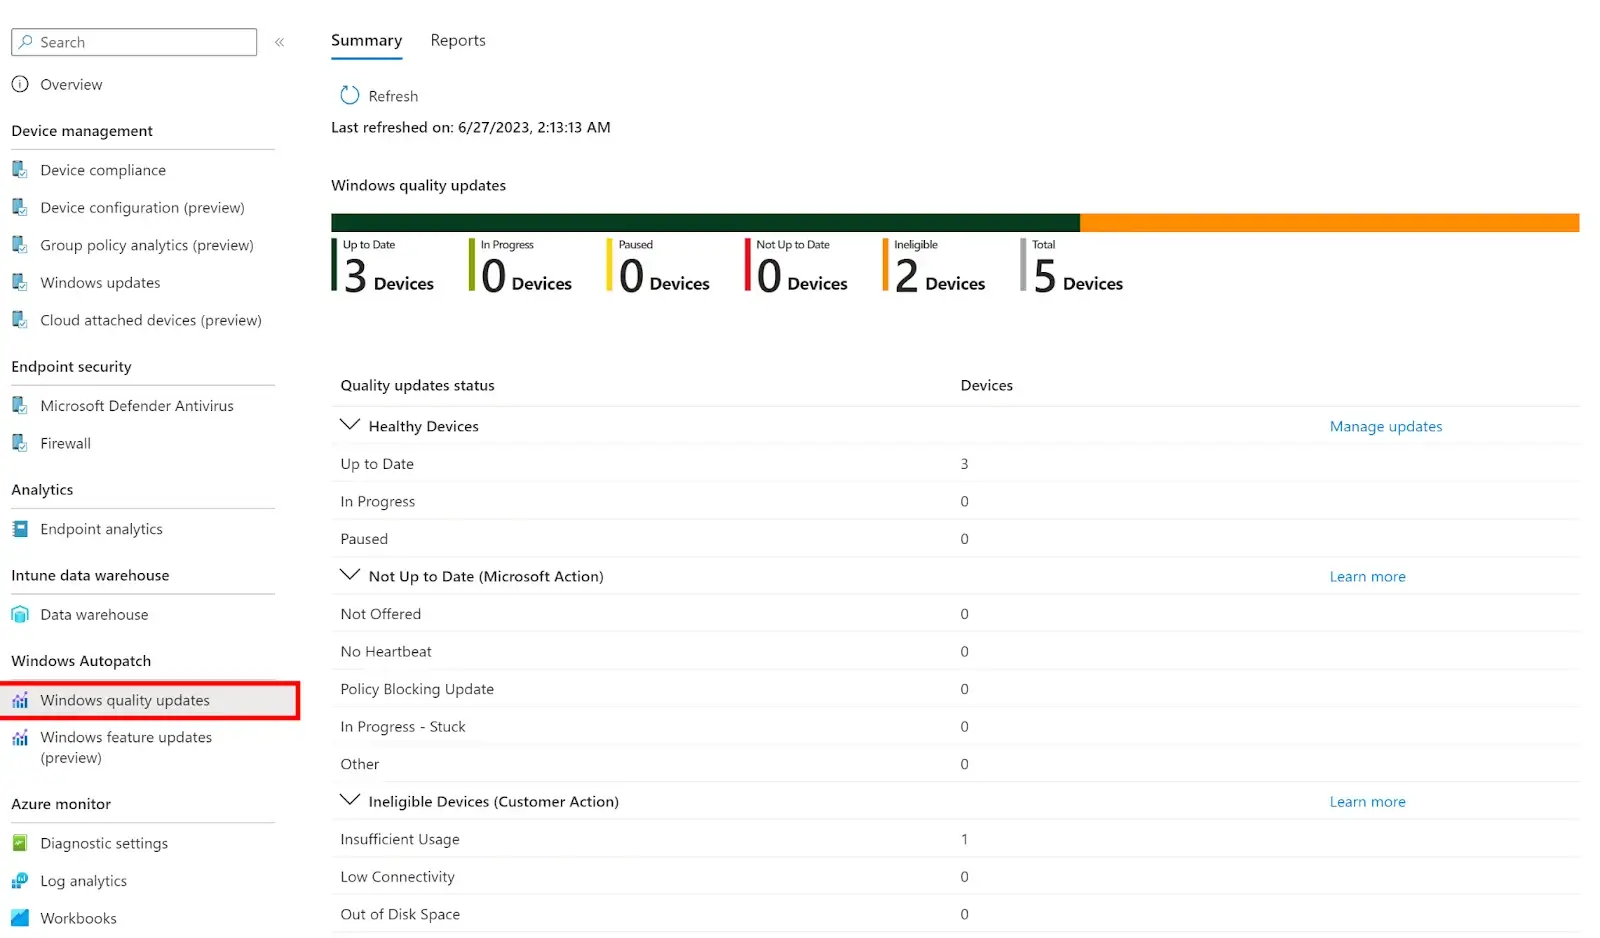
Healthy Devices – The devices have checked in with Windows Autopatch and will receive all Windows Quality updates within 21 days of release. Microsoft ensures that 95% of all managed devices will be updated within that time frame.
Not Up to Date (Microsoft Action) – The device has not checked into Windows Autopatch within the 21-day deployment period or is still on last month’s quality update. Microsoft will try to resolve the issues within the 21-day deployment period.
Ineligible Devices (Customer Action)—If a device is flagged under this category, the IT admin must resolve the issues preventing it from receiving updates or registering with Autopatch.
For more information on the Sub status, please visit the Microsoft Documentation here.
If you’re looking to view which devices are having these issues, or have been updated fully, then click on the Reports tab at the top of the screen to view more detailed reports.
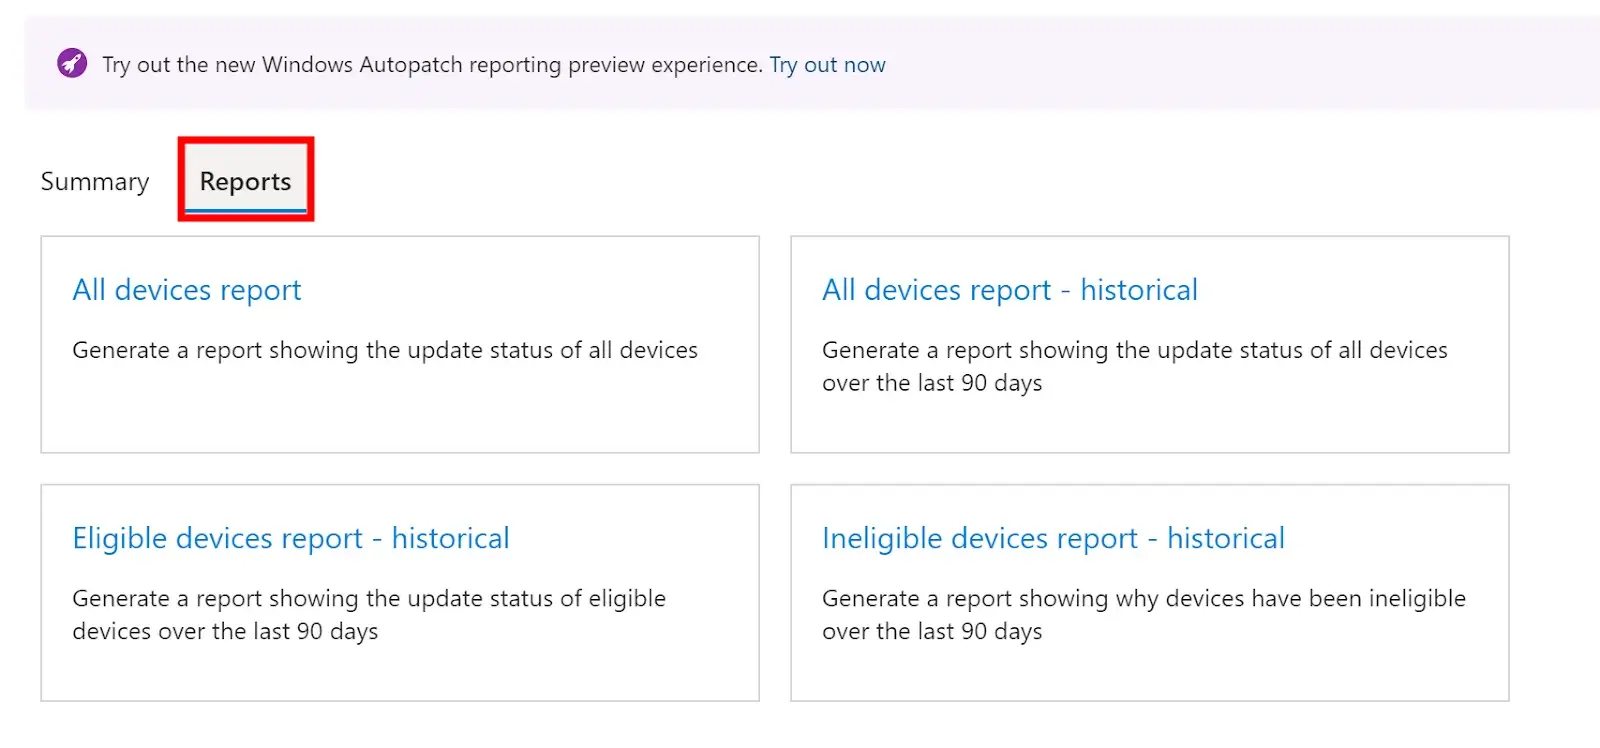
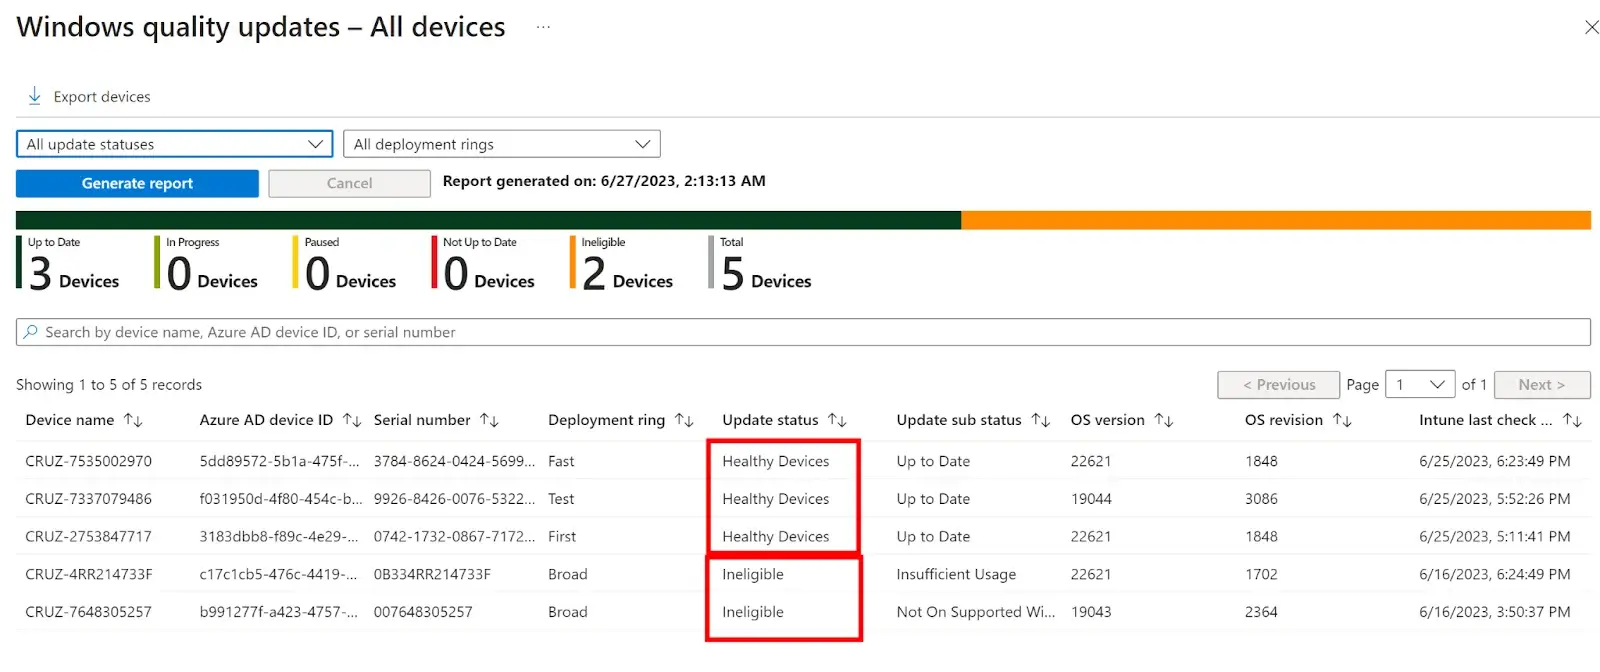
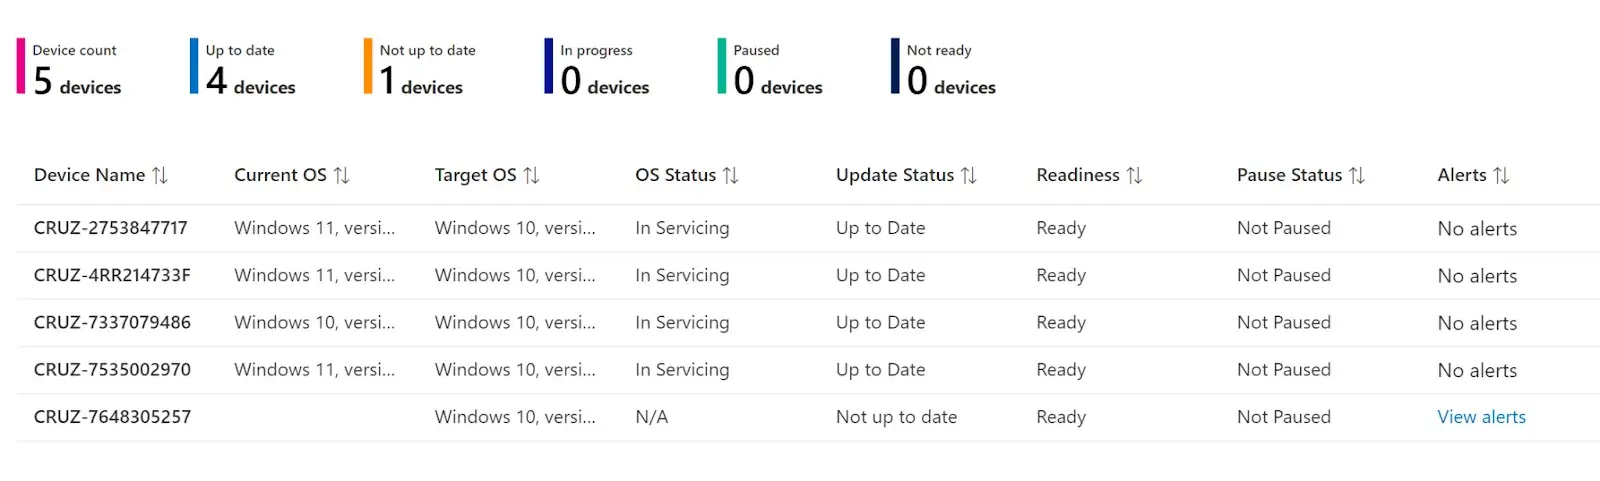
Clicking on the All-Devices Report shows us a breakdown of all registered and managed devices plus their update status and sub status.
These reports can be exported to csv and filtered based on deployment rings and update status.
Note: At the time of writing it is not possible to export Windows Autopatch reports via the Graph/RESTFUL API.
Windows Feature Updates Reporting
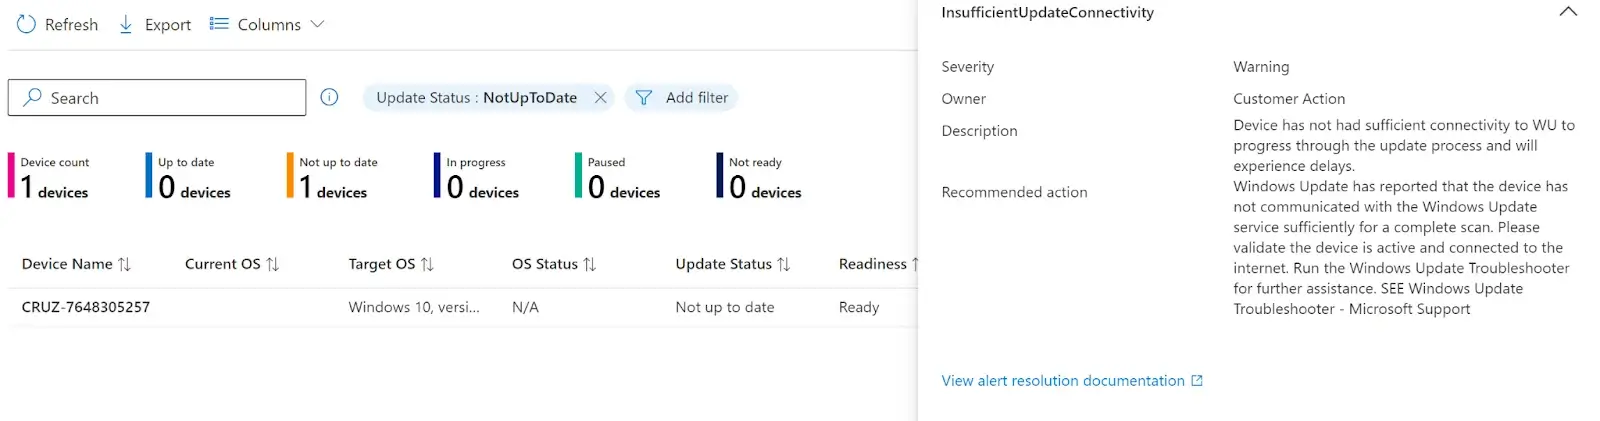
The Windows Feature Updates Report will show you the rollout statuses of all Feature update rings that are currently enabled and using the Windows Autopatch. On the summary page you can see a line graph breakdown of all your devices and their compliance status.

To view information about why a device may not be updated, click on the number under that column. This will load a new tab showing you all the devices that are not updated and how you can possibly resolve that issue.
Like the Windows Quality Updates, you also have more detailed reporting for the Feature updates. If you click on the Reports tab, you will have these two options available:
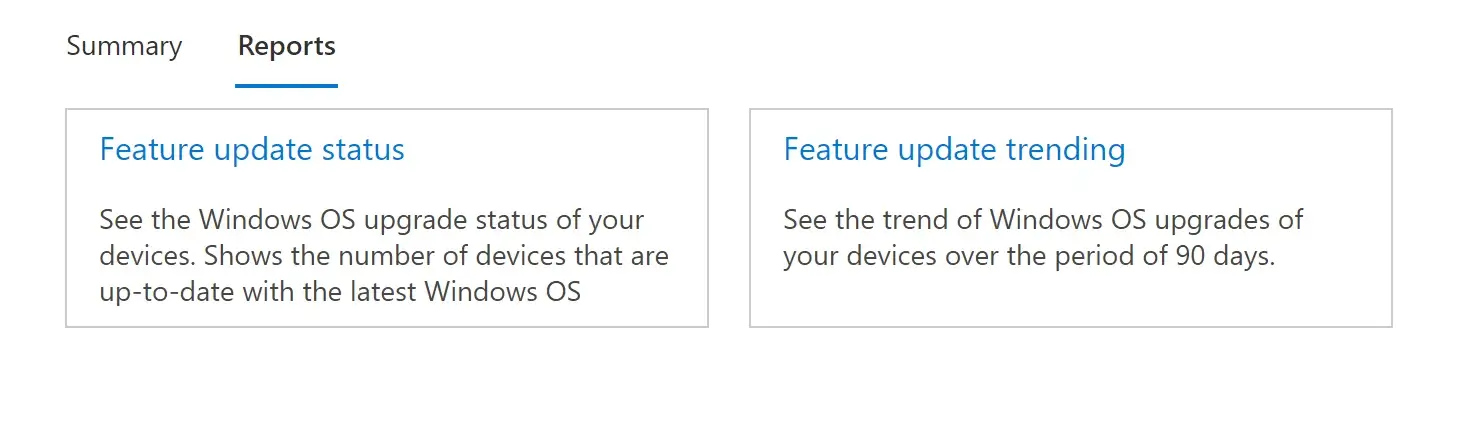
Feature Update Status: We will provide a complete list of all managed devices and their compliance status for all deployed Feature Updates. This list can also be exported to a CSV file.
Feature Update Trending: This will provide you with a line graph showing all of your managed devices and their compliance status. You can filter this by device count or percentage of updated devices.
Autopatch Troubleshooting
Now that you are all set up and using Windows Autopatch, what happens now when something goes awry? Since Autopatch is a managed service hosted by Microsoft, there is not much you can or need to do if things are not working as they should. At most, you will run into tenant registration issues when using the Windows Autopatch Readiness Assessment Tool. Those issues can be addressed by following Microsoft’s recommendations in the error messages. Those errors and possible solutions can be found through Microsoft’s resources.
Another point during the process where admins may run into issues is during the Device Registration phase. Many variables come into play when registering devices. Microsoft has pre/Post Device Registration Checks to verify that all registered devices meet the minimum requirements and prerequisites before and after being registered with the service. If any of these checks fail, then the device will be placed in a Not Ready state until an admin can address the issue.
Devices registered with the service check in every 24 hours and will determine the Health of the device using the following post checks:
| Check | Description |
|---|---|
| Windows OS build, architecture, and edition | Checks to see if devices support Windows 1809+ build (10.0.17763), 64-bit architecture and either Pro or Enterprise SKUs. |
| Intune – Windows Update managed policies | Checks to see if devices have Windows Updates policies managed via Microsoft Intune (MDM). |
| GPO – Windows Update managed policies | Checks to see if devices have Windows update policies managed via GPO. Windows Autopatch doesn’t support Windows update policies managed via GPOs. Windows update must be managed via Microsoft Intune. |
| GPO – Microsoft Office managed policies | Checks to see if devices have Microsoft Office updates policies managed via GPO. Windows Autopatch doesn’t support Microsoft Office update policies managed via GPOs. Office updates must be managed via Microsoft Intune or another Microsoft Office policy management method where Office update bits are downloaded directly from the Office Content Delivery Network (CDN). |
| Autopatch Network Endpoints | There’s a set of network endpoints that Windows Autopatch services must be able to reach for the various aspects of the Windows Autopatch service. |
| Teams Network Endpoints | There’s a set of network endpoints that devices with Microsoft Teams must be able to reach for software updates management. |
| Edge Network Endpoints | There’s a set of network endpoints that devices with Microsoft Edge must be able to reach for software updates management. |
| General Internet Connectivity | Checks to see if a device has internet connectivity to communicate with Microsoft cloud services. Windows Autopatch uses the PingReply class. Windows Autopatch tries to ping at least three different Microsoft’s public URLs two times each, to confirm that ping results aren’t coming from the device’s cache. |
Conclusion
Microsoft continues to expand the capabilities and features within Windows Autopatch and other services used for managing updates. They recently released Windows Driver Update Management for Intune, which allows Admins to manage and approve drivers across various devices. At the time of writing this blog, Autopatch only supports Microsoft’s first-party patching. For all your third-party patching needs, I recommend checking out Patch My PC.
Windows Autopatch groups are currently in preview, and Microsoft has released various improvements to Policy Health, Alert Notifications, and Reporting. With time, we anticipate additional enhancements that will better help admins save time and focus on the more critical aspects of their daily lives!
Windows Autopatch is just one of many third-party applications that can help make life easier. Manage all of your third-party applications through one seamless and easy platform, like Patch My PC. Schedule a live demo with an Engineer today!