
The most common publishing failure we see is related to proxies and timestamping.
We will be reviewing in detail why this scenario can cause issues and how to fix it!
Determine if You are Affected by This Scenario
Below is a list of possible error codes that may be returned in the PatchMyPC.log. The actual error code you see will depend on how the proxy/firewall handles HTTP web requests with no proxy defined.
Error Codes:
An error occurred while publishing an update to WSUS: Failed to sign package; error was: 2147954402
An error occurred while publishing an update to WSUS: Failed to sign package; error was: 2147954429
An error occurred while publishing an update to WSUS: Failed to sign package; error was: 2147954430
An error occurred while publishing an update to WSUS: Failed to sign package; error was: 2147954407
An error occurred while publishing an update to WSUS: Failed to sign package; error was: 2148086027
An error occurred while publishing an update to WSUS: Failed to sign package; error was: 2149122451
An error occurred while publishing an update to WSUS: Failed to sign package; error was: 2149122455
An error occurred while publishing an update to WSUS: Failed to sign package; error was: 2149122449
Additional Details:
2147954402 = The operation timed out
2147954429 = A connection with the server could not be established
2147954407 = The server name or address could not be resolved
2148086027 = ASN1 bad tag value met.
2149122451 = Forbidden (403).
2149122455 = Proxy authentication required (407).
2149122449 = Unauthorized (401).
A Little Background on This Error
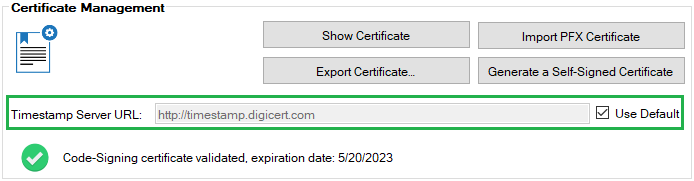
Within our publishing service, we always have timestamping enabled by default, as shown in the image below.
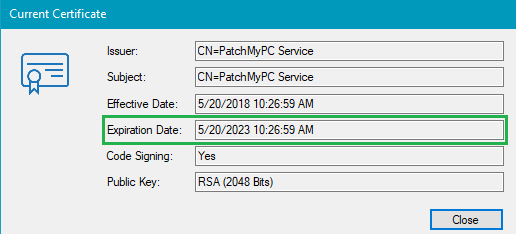
By enabling timestamping, it allows clients to trust updates published even after the code-signing certificate has expired. For example, the example below shows a WSUS Signing Certificate that expires on May 20, 2023. If timestamping is enabled, clients will trust updates even if they are installed after the expiration date.
In the PatchMyPC.log, you can also see the timestamping during the publishing attempt.

Why Publishing May Fail when Timestamping
One issue that can arise here is related to the way the WSUS publishing API performs the timestamping operation during the publishing. The WSUS API uses the Windows CryptoAPI to perform the timestamp on the updates CAB file.
The CryptoAPI uses the proxy defined at the SYSTEM level on the WSUS server. Because of this, the publishing operation with timestamping can often error out when a proxy is required for internet access.
So, even if the proxy is defined within our publishing service or on-site system in Configuration Manager, it will not be used during the publishing operating for timestamping.

Workaround 1 – Set the SYSTEM Level Proxy Using PSEXEC and Internet Explorer
To resolve this issue, you will need to configure the proxy at the SYSTEM level on the server. The easiest method to change the proxy at the SYSTEM level is using PSEXEC.exe and Internet Explorer.
- Download PSEXEC.exe from https://live.sysinternals.com/
- Open command prompt as Administrator
- Launch Internet Explorer as SYSTEM using command line: psexec.exe -s -i “C:\Program Files\internet exploreriexplore.exe”
- In Internet Explorer to Settings > Connections > LAN Settings > Enable “Use a proxy server for your LAN”, configure the IP Address and port, click OK, and close IE
Workaround 2 – Set the SYSTEM Level Proxy Using netsh
If you prefer not to use PsExec, or it’s not permitted for use in your organization, you can configure your server’s winhttp proxy using netsh.
- Launch Command Prompt as administrator (cmd.exe)
- Run the following command line (where the server name and port are set for your environment)
netsh winhttp set proxy http://myproxyserver.com:8080
Note: The netsh command doesn’t allow the configuration of explicit authentication to a proxy server. If your proxy server is configured for explicit authentication we recommend making an allowance for the machine account where the publisher is installed.
Workaround 3 – Disable Timestamping Within the Publishing Service
Although it’s probably not the best long-term solution, you can disable timestamping within the publishing service. Disabling timestamping can also be an excellent method to test if it’s the timestamping operation causing the updates to fail to publish.
If you are disabling timestamping for testing purposes, we recommend you only publish a single product such as 7-Zip.