Since Microsoft recently announced that Office 365 Connectors were being retired in Microsoft Teams, many admins have wondered how they will facilitate webhook notifications in Teams channels. In this post, we will show you how to migrate your notifications from Office 365 connectors to the Workflows app for webhook notifications in Microsoft Teams.
Retirement of Office 365 connectors within Microsoft Teams
The developer blog recommends that customers now utilize “Power Automate workflows as the solution to relay information into and out of Teams in a scalable, flexible, and secure way.”
What are the timelines for the retirement of the Office 365 Connectors?
August 15th, 2024 is when Microsoft first announced they would be retiring the Office 365 connectors feature from Microsoft Teams. This announcement, on July 3rd, 2024 was met with instant backlash from the community. Some customers have hundreds of webhook connectors set up for notifications. Examples range from platforms such as Azure DevOps for build and release notifications and work item changes, Azure Monitor for resource monitoring, and GitHub actions for Continuous Integration/Continuous Deployment (CI/CD). Migrating from using Office 365 connectors to another solution, over the summer, when staff were on vacation, was a ludicrous proposal.
Ok, it wasn’t “All” that bad. The earlier date given was when customers could no longer create new Office 365 connectors. Microsoft had planned to retire the service in waves:-
Wave 1 – effective August 15th, 2024: All new Connector creation will be blocked within all clouds
Wave 2 – effective October 1st, 2024: All connectors within all clouds will stop working
Communication Update 23rd July 2024
Microsoft extended the retirement timeline through December 2025 to provide ample time to migrate to a different solution, such as Workflows (Power Automate) or Microsoft Graph.
Microsoft touted that all existing connectors within all clouds would now continue to work until December 2025, however using connectors beyond December 31, 2024 would require additional action:-
“Connector owners will be required to update the respective URL to post by December 31st, 2024. At least 90 days prior to the December 31, 2024 deadline, we will send further guidance about making this URL update. If the URL is not updated by December 31, 2024 the connector will stop working. This is due to further service hardening updates being implemented for Office 365 connectors in alignment with Microsoft’s Secure Future Initiative.
Starting August 15th, 2024 all new creations should be created using the Workflows app in Microsoft Teams”
The verbiage doesn’t specifically suggest that you can’t create Office 365 Connectors starting August 15th, 2024; instead, it suggests that you start using the Workflows app instead.
It’s safe to assume that we will have to replace all our existing Office 365 connectors by the end of the year. So, as we sip cocktails beside the pool this summer, we should start planning that work now.
Workflows App Licensing
Workflows in Microsoft Teams are by far the easiest way to create a new webhook URL for a Teams channel. The main difference with Workflows is that the workflow will be owned by the user creating it. The user creating a workflow must be licensed to use Office 365. Specifically, the following SKUs license them to use Cloud Workflows.
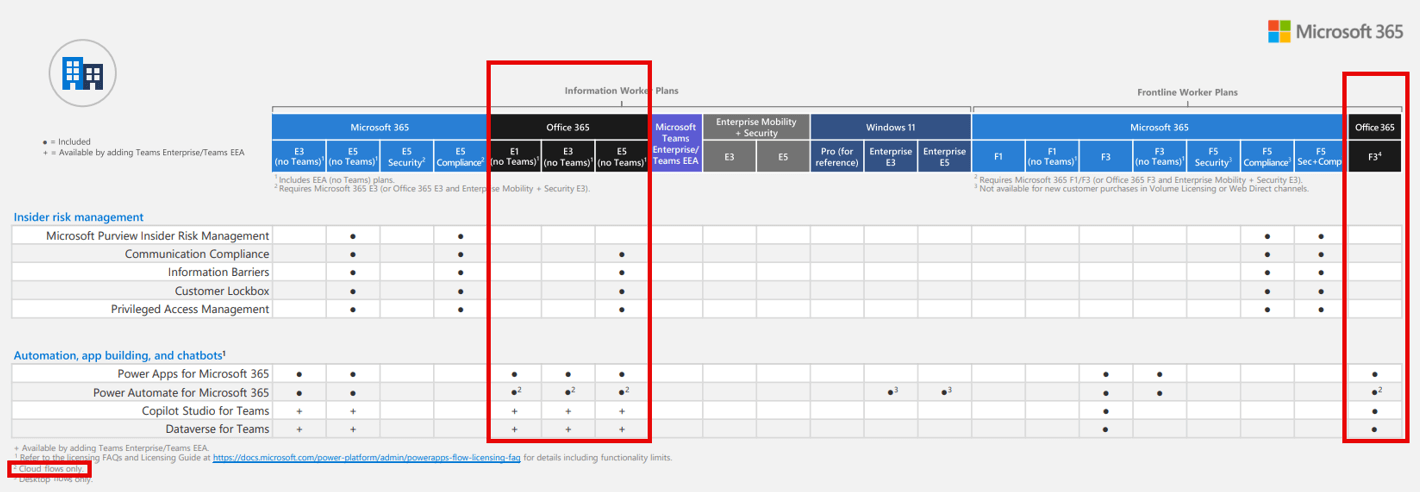
Cloud Workflows are included with:-
Office 365 E1
Office 365 E3
Office 365 E5
Office 365 F3
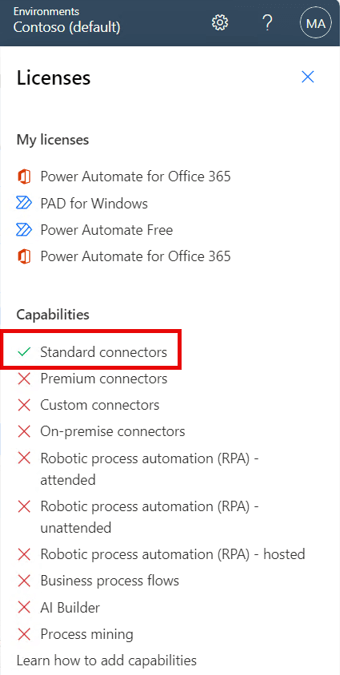
More specifically, Webhook notifications in Microsoft Teams, created via the Workflows app, are considered Standard Connectors and fall within the licenses mentioned above.
Create a Webhook URL in a Teams Channel to receive Webhook Notifications
Webhook notification URLs can be generated via the Workflows app within Microsoft Teams or from Power Automate. It is much simpler to generate them from the Workflows app, but we will show both methods.
Workflows App
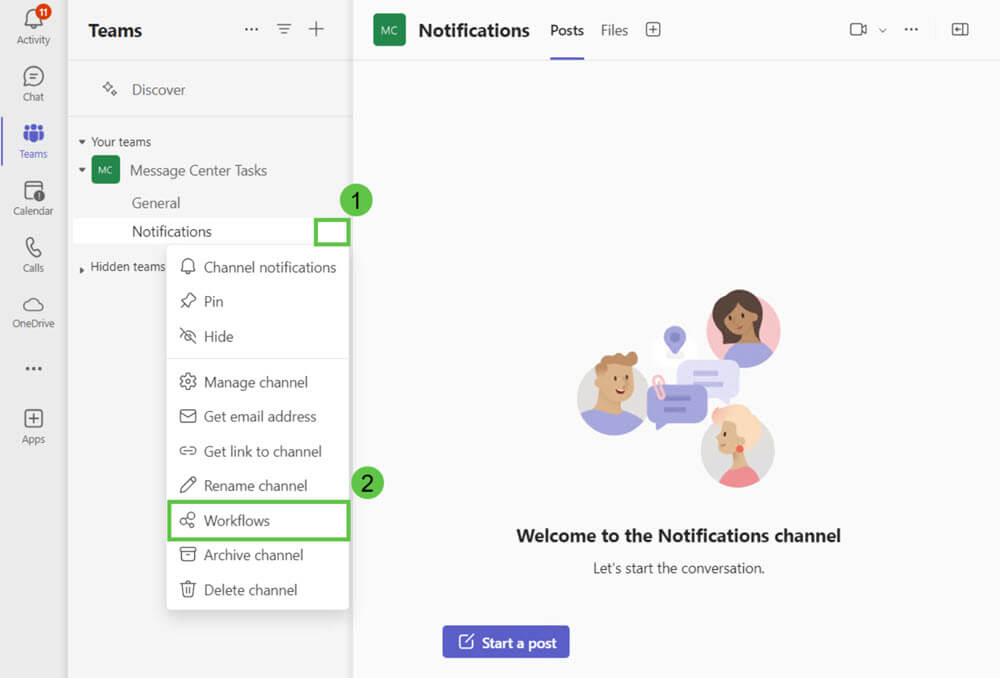
Open Microsoft Teams and navigate to the Channel where you want to receive Webhook Notifications.
Click the More Options button … and select Workflows.
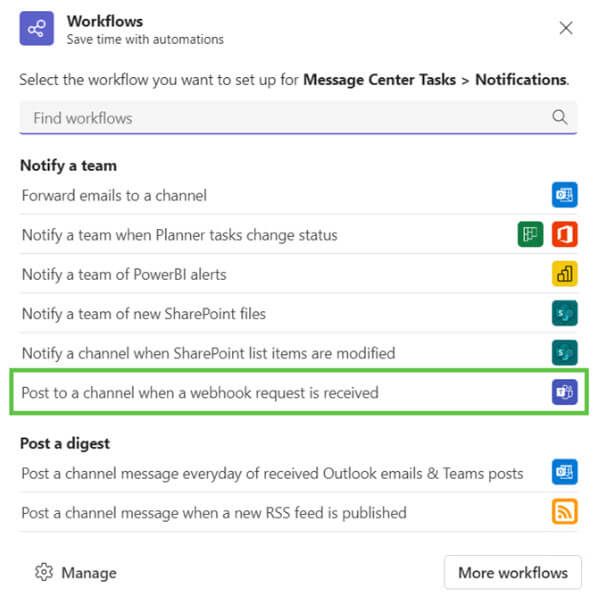
Select Post to a channel when a webhook request is received.
Allow a moment for the template to load, it can take a minute or two.
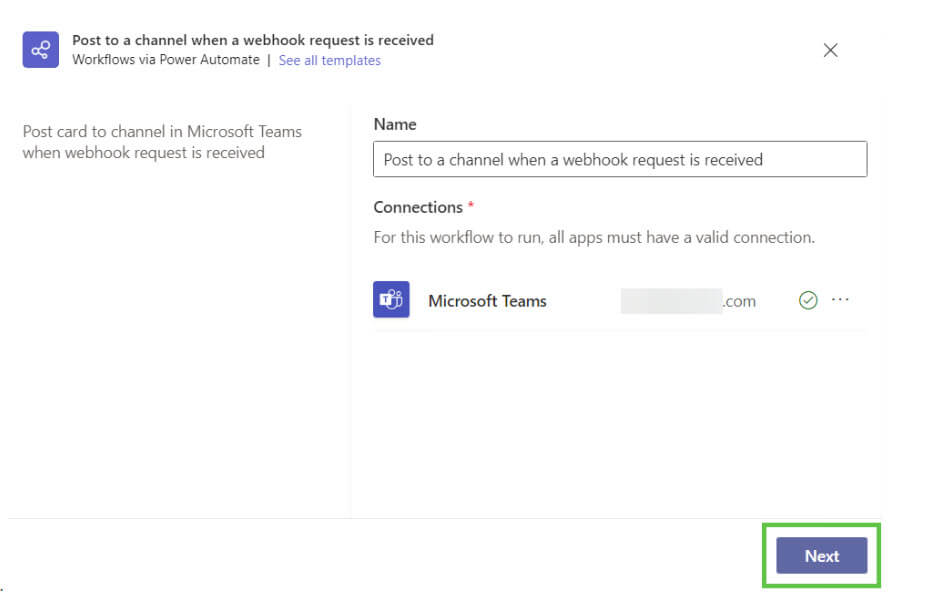
Click Next.
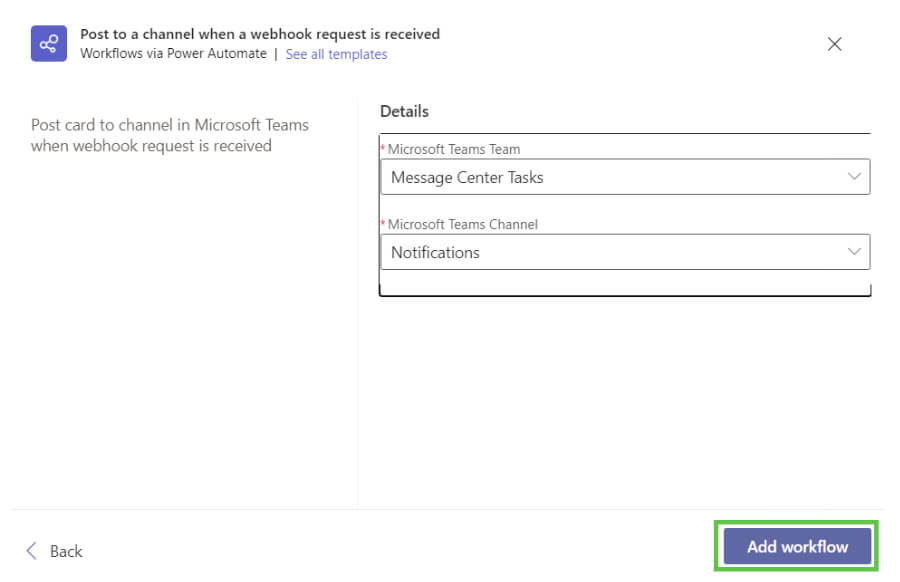
Allow a moment for the details tab to load to verify which Team and Channel the webhook URL will be created for and click Add workflow.
Click the copy icon to copy the webhook URL to your clipboard and click Done.
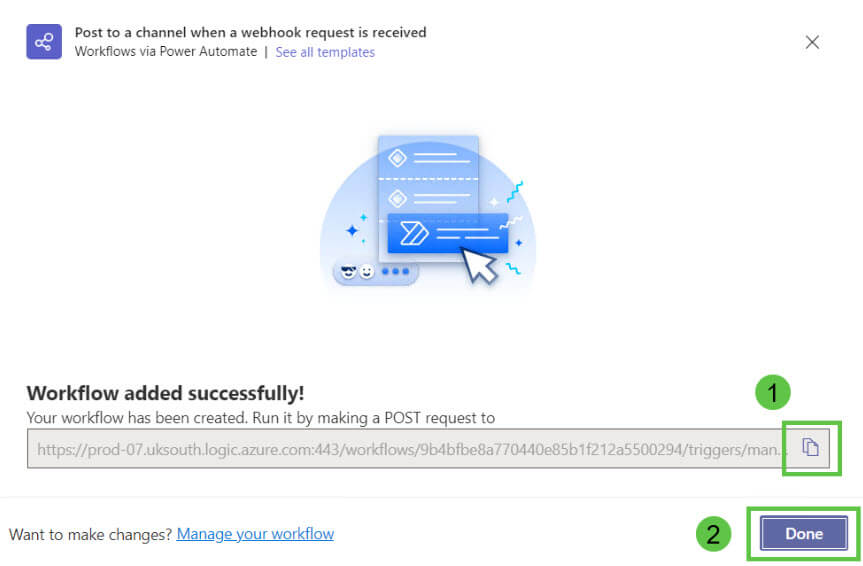
Use this webhook URL in your application(s) to send Adaptive Cards to the selected Teams Channel.

Power Automate
Navigate to https://make.powerautomate.com/ and sign-in.
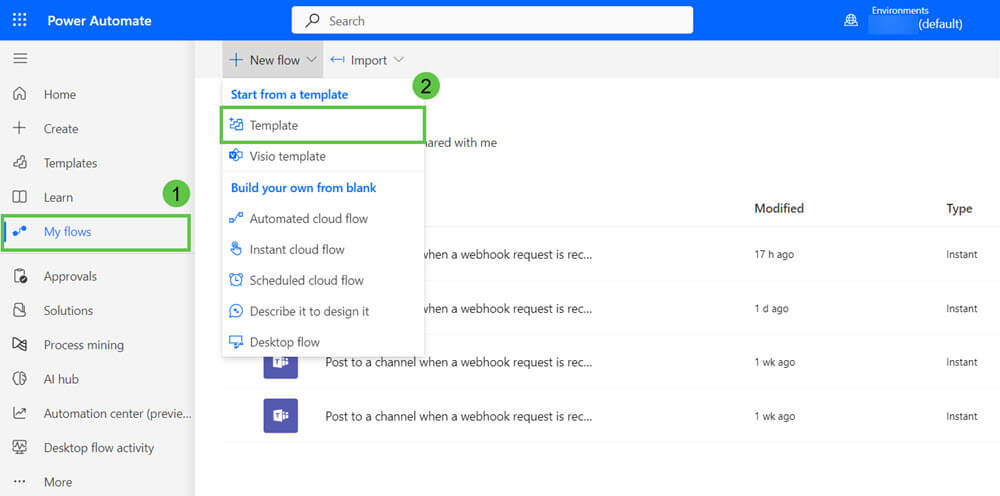
Select My flows and click New flow > Template.
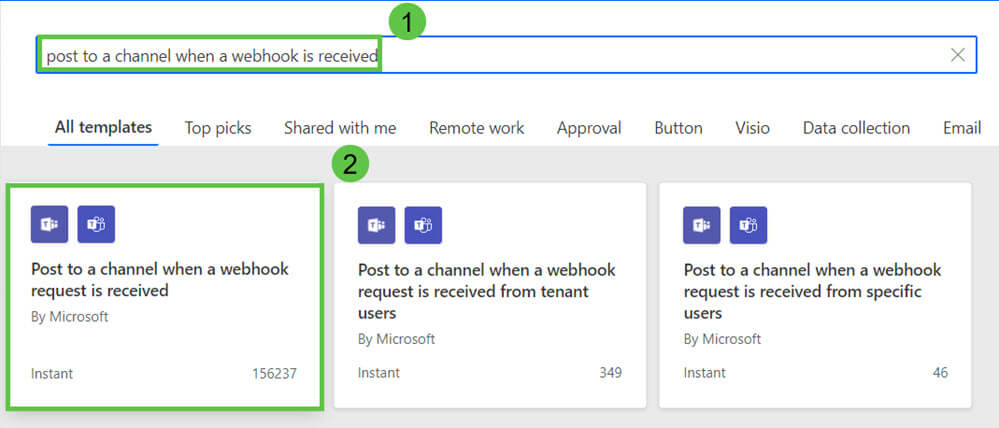
Search for post to a channel when a webhook is received and click the same search result.
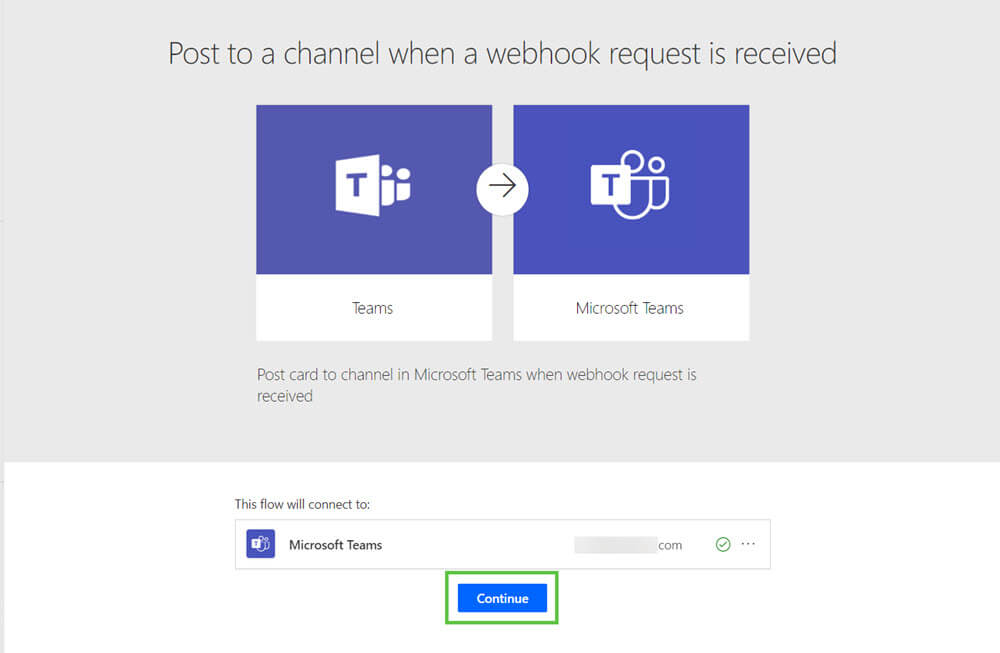
Click Continue.
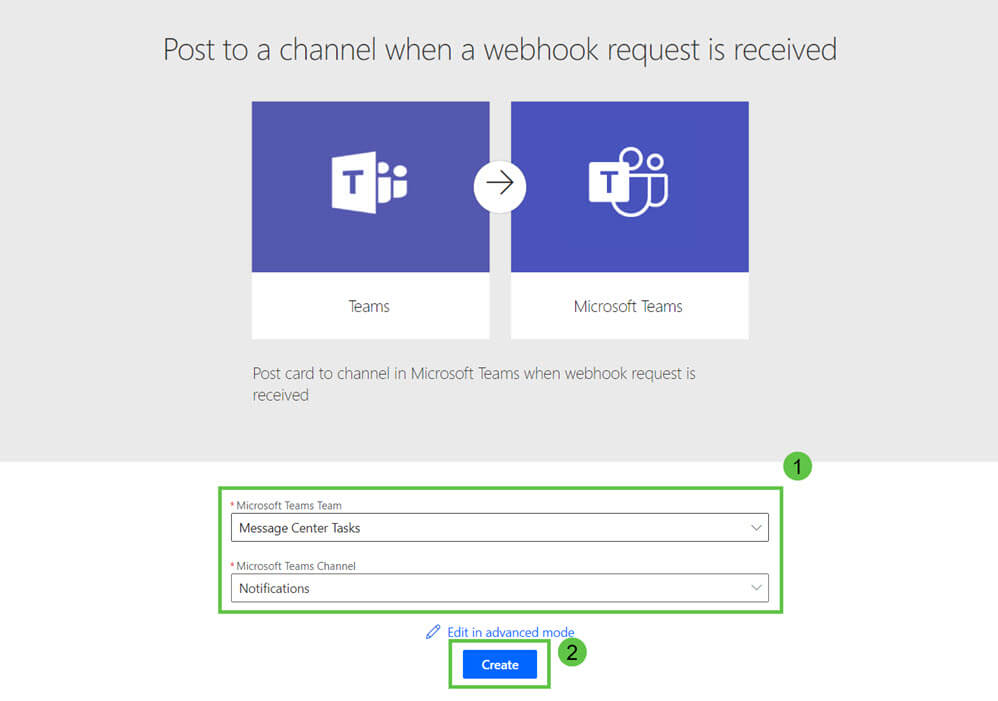
Select the Team and Channel you intend to post the notifications to and click Create.
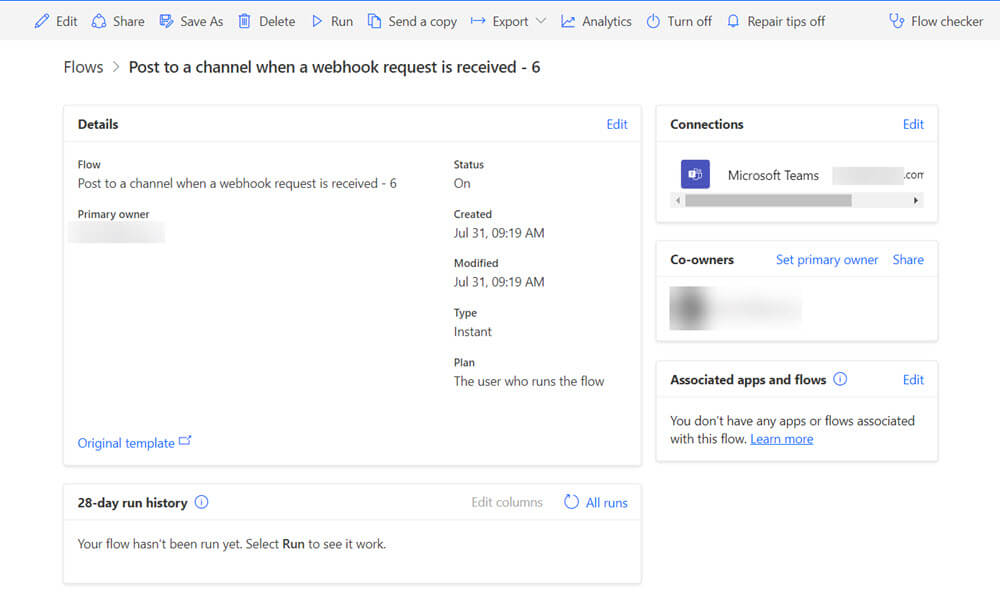
Review the created flow.
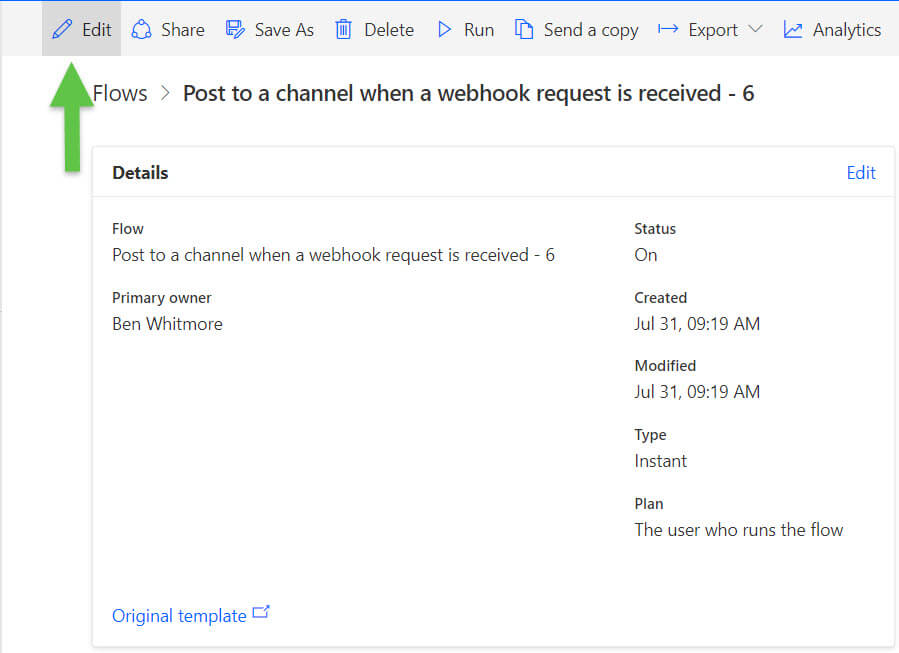
Click Edit.
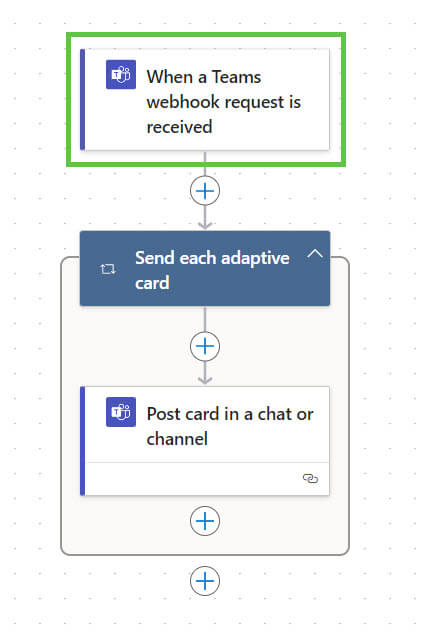
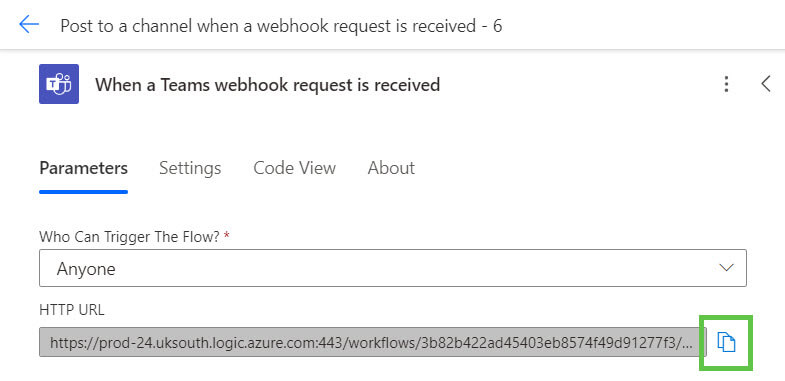
Click the When a Teams webhook request is received trigger.
Copy the HTTP URL to the clipboard to use when triggering a notification.
Example of how to send an Adaptive Card Teams channel message using PowerShell
You simply need the webhook URL generated when you created the Workflow. Then, you can use a simple Invoke-Rest Method command from PowerShell to send notifications to the Teams channel. Here is an example of the code used to generate the notification displayed in this image.
$url = 'WebhookURLHere'

$jsonData = @'
{
  "type": "message",
  "attachments": [
    {
      "contentType": "application/vnd.microsoft.card.adaptive",
      "content": {
        "$schema": "http://adaptivecards.io/schemas/adaptive-card.json",
        "type": "AdaptiveCard",
        "version": "1.4",
        "body": [
          {
            "columns": [
              {
                "items": [
                  {
                    "text": "Test notification from Patch My PC Publisher",
                    "weight": "bolder",
                    "size": "large",
                    "wrap": true,
                    "type": "TextBlock"
                  }
                ],
                "width": "stretch",
                "type": "Column"
              },
              {
                "items": [
                  {
                    "url": "https://iili.io/JjeJoEx.png",
                    "size": "Medium",
                    "horizontalAlignment": "Right",
                    "type": "Image"
                  }
                ],
                "width": "auto",
                "type": "Column"
              }
            ],
            "separator": true,
            "type": "ColumnSet"
          },
          {
            "items": [
              {
                "text": "This notification has been sent by Patch My PC Settings tool. If you can read this, your Webhook is correctly setup.",
                "weight": "bolder",
                "wrap": true,
                "type": "TextBlock"
              }
            ],
            "style": "good",
            "separator": true,
            "spacing": "Small",
            "type": "Container"
          },
          {
            "columns": [
              {
                "items": [
                  {
                    "url": "https://patchmypc.com/wp-content/uploads/2018/06/Patch20My20PC20-20Logo20Horizontal20-20300ppi.png",
                    "size": "Medium",
                    "width": "180px",
                    "type": "Image"
                  }
                ],
                "width": "auto",
                "verticalContentAlignment": "Center",
                "type": "Column"
              },
              {
                "items": [
                  {
                    "text": "Report generated on **BB-CM1**",
                    "size": "small",
                    "isSubtle": true,
                    "wrap": true,
                    "horizontalAlignment": "Right",
                    "spacing": "None",
                    "type": "TextBlock"
                  },
                  {
                    "text": "11/18/2024 8:53:28 AM (GMT Standard Time)",
                    "size": "small",
                    "isSubtle": true,
                    "horizontalAlignment": "Right",
                    "spacing": "None",
                    "type": "TextBlock"
                  }
                ],
                "width": "stretch",
                "verticalContentAlignment": "Center",
                "type": "Column"
              }
            ],
            "separator": true,
            "spacing": "None",
            "type": "ColumnSet"
          }
        ],
        "msteams": {
          "width": "Full"
        }
      }
    }
  ]
}
'@

Invoke-RestMethod -Uri $url -Method Post -ContentType "application/json" -Body $jsonData
Workflow Nuances
Unlike Office 365 Connectors, the notification posted in the Teams Channel will contain the name of the person who created the flow. Remember, the flow is owned by the user who created it.
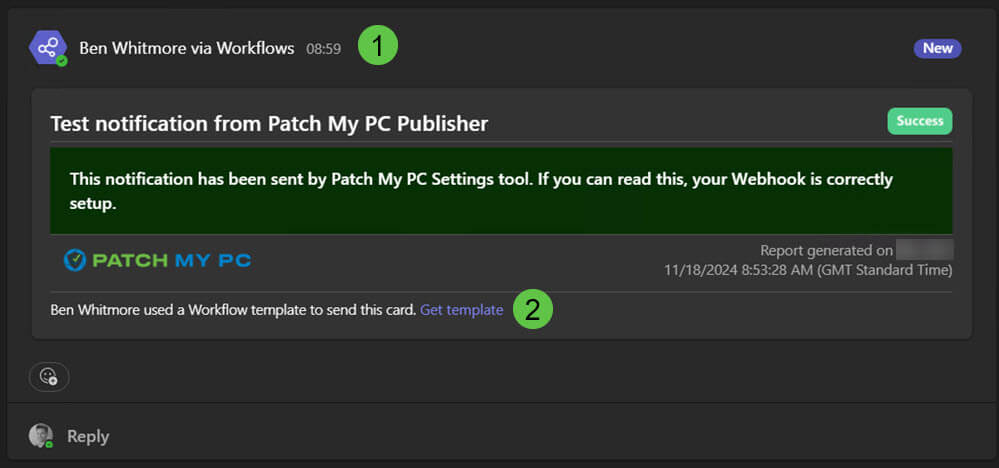
The flow is posted in the Teams Channel by the flow Bot on behalf of the user.
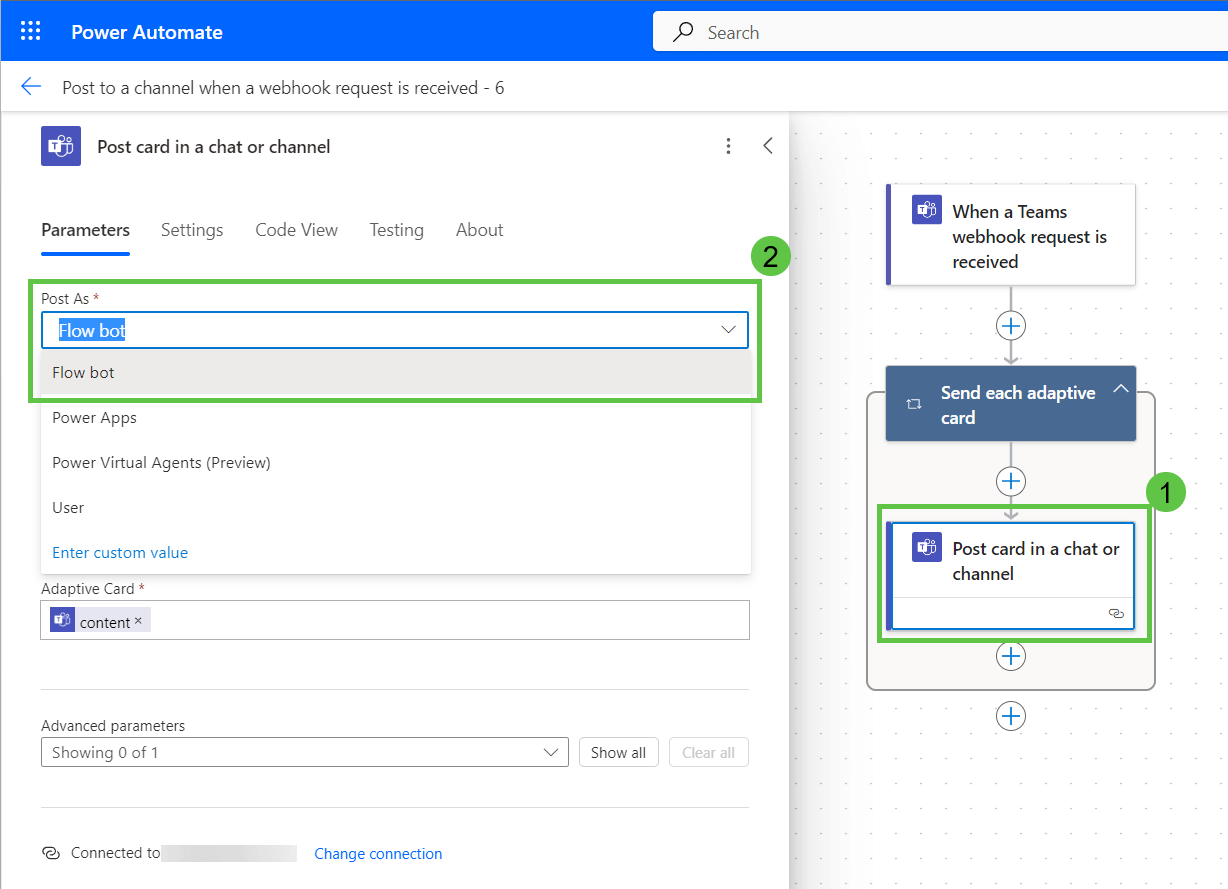
If you do not want the name of the user displayed on the notification, you could create an account solely for the purpose of posting notifications and name it “Company Notification Bot”. You would need to ensure this account is a member of the Teams the notification will be posted in and also is licensed as mentioned at the beginning of this post.
Summary
The Workflows app in Microsoft Teams is a built-in feature designed to create custom workflows directly within the Teams application. This app can be particularly useful for straightforward tasks like posting notifications to a channel when certain triggers are met. The app is pretty neat and offers a very low bar of entry for folks to begin using Power Automate and flows.
The workflows created by the templates are also accessible from https://make.powerautomate.com where users can edit the flows and perform more complex tasks.
It’s frustrating that customers were given short notice of the deprecation of Office 365 Connectors. The deadline was pushed back until the end of 2024 before existing Office 365 connectors would cease to function. Workflows offers a nice alternative to posting notifications to Channels in Teams, but some users may not like the fact that the user who created the flow will be visually displayed on the notification.
NOTE
The workflows app is currently supported in both Patch My PC Cloud and Patch My PC Publisher version 2.1.27.0 or higher.
