HomeKnowledge BaseHow Publishing Alerts Work in Patch My PC PublisherHow Publishing Alerts Work in Patch My P…
How Publishing Alerts Work in Patch My PC Publisher
How Publishing Alerts Work in Patch My PC Publisher
Justin Chalfant
Posted:
Updated:
Table of Contents
An important factor of third-party patching is staying informed as new updates publish in real-time. Our alerts feature allows you to be notified via the following methods:
Email
Microsoft Teams webhook notification
Slack webhook notification
This article will cover how the SMTP Settings and Webhook Settings work within Patch My PC Publisher and how to configure them.
SMTP SettingsCopy Link
IMPORTANT Modern authentication is in development for Patch My PC Publisher. At this time, Publisher relies on basic SMTP authentication for sending email reports.
Please refer to this article for more information on how to enable SMTP authentication for a specific mailbox, which will allow Patch My PC Publisher to authenticate and send emails through your Exchange Online environment.
You can configure the Publisher to send email notifications whenever new updates or applications are published. Follow the steps below to set up SMTP correctly.
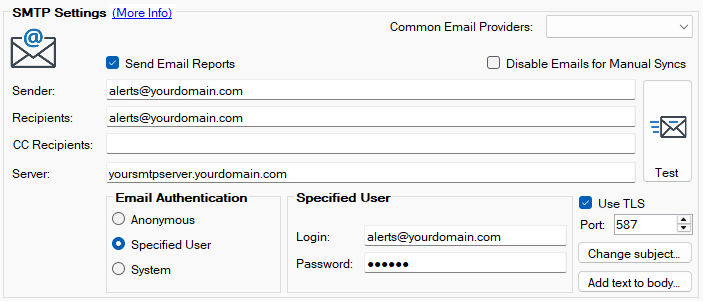
1. Sender (Required) Enter the email address you want the alerts to come from. e.g. [email protected]
2. Recipients (Required) Enter the email address(es) that should receive the alerts. You can enter multiple addresses separated by a semicolon. e.g. [email protected]; [email protected]
3. CC Recipients (Optional) Add any additional recipients if needed.
4. Server (Required) Enter your mail server address. e.g. yoursmtpserver.yourdomain.com
5. Port (Required) Typically the SMTP server port is 25, 587, or 465 but this can vary depending on the SMTP provider. If you select Use TLS, the Publisher will automatically switch the port to 587 (the standard TLS port), but you can change it if your provider requires a different value.
6. Email Authentication When choosing an authentication method, select the option that aligns with how your mail system accepts SMTP connections. Some environments allow internal relays without credentials, while most cloud providers require authenticated or TLS-secured connections. The right choice depends on whether your SMTP server supports anonymous relay, requires a dedicated username and password, or allows integrated Windows authentication.
Anonymous Use this only if your SMTP relay explicitly allows unauthenticated sending. Most cloud providers (including Exchange Online) do not support anonymous SMTP, so this option typically only works with on-premises mail relays configured to accept unauthenticated traffic from trusted internal IPs.
Specified User (Recommended) Use this when your SMTP server requires authentication. Enter a valid username and password for the mailbox or SMTP relay account you want the Publisher to use. This is the recommended option for most environments, including Exchange Online, Gmail, and any authenticated SMTP relay. Enter a username in the Login field and password in the Password field to be used for SMTP authentication.
System Uses the Windows account running the Patch My PC Publisher service. Choose this only if your SMTP relay supports integrated authentication (NTLM/Kerberos). This is usually limited to on-prem Exchange servers or internal SMTP relays on the same domain. The Publisher will typically be running in the SYSTEM context.
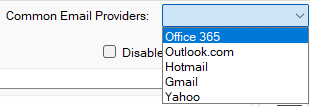
Note: At the top of the SMTP Setttings section, you can choose from the Common Email Providers dropdown (Office 365, Outlook.com, Gmail, etc.).
Selecting one will auto-populate the server name, port, and TLS settings for that provider. You can still change any field manually afterwards.
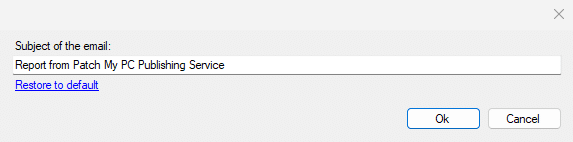
7. Change Subject (Optional) The default email subject is Report from Patch My PC Publishing Service. If you wish to change this, click Change subject, enter your preferred Subject of the email, and click Ok.
Once the settings are complete, you can click the Test button to see if the recipient received the test email. If you have any issues sending emails, it’s likely an SMTP configuration error, and you can review our article Troubleshooting SMTP Email Report Sending When Using Patch My PC.
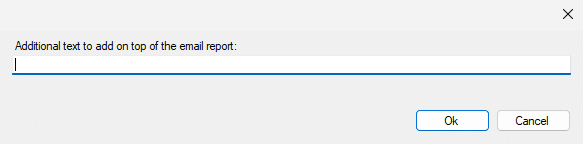
8. Add text to body (Optional) Enter any additional text you want included at the top of the email report, such as notes or context for your recipients.
9. Click Apply to save your changes.
Once the SMTP settings are saved, the Publisher will automatically send an email at the end of each synchronization when any updates or applicationshave been published.
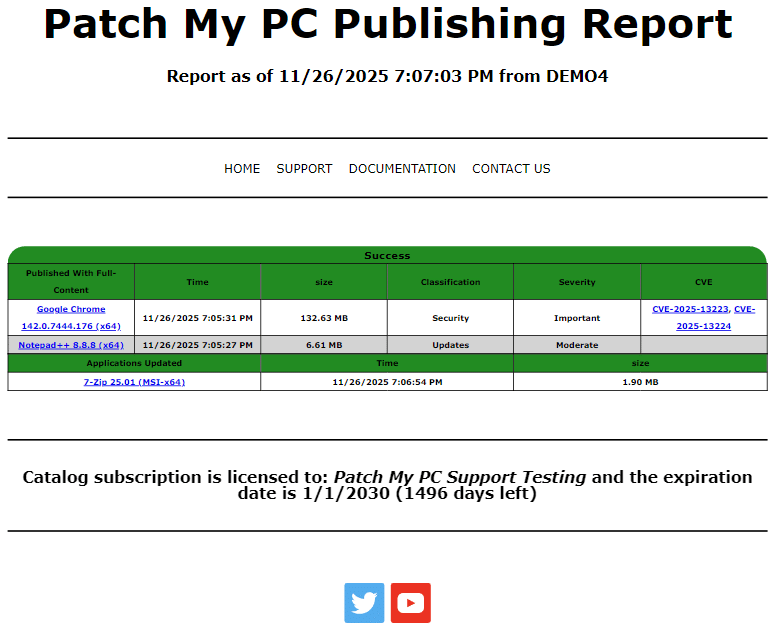
The email will include the following details for all Published products:
In the example below, you can see an email alert where both WSUS updates and ConfigMgr applications were published succesfully.
For products published to Intune, The email will include the following additional information
Intune Tenant friendly name
Intune assignments set during Publishing.
Webhook SettingsCopy Link
How to Create a Microsoft Teams Webhook URLCopy Link
Another option for sending publishing alerts is to use a Microsoft Teams Webhook. The Teams webhook will allow the Publisher to send a message into a Teams channel either as each update or application is published, in real-time, or a single message at the end of the synchronization.
Before you can send Microsoft Teams alerts, you need to create a Microsoft Teams Workflow to obtain a valid webhook URL.
IMPORTANT
The account being used to create the Teams Workflow must be a member of the Team > Channel where you want the Patch My PC notifications to appear. The notification will include the name of the person who created the Teams Workflow. You cannot omit the name from the notification. This is by design from Microsoft.
Please follow the steps below to create an incoming webhook URL:
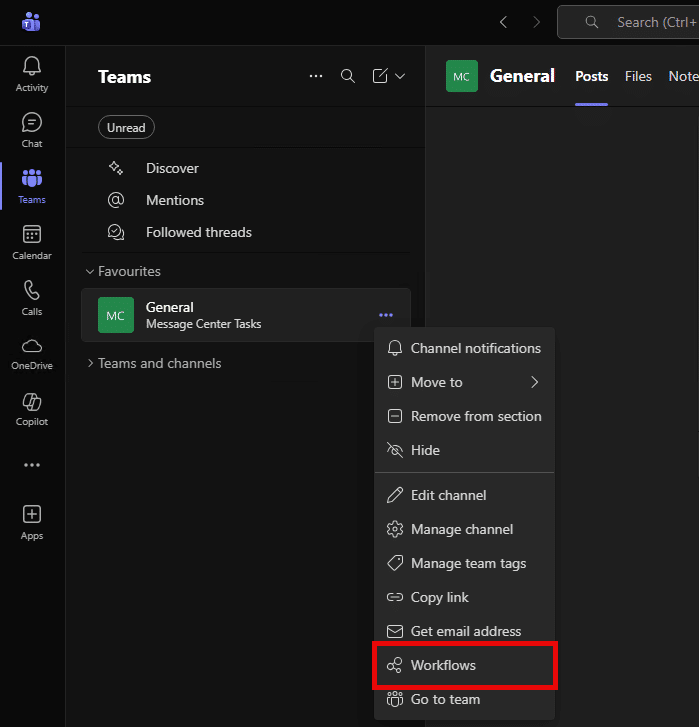
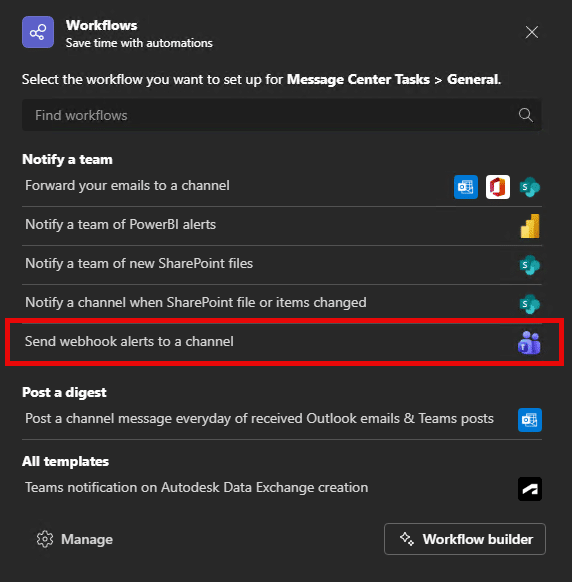
1. Open Microsoft Teams and navigate to the Channel where you want to receive Webhook Notifications. 2. Click the More Options button … and select Workflows.
3. Select Send webhook alerts to a channel.
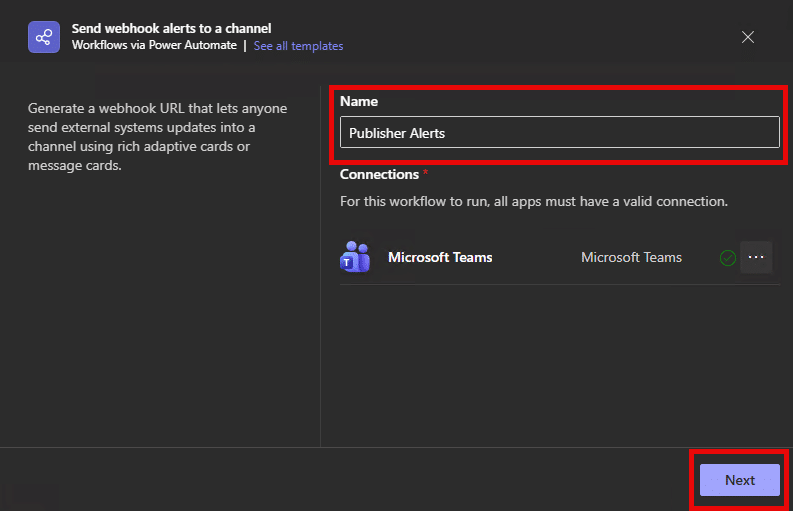
4. Allow a moment for the template to load, it can take a minute. Optionally, update the Name of the workflow so it can be easily distingushed in PowerAutomate. Click Next.
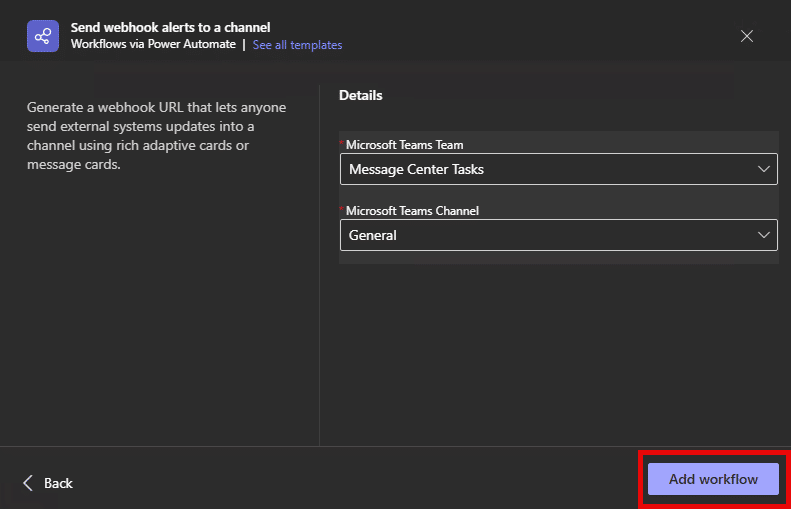
5. Allow a moment for the details tab to load to verify which Team and Channel the webhook URL will be created for and click Add workflow.
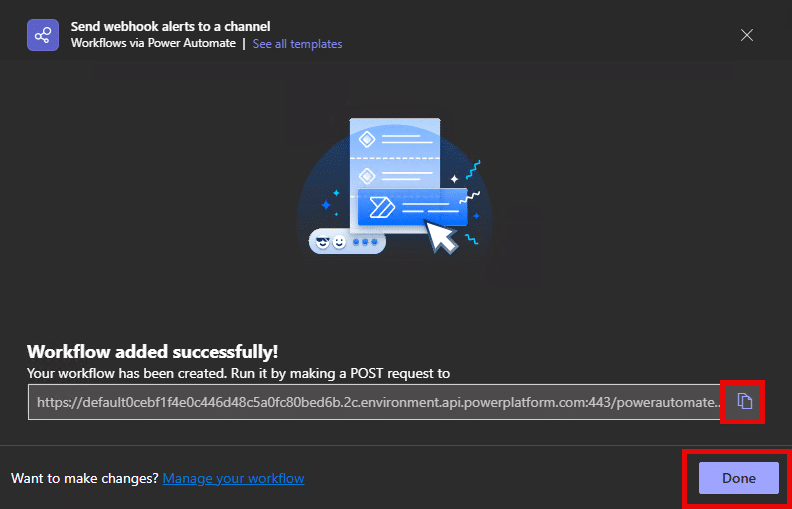
6. Click the copy icon to copy the webhook URL to your clipboard before click Done.
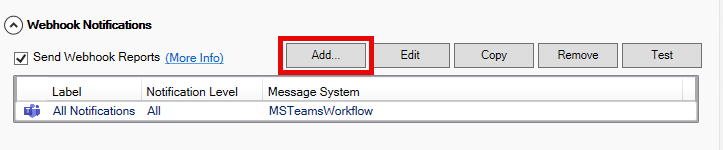
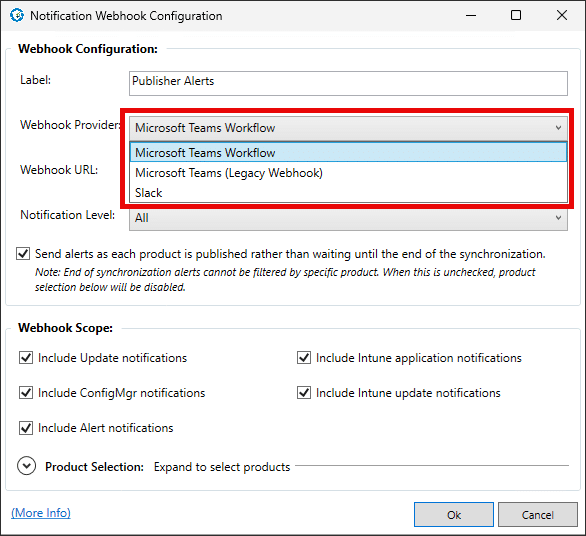
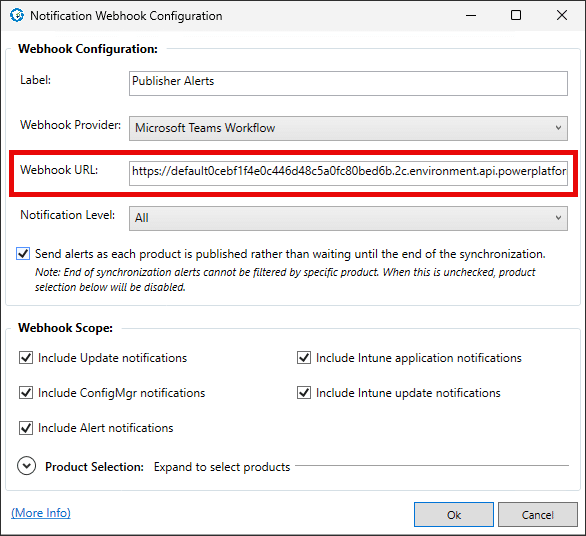
In the Patch My PC Publisher, navigate to the Alerts tab and in Webhook Settings click Add.
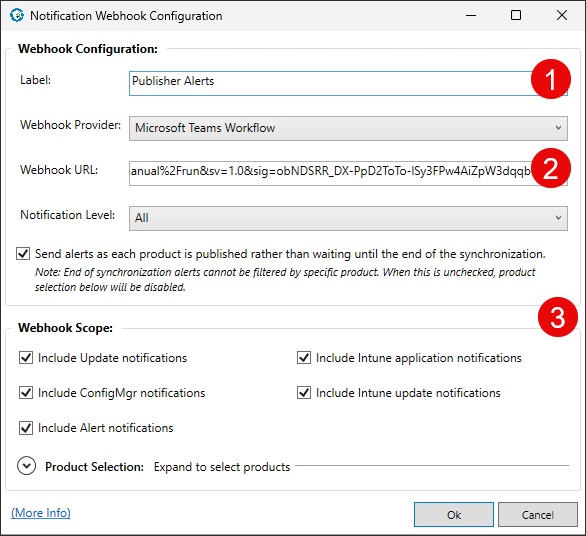
Add a Label and paste the Workflows URL obtained in Step 6 into the Webhook URL box. Configure additional settings for the alert too.
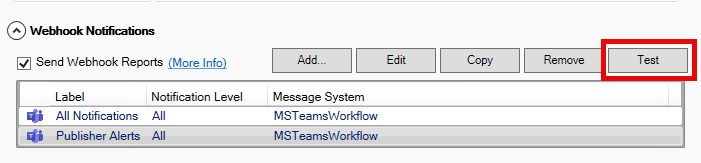
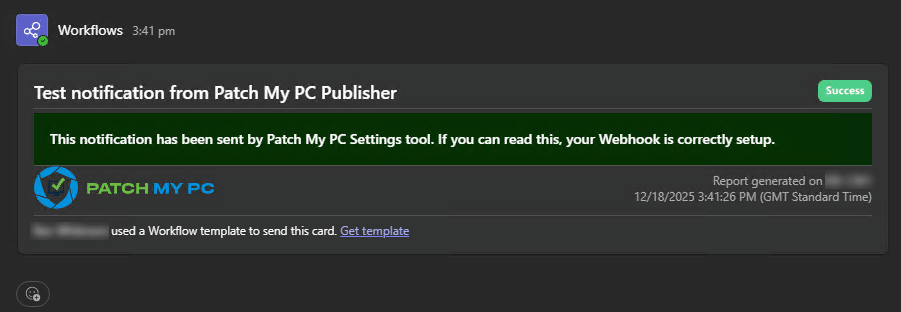
Click Ok to save the webhook and click Test to ensure the newly configured webhook is received to the Microsoft Teams channel.
Consideration for Private ChannelsCopy Link
In Microsoft Teams, bots, including those created via Power Automate (Flow), can interact with channels to provide automated responses, notifications, and other functions. However, posting messages as a Flow bot to a private channel presents a challenge because of permissions restrictions that exist within the Teams platform.
A private channel in Teams is a more restricted environment compared to a standard channel. Only members who are specifically added to the private channel can access it and interact within it.
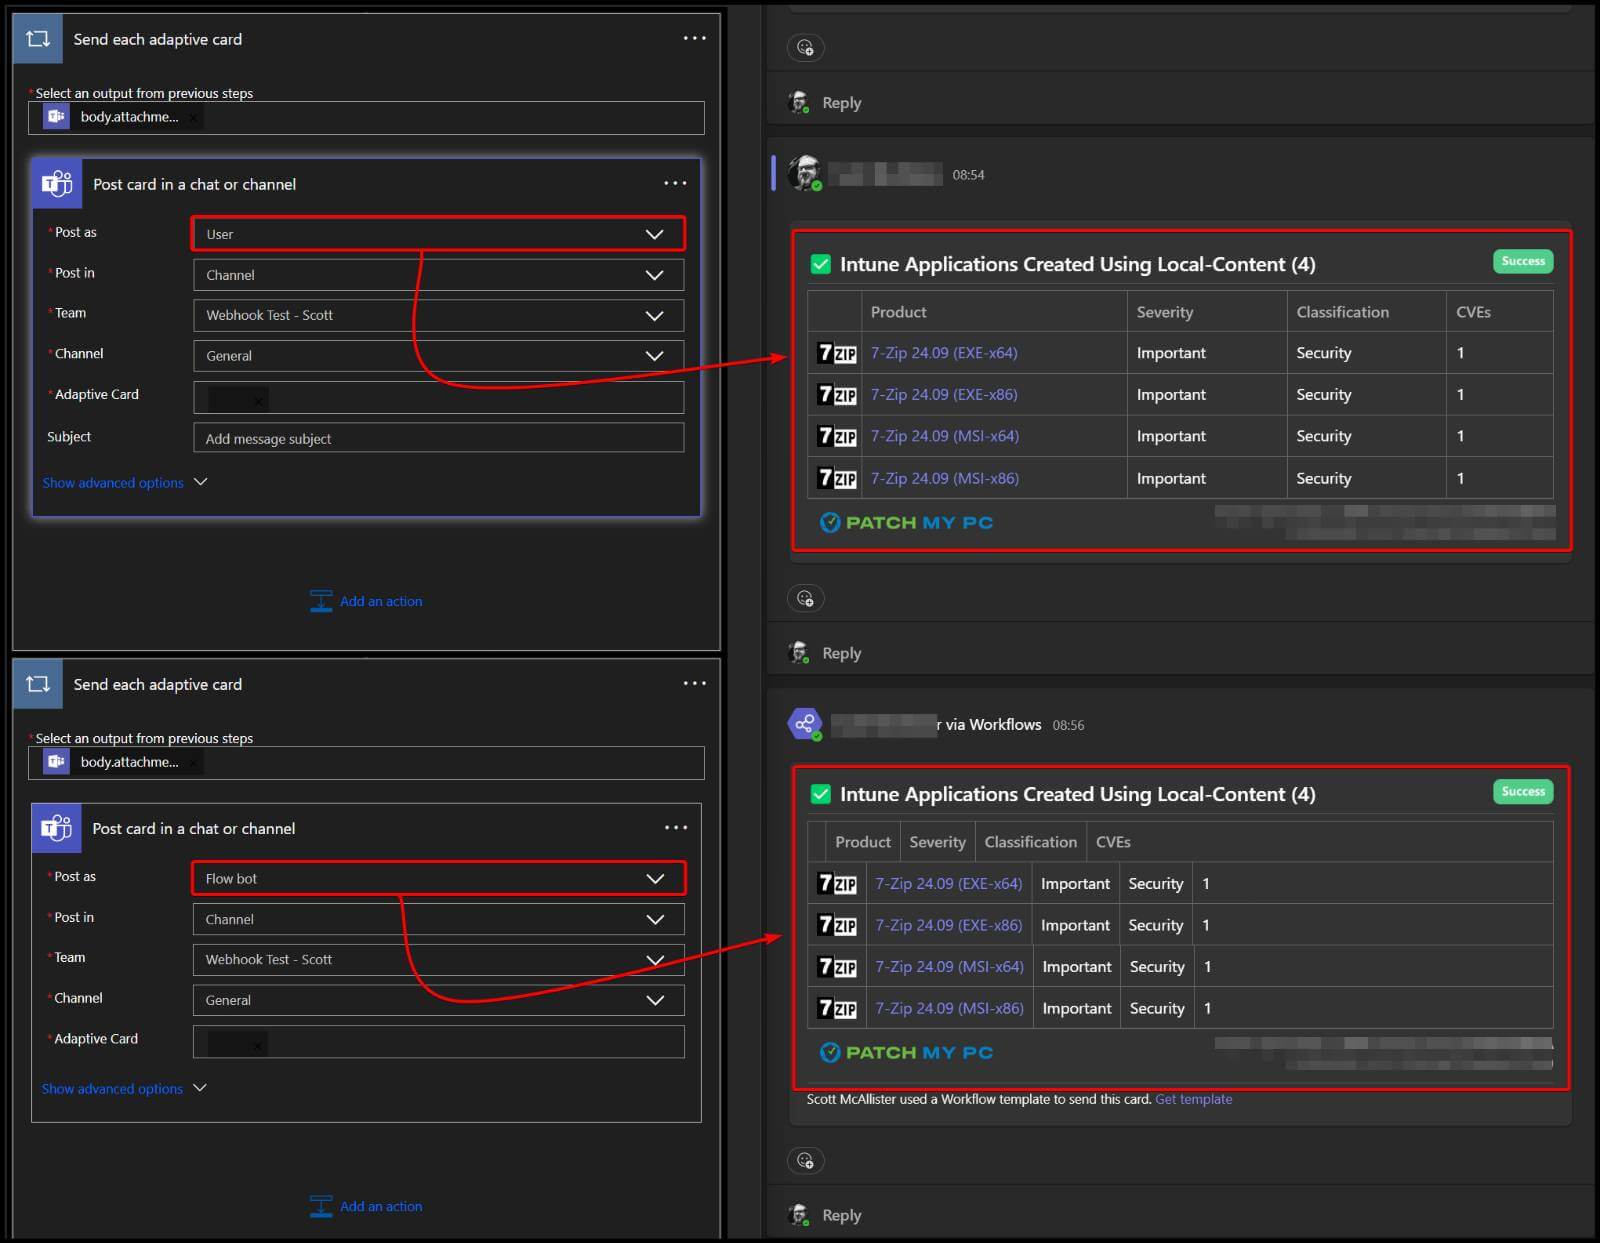
To ensure the workflow can post to a private channel, you need to edit the Post As value for the Flow.
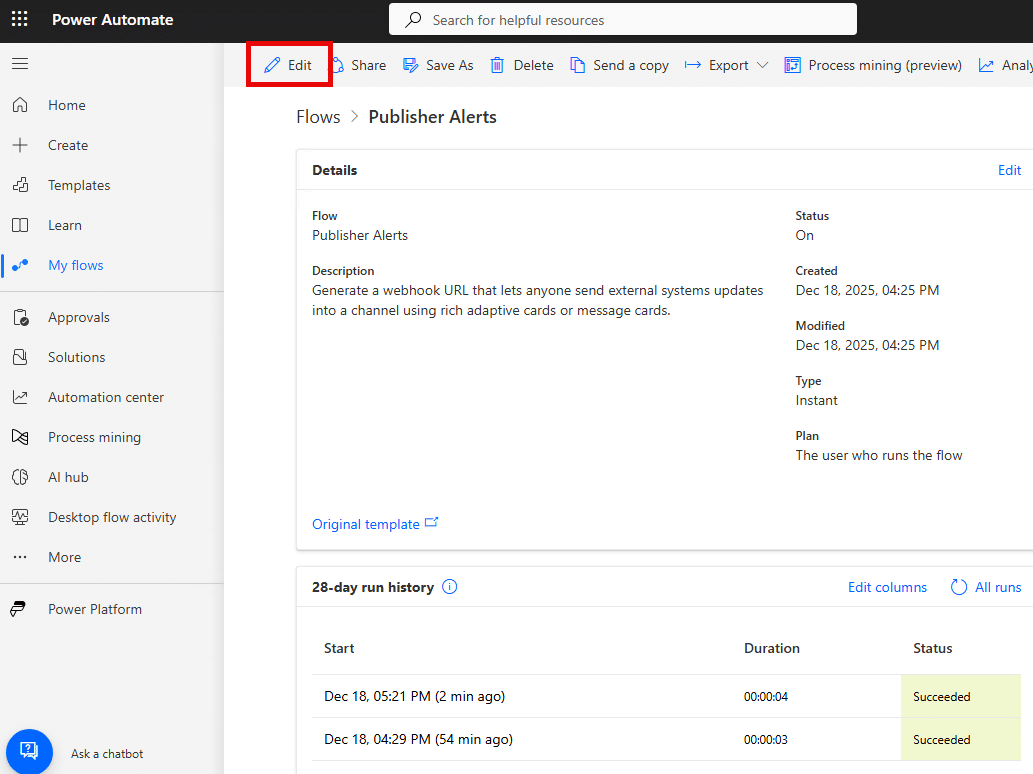
1. Navigate to https://make.powerautomate.com 2. Find the Workflow used for Teams notification in the Private Channel and click Edit.
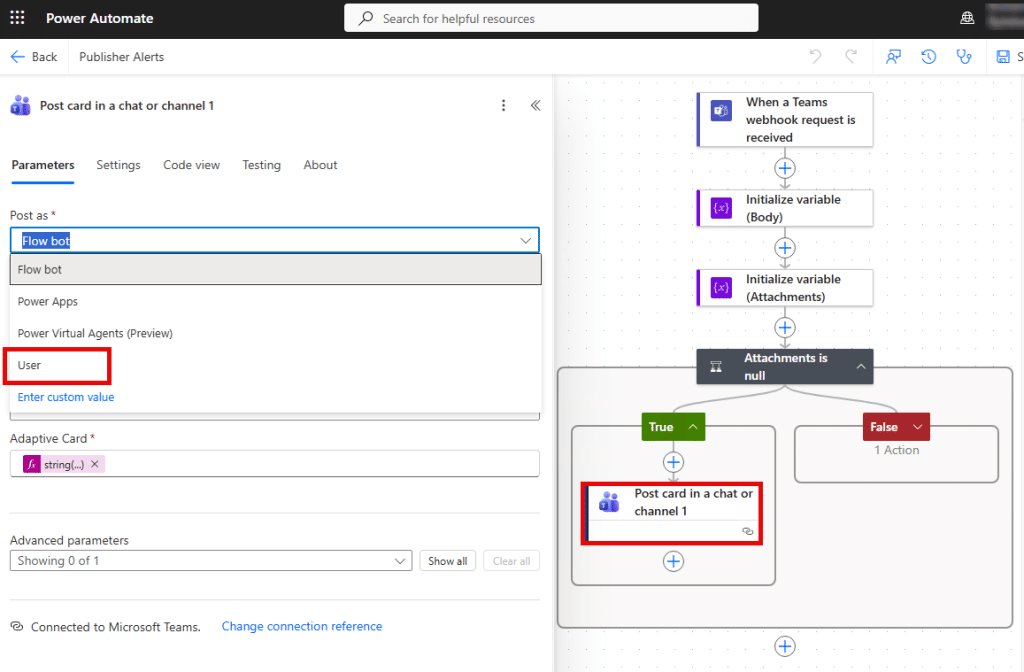
3. Select the step in the flow chart named Post card in a chat or channel. 4. Modify the Post As value and change it from Bot to User.
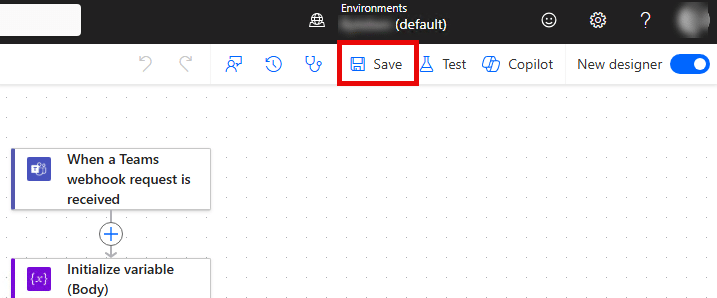
5. Click Save.
How to update existing Microsoft Teams webhooks to support Microsoft Teams WorkflowsCopy Link
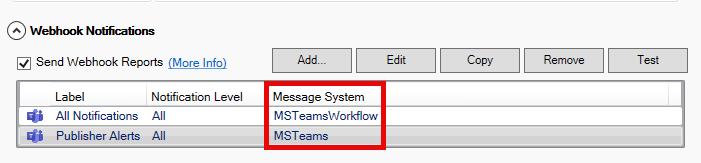
Teams Workflows support the “Adaptive Message Card” format. Legacy webhooks created in the Patch My PC Publisher still use the “Message Card” format.
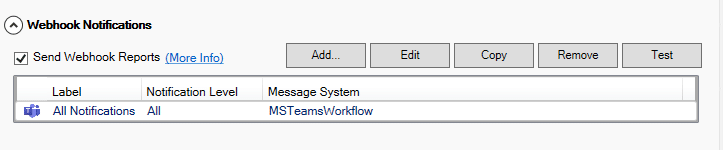
We recommend that any webhook configured with the MSTeams “Message System” (2) in the Publisher should be updated to the MSTeamsWorkflow “Message System” (1) type.
To update an existing webhook to the new format:-
1. Follow the steps outlined in How to Create a Microsoft Teams Webhook URL to generate a new webhook URL for a Microsoft Teams Workflow. 2. Highlight the webhook and click Edit. 3. Change the Webhook Provider from Microsoft Teams (Legacy Webhook) to Microsoft Teams Workflow.
4. Replace the existing Webhook URL with the one obtained by completing Step 1 above.
Click Ok
IMPORTANT: The table formatting in the adaptive card for Teams may appear misaligned or incorrect unless the Post As parameter in the flow action is set to Flow Bot.
How to Create a Slack Webhook URLCopy Link
Another option for sending publishing alerts is to use a Slack Webhook. The Slack webhook will allow the Publisher to send a message into a Slack channel either as each update or application is published, in real-time, or a single message at the end of the synchronization.
Please follow the steps below to create an incoming webhook URL:
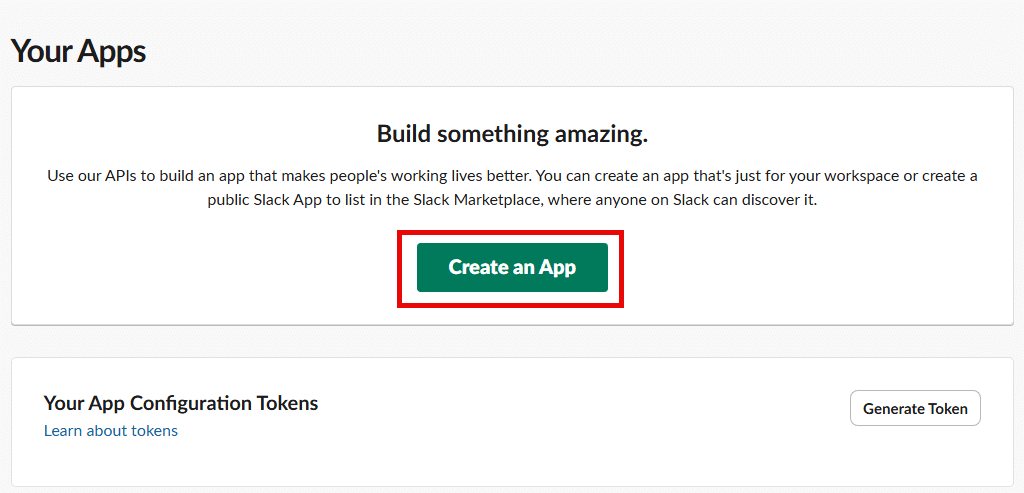
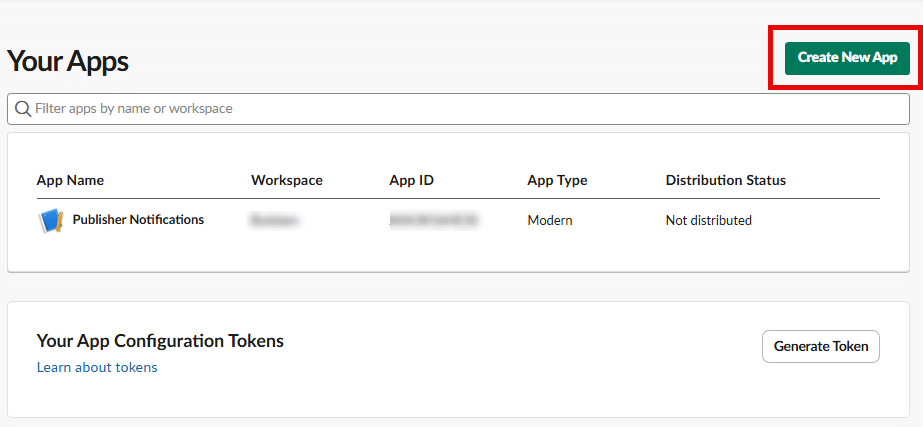
1. On the following web page https://api.slack.com/apps, select Create an app or Create New App if you have already configured apps previously. You will need to be logged into your Slack account and, depending on your settings, you may need to be a Workspace Owner of the account.
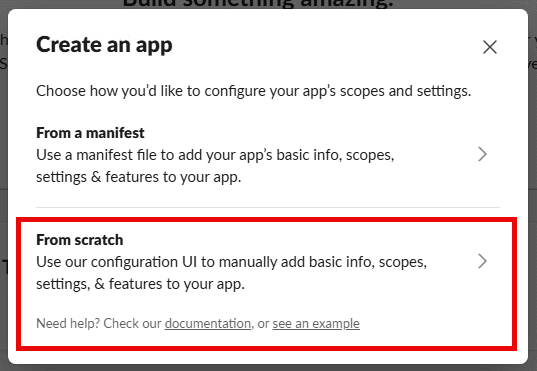
2. Select From scratch.
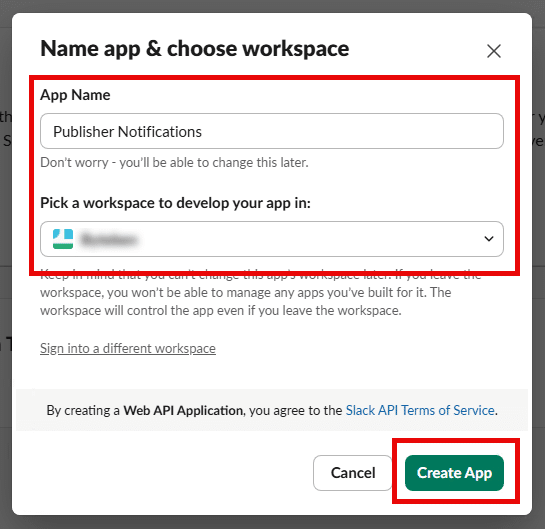
3. Enter an App Name, Pick a workspace to develop your app in and click Create App.
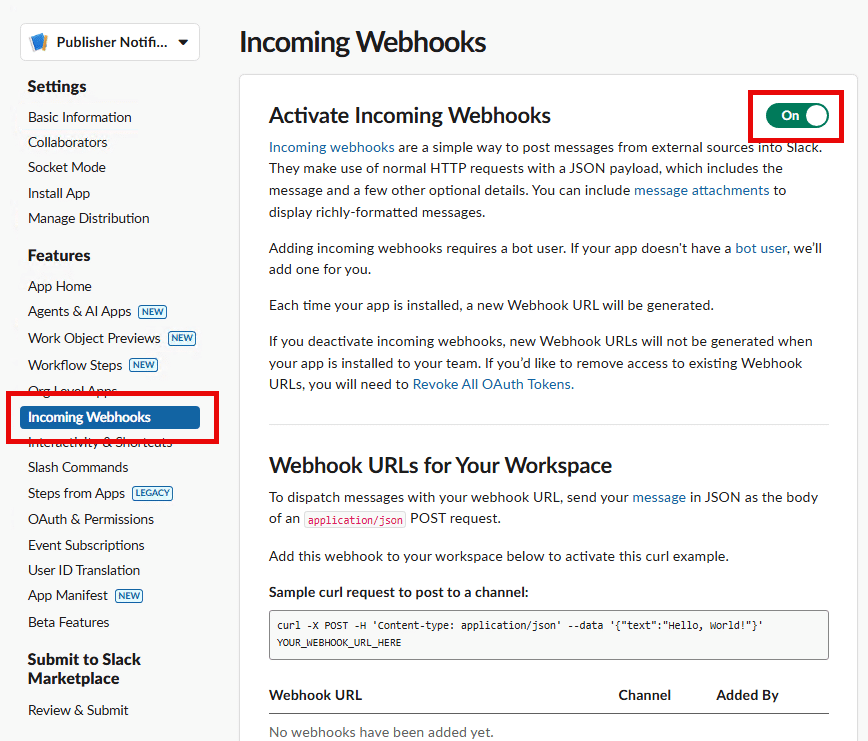
4. Set Activate Incoming Webhooks to On.
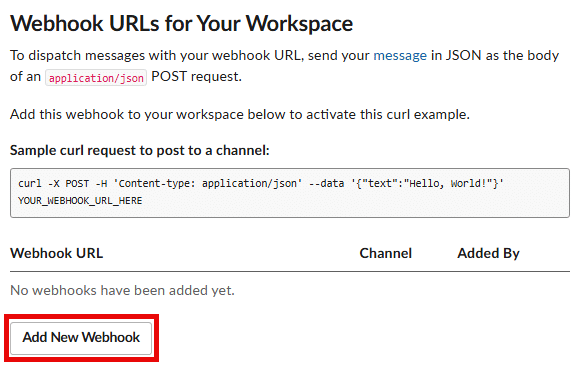
5. Select Add New Webhook.
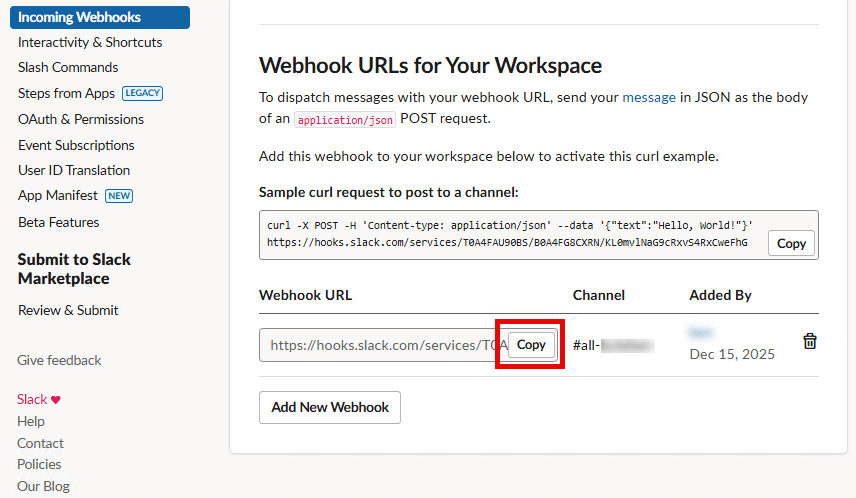
6. Select the desired channel for webhook notifications from Channel for webhook and then select Allow
7. Copy the webhook URL.
8. In the Patch My PC Publisher, navigate to the Alerts tab and in Webhook Settings click Add.
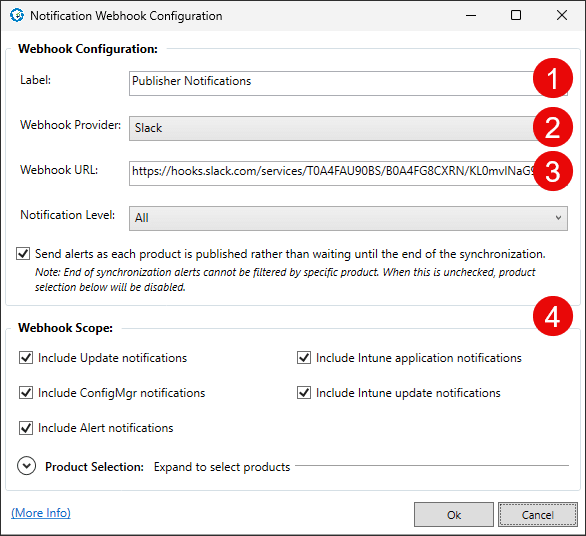
9. Select Slack as the Webhook Provider, add a Label and paste the Workflows URL obtained in Step 7 into the Webhook URL box. Configure additional settings for the alert too. Click Ok.
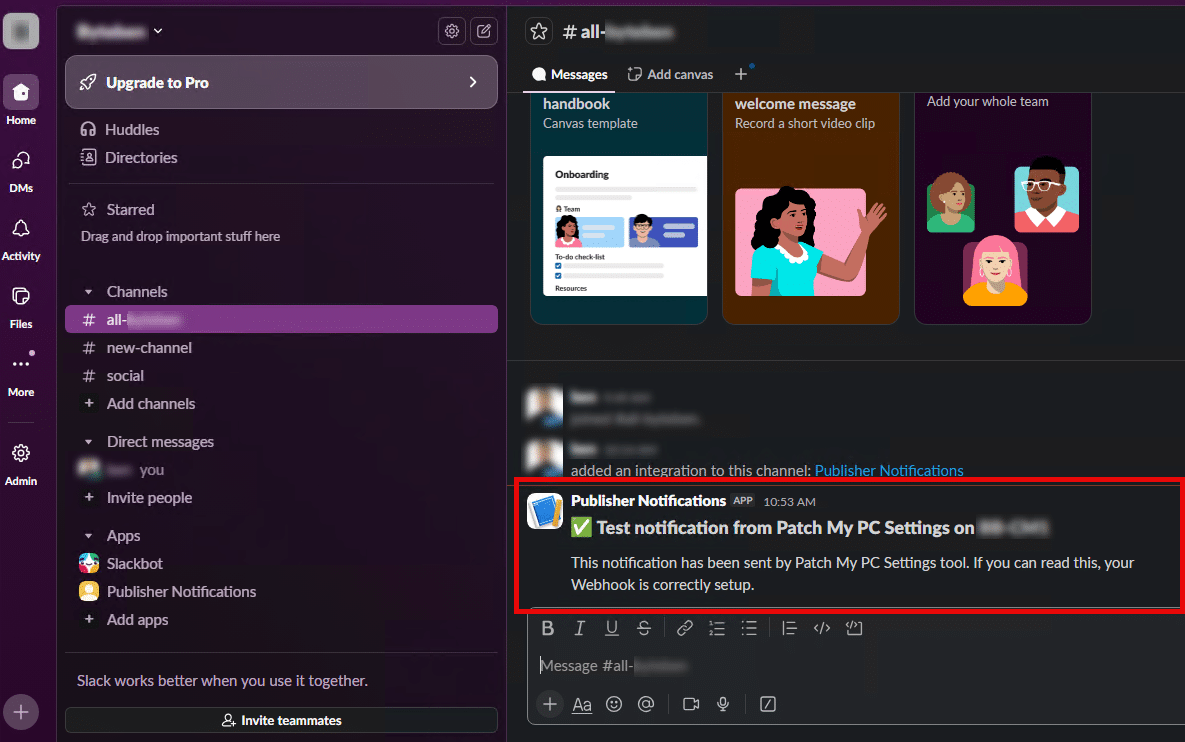
10. Click the Test button.
You should see the test message sent in the Slack channel you selected.
Custom Options for Teams and Slack WebhooksCopy Link
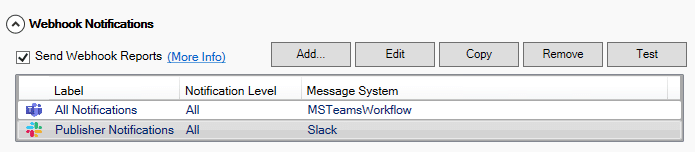
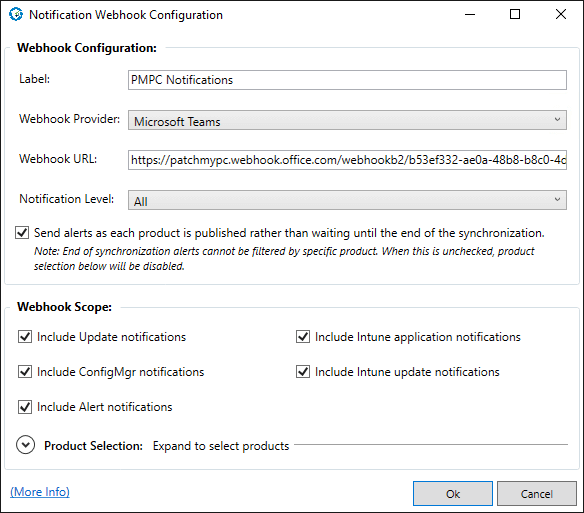
You can configure the webhook notifications for Teams or Slack in the Notification Webhook Configuration window. To view the Notification Webhook Configuration select Add or Edit under Webhook Settings.
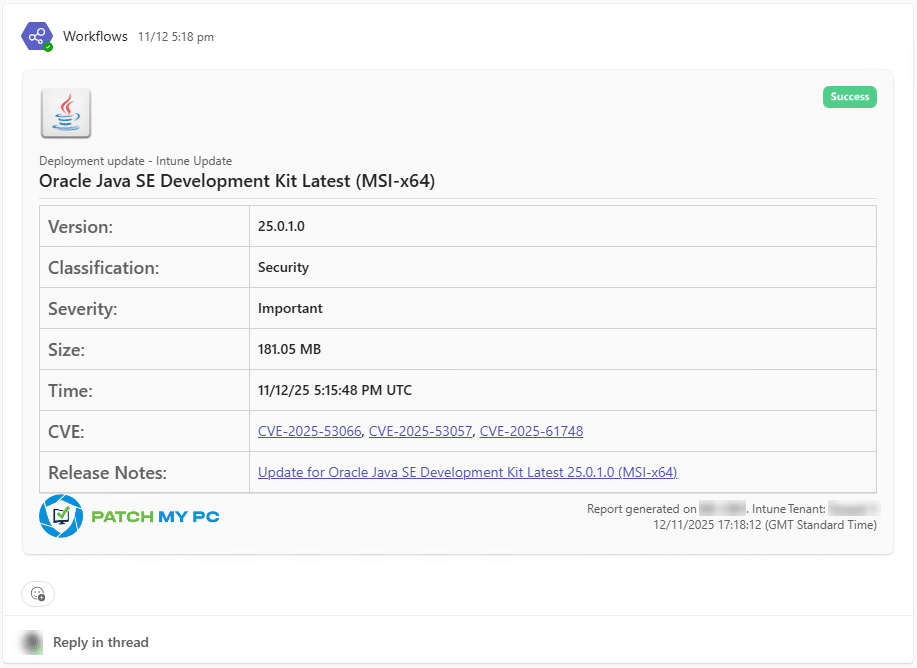
When the option Send alerts as each product is published rather than waiting until the end of the synchronization. is enabled, the Publisher will send a message in real-time right after each update or application is published. When this option is enabled, the message will include more detailed information about each update, including:
Below is an example of the individual notification in Teams.
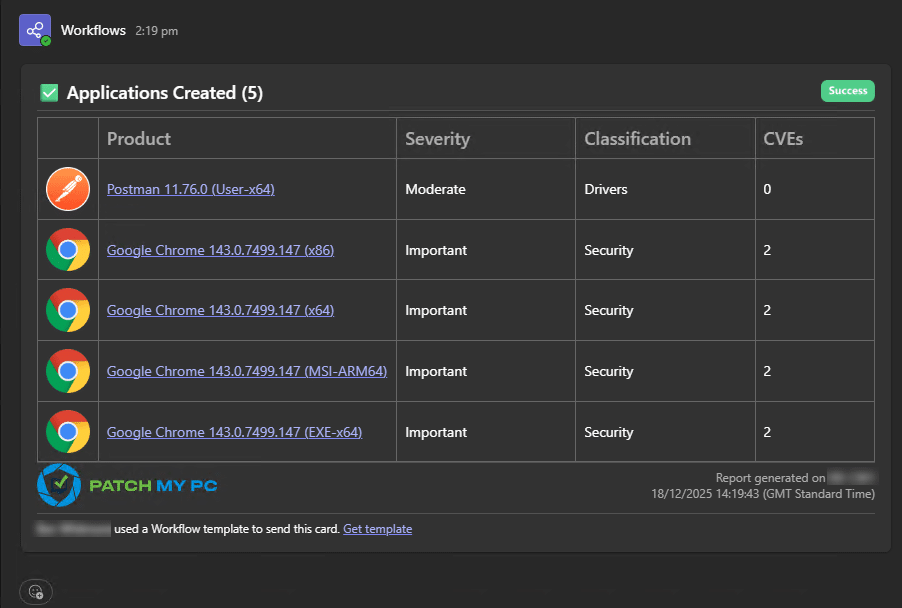
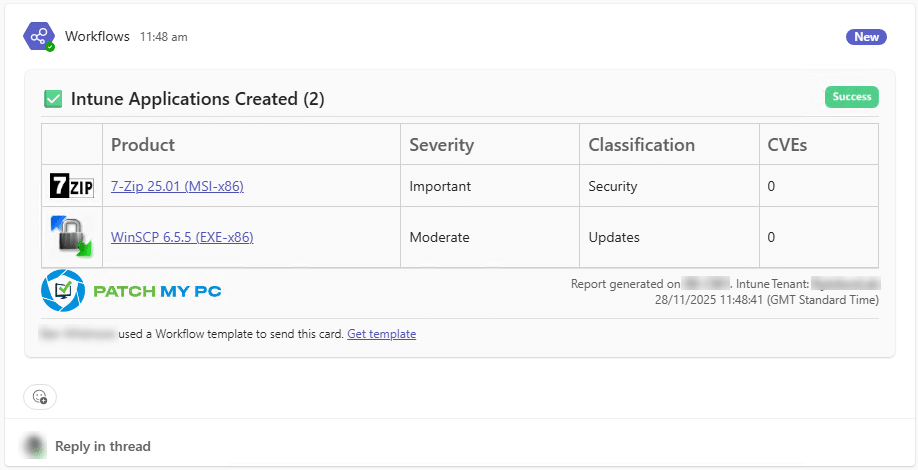
When the option “Send alerts as each product is published rather than waiting until the end of the synchronization.” is disabled, the Publisher will only send a summary of updates and applications published at the end of the synchronization. This option will only include the name of the update or application and the link to the release notes. Below is an example of the Teams summary notification.
You can choose the notification level in the Notification Webhook Configuration window. The levels include receiving All, Error, or Success. This option can be helpful if you want a specific channel to only receive alerts if an update or application fails to publish.
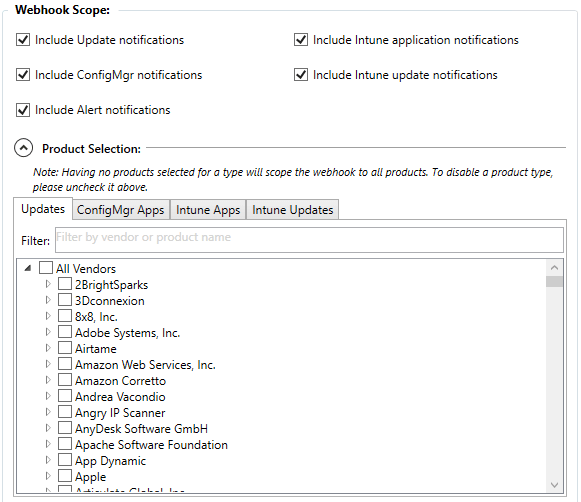
In the Webhook Scope section you can scope the product type you want for the alerts. You can also scope out alerts by specific products with the Product Selection section.
Note: When the Summary option is enabled, notifications can be truncated if they are too long. This is due to Teams and Slack limitations. Since we can’t send long notifications to Teams or Slack, you will need to enable SMTP Settings to receive a full email report. If email reports are not enabled, you will need to fall back to the log file for more information on any error messages that occured during Publishing.