
In this article, we will show you how to prepare an offline package for SQL Server Management Studio (SSMS) 22 and deploy it as a Custom App using Patch My PC Cloud or publish it as a Custom App using Patch My PC Publisher.
Like many Microsoft applications, SSMS uses a bootstrapper that dynamically downloads the required installation files during setup. Creating an offline layout allows you to include these files in the application package, supporting deployment to devices without internet access and distribution through your existing content infrastructure.
The following guide creates an offline layout containing all supported SSMS 22 workloads, components, and language packs.
This article serves as a guide to illustrate how SSMS can be packaged as a custom application. However, due to the variables involved in configuring components, languages, and installation settings, Patch My PC Support is unable to provide assistance with tailoring the package to meet specific customization needs.
For detailed guidance on customizing the offline layout and installation parameters, refer to the official Microsoft documentation.
Requirements
Before creating an offline package for SQL Server Management Studio (SSMS) 22, we need to build the package content sources on a system with the following prerequisites:
- Windows 11 (minimum supported version) or later, or Windows Server 2019 Standard/Data center or later.
- A 64-bit (x64) processor with four or more CPU cores and a minimum of 4 GB of RAM.
- Microsoft Visual C++ v14 Redistributable (x86 and x64)
- NET Framework 4.7.2 or later to install SQL Server Management Studio 22. [AC1] [NK2]
- The required Microsoft certificates must be installed on the device. If the certificates are missing or outdated, the installer may fail silently. [AC3] [NK4] https://learn.microsoft.com/en-us/ssms/install/install-certificates
For the complete and most up-to-date list of requirements, refer to the Microsoft documentation: https://learn.microsoft.com/en-us/ssms/system-requirements
Create the Offline package for SSMS 22
Step 1: Download the Bootstrapper
- Download the latest SQL Server Management Studio (SSMS) bootstrapper from Microsoft: https://learn.microsoft.com/en-us/ssms/install/install
- Save the bootstrapper to a packaging device with Internet access and meets the above requirements.
Step 2: Create a Local Layout
Open a Command Prompt window with administrative privileges, navigate to the directory containing the bootstrapper, and run the following command to create a local layout:
vs_SSMS.exe --layout C:\SSMS_Layout --all
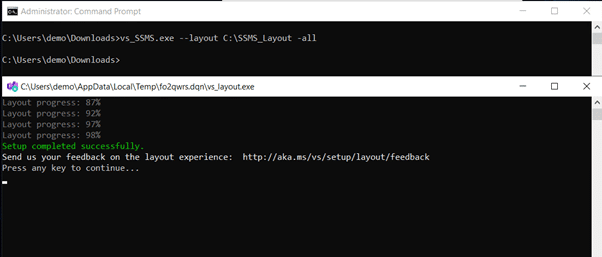
This command creates the C:\SSMS_Layout directory and downloads all required installation files, workloads, components, and language packs for SSMS 22.
In this guide, we use the –all parameter to download all supported workloads, components, and language packs. If you only need specific components, you can create a smaller layout using the following example:
vs_SSMS.exe --layout C:\SSMS_Layout --add Microsoft.SSMS.Component.IS --add Microsoft.SSMS.Component.RS
A complete list of supported workload and component IDs is available in the Microsoft documentation: https://learn.microsoft.com/en-us/ssms/install/workload-component-ids
Step 3: Prepare the SSMS Package
In this step, we will prepare the package using two files: the primary installer (vs_SSMS.exe) and a ZIP archive containing the remaining layout content.
- Navigate to the C:\SSMS_Layout directory
- Select all files and folders except vs_SSMS.exe
- Right-click and select Compress to ZIP file, or use a compression tool such as 7-Zip
- Name the archive SSMS_Layout.zip
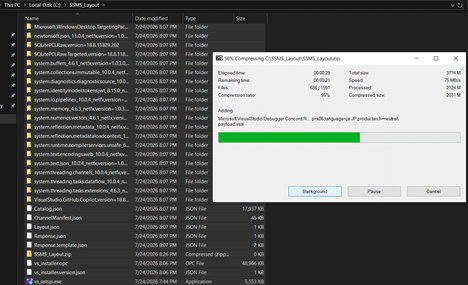
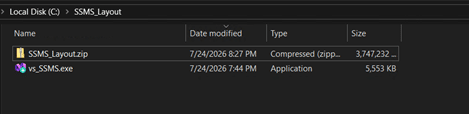
- After creating the ZIP file, remove all remaining files and folders except:
- vs_SSMS.exe
- SSMS_Layout.zip
Step 4: Create the SSMS 22 Custom App in Patch My PC Cloud
Now, let’s create the Custom App using the packaged content.
- Sign in to the Patch My PC Cloud Portal: https://portal.patchmypc.com
- On the App Catalogue page, select Add App
- Upload the primary installer vs_SSMS.exe and the additional file SSMS_Layout.zip
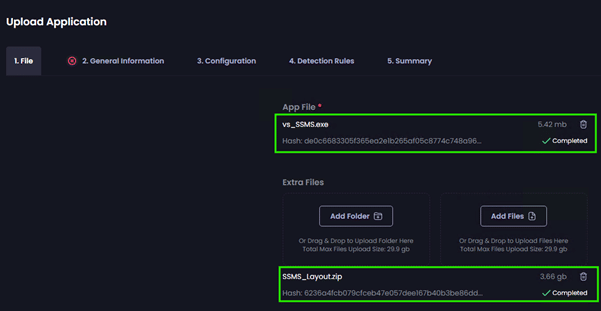
- Click Next and complete the General information about the app:
- AppName: SQL Server Management Studio 22
- App icon: https://msicons.com/sql-server-management-studio
- Vendor: Microsoft Corporation
- Description: SQL Server Management Studio (SSMS) is an integrated environment for managing any SQL infrastructure, from SQL Server to Azure SQL Database. SSMS provides tools to configure, monitor, and administer instances of SQL Server and databases.
- Click Next and enter the app configuration details
- Install Context: System
- Architecture: 64-bit
- Version: 22.8.1
- Language: English
- Installed Apps Name: SQL Server Management Studio 22
- Silent install Parameters:
--noWeb --quiet --norestart --wait - Uninstall Command (Custom): C:\Program Files (x86)\Microsoft Visual Studio\Installer\setup.exe –quiet –norestart uninstall –installPath “C:\Program Files\Microsoft SQL Server Management Studio 22\Release”
Note: The uninstall command is applicable to Patch My PC Cloud deployments only. At this time, Patch My PC Publisher for Configuration Manager does not support uninstall commands for EXE-based Custom Apps. You can track and upvote the feature request here: https://ideas.patchmypc.com/ideas/PATCHMYPC-I-8648
The Installed Apps Name and Version values may change between SSMS releases. Therefore, we recommend validating these values by installing the application manually on a test device before creating the Custom App. To simplify this process, you can use the Custom Apps Helper script to identify the application’s installed name and version: https://github.com/PatchMyPCTeam/Community-Scripts/tree/main/Other/CustomAppsHelper
- Click Next and select the default detection method
- Click on Create
The application requires a pre-install script to extract the contents of the ZIP file before the installation can begin.
Please save the PowerShell script below as a .ps1 file and include it as a Pre-Install Script in your deployment configuration.
  try {
    $zipFile = Get-ChildItem -Path $PSScriptRoot -Filter "*.zip" -File | Select-Object -First 1

    if (-not $zipFile) {
        throw "No ZIP file found in $PSScriptRoot"
    }

    Write-Host "Extracting $($zipFile.Name)..."

    Expand-Archive -LiteralPath $zipFile.FullName -DestinationPath $PSScriptRoot -Force -ErrorAction Stop

    Write-Host "ZIP extraction completed successfully."
    exit 0
}
catch {
    Write-Host "Extraction failed: $($_.Exception.Message)"
    exit 1
}
Publish SQL Server Management Studio 22 with Patch My PC Publisher
After creating the Custom App in the Patch My PC Cloud Portal, the application will be synchronized to Publisher and listed under the ConfigMgr Apps tab. If the application does not appear immediately, click Refresh to retrieve the latest Custom App changes.
- Open Patch My PC Publisher, expand All Custom Products, and locate the SQL Server Management Studio 22 application
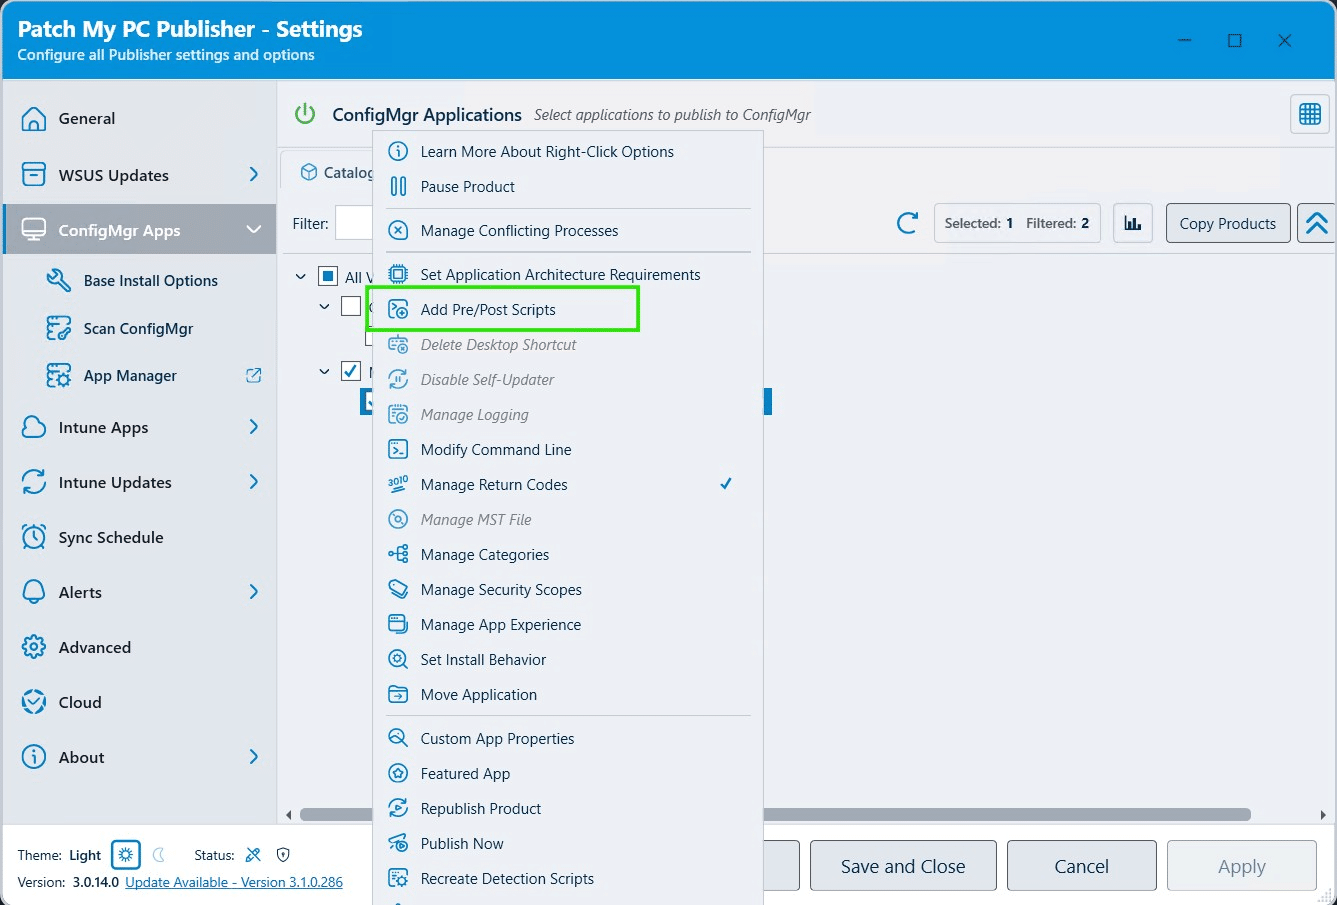
- Enable the application, then right-click it and select Add Custom Pre/Post Scripts
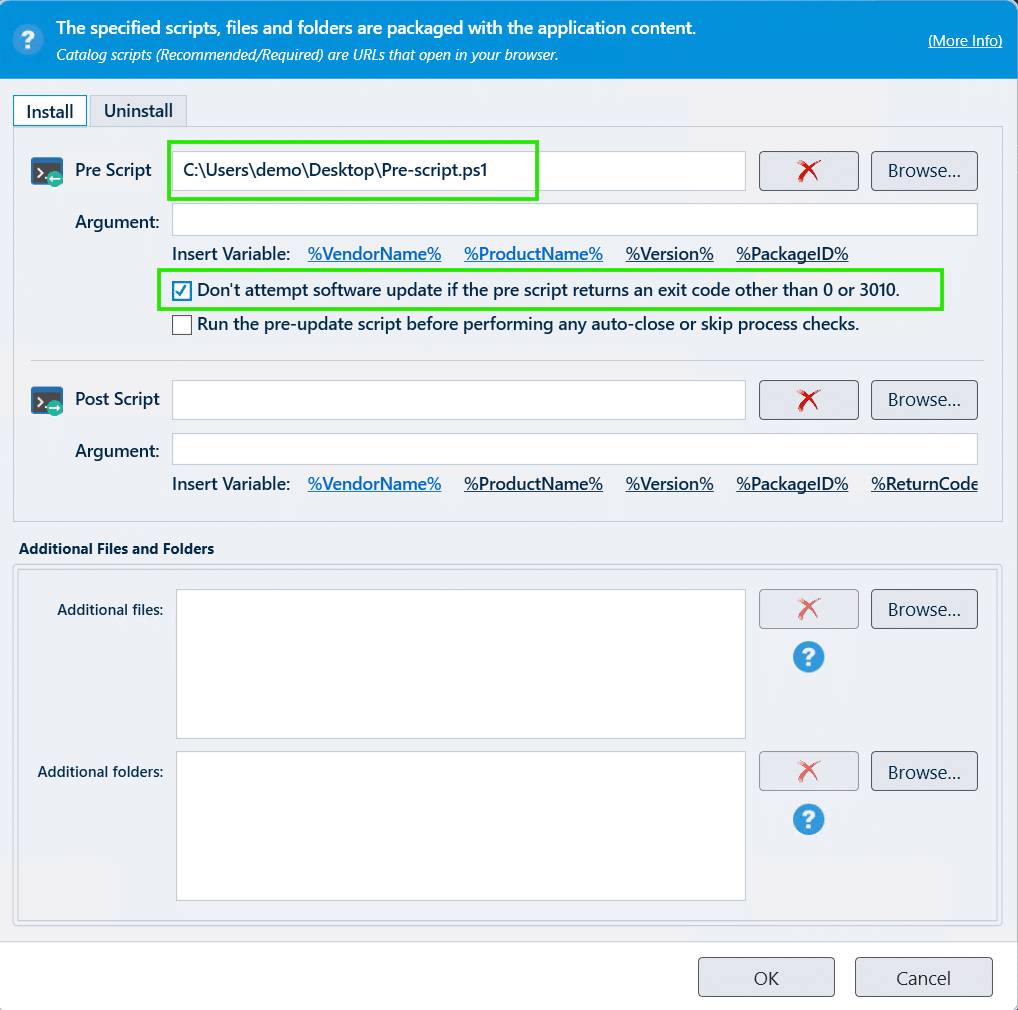
- Import PreScript.ps1 as a pre-script
- Right click on the App and select “Add Pre/Post scripts”.
- Browse and import the Script saved locally on the device. Select the check box name Don’t attempt software update if the pre script returns an exit code other than 0 or 3010.
Publish SQL server management studio 22 with Patch My PC Cloud
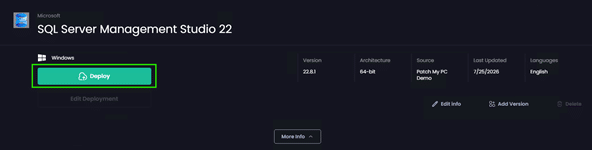
- Within the App Catalogue, navigate to the Custom App and then select Deploy
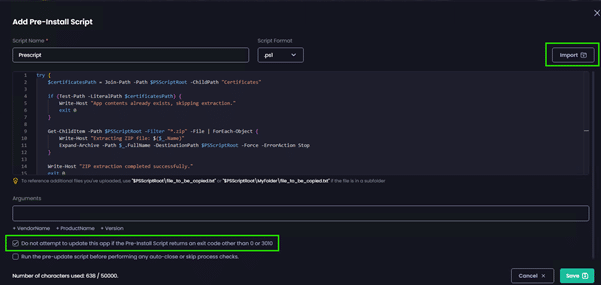
- Import the Pre-Script.ps1 in the Configuration page
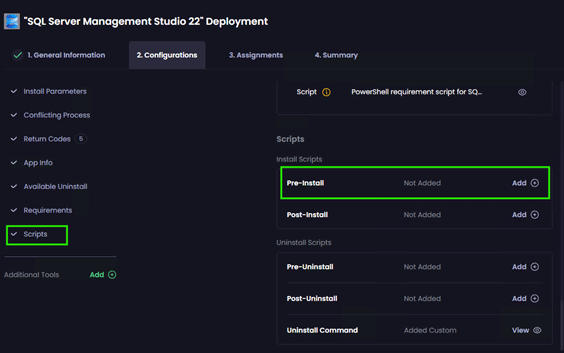
- Enable “Do not attempt to update this app if the Pre-Install Script returns an exit code other than 0 or 3010” and hit Save
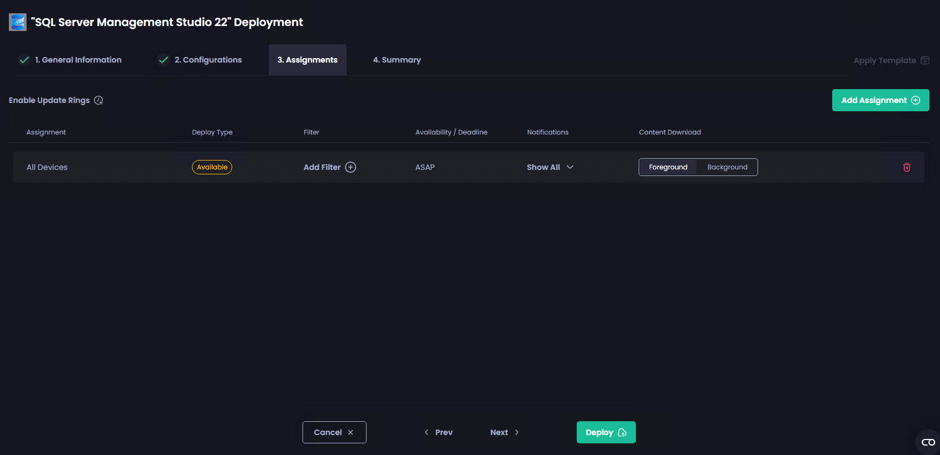
- Choose your assignments and finally, click Deploy
Note: The steps above will help you create the base application. However, the base application is intended for new installations and will not update an existing SQL Server Management Studio (SSMS) 22 installation.The install commands used for the Base App and Update-Only package are different, which is why a separate update package is required.
To create an offline Update-Only package for SQL Server Management Studio 22, follow the same process outlined above to create the offline layout and package the installation files. When configuring the application, use the following install command to perform an offline update of an existing SSMS installation:
update --quiet --noWeb --norestart --wait
Known Error Codes and Troubleshooting:
When the SSMS bootstrapper begins the installation, log files are generated in the %TEMP% directory. Common log files include:
- ssms_client.log
- dd_setup_errors.log
- dd_setup.log
- dd_bootstrapper.log
Error 0x80131509: Unable to Verify the Certificate (Invalid Certificate)
In offline deployment scenarios, devices must have up-to-date Microsoft root and intermediate certificates installed. During installation, the SSMS setup engine validates the digital signatures of all installation files. Because offline devices cannot retrieve certificate updates from Windows Update or the internet, certificate validation may fail if the required certificates are missing or outdated.
To resolve this issue, consider one of the following options:
Option 1: Distribute Trusted Root Certificates Enterprise-Wide
For environments with offline devices that do not have the latest Microsoft root certificates, administrators can update trusted root certificates using Microsoft’s guidance on configuring trusted and disallowed certificates.
Option 2: Import Certificates During Installation
You can use a pre-installation script to verify and import the required certificates automatically before the application installation begins. The necessary certificate files are included in the SSMS offline layout and can be imported as part of the deployment process.
function Import-RequiredCertificates {
    param([Parameter(Mandatory)][string]$CertificatesPath)

    Get-ChildItem -Path $CertificatesPath -Filter "*.cer" -File | ForEach-Object {
        Write-Host "Importing certificate: $($_.Name)"
        certutil.exe -addstore -f Root $_.FullName *> $null

        if ($LASTEXITCODE -ne 0) {
            throw "Failed to import certificate: $($_.Name)"
        }
    }
}
try {
    $ZipFile = Get-ChildItem -Path $PSScriptRoot -Filter "*.zip" -File |
               Select-Object -First 1

    if (-not $ZipFile) { throw "No ZIP file found in $PSScriptRoot" }

    Write-Host "Extracting $($ZipFile.Name)..."
    Expand-Archive -LiteralPath $ZipFile.FullName -DestinationPath $PSScriptRoot -Force -ErrorAction Stop

    $CertificatesPath = Join-Path $PSScriptRoot "Certificates"
    Import-RequiredCertificates -CertificatesPath $CertificatesPath

    Write-Host "PreScript completed successfully."
    exit 0
}
catch {
    Write-Host "PreScript failed: $($_.Exception.Message)"
    exit 1
}
Error Codes 1001, 1003, 8006: SSMS or Visual Studio Installer Processes Are Running
These error codes may occur when SQL Server Management Studio, or a related Visual Studio Installer process, is already running on the device.
To resolve this issue, configure Conflicting Processes within Patch My PC to close the affected processes before the installation starts. (ex:SSMS.exe):
- Configure Conflicting Process in a Patch My PC Cloud Deployment | Patch My PC documentation
- Manage Conflicting Processes in Patch My PC Publisher | Patch My PC documentation
Error Codes 5003, 8002, -1073720687: Bootstrapper Failed to Download Installation Files
These errors can occur when the bootstrapper attempts to download content that is not available in the offline package.
Verify that all required workloads, components, and language packs were successfully downloaded when creating the offline layout. If any content is missing, recreate the layout using the appropriate bootstrapper parameters and republish the package.