HomeKnowledge BaseHow to package Visual Studio 2022 as a Custom AppHow to package Visual Studio 2022 as a C…
How to package Visual Studio 2022 as a Custom App
In this article, we will show you how you can prepare a package for Visual Studio 2022 and deploy it as a Custom App using Patch My PC Cloud or publish it as a Custom App using Patch My PC Publisher.
With its modular installation model, Visual Studio allows you to select specific workloads based on development needs. However, this flexibility also means that packaging Visual Studio for deployment requires careful planning, especially when managing installation size, dependencies, and update strategies.
The following guide will focus on the core editor workload only for the Community Edition.
This article serves as a guide to illustrate how Visual Studio can be packaged as a custom application. However, due to the many variables involved in configuring workloads and application settings, Patch My PC Support is unable to provide assistance with tailoring the package to meet specific customization needs.
For detailed guidance on customizing the offline installer, including available command-line options, please refer to the official documentation
Prepare a package for Visual Studio 2022Copy Link
The steps below apply to the Community, Professional, and Enterprise editions of Visual Studio. To ensure you always install the latest version of the Current Channel for Visual Studio 2022, download the appropriate bootstrapper from the table below:-
Save it to a location where you have write permissions.
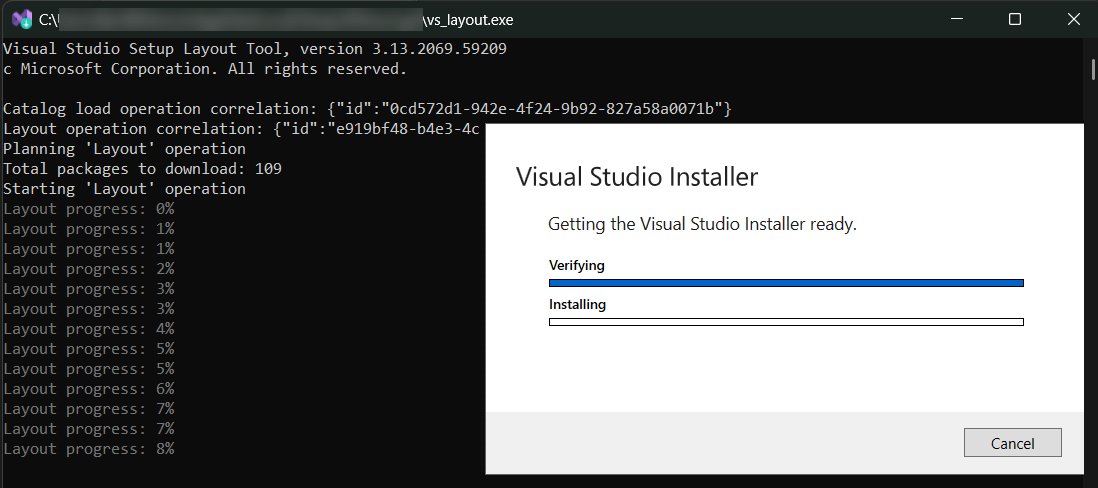
Step 2: Create the Local LayoutCopy Link
It is necessary to create a local layout which downloads the necessary workload modules and files using the stub installer. Additionally, the layout will set the language for the package. The only workload and component we will use for this example package is Microsoft.VisualStudio.Component.CoreEditor and Microsoft.VisualStudio.Workload.CoreEditor.For a full list of componenets and workloads for each edition, follow the links at https://learn.microsoft.com/en-us/visualstudio/install/workload-and-component-ids?view=vs-2022
Wait for the download to complete. This may take some time depending on your internet connection.
Step 3: Prepare the Layout PackageCopy Link
Locate the localVSlayout folder created in Step 2.
Compress the following files and folders into a ZIP archive:
Select all folders and files within localVSlayoutexceptvs_setup.exe
Right-click and select “Compress to ZIP file” or use a tool like 7-Zip
Name the archive localVSlayout.zip
Delete the original files and folders from .localVSlayout after confirming the ZIP file was created successfully.
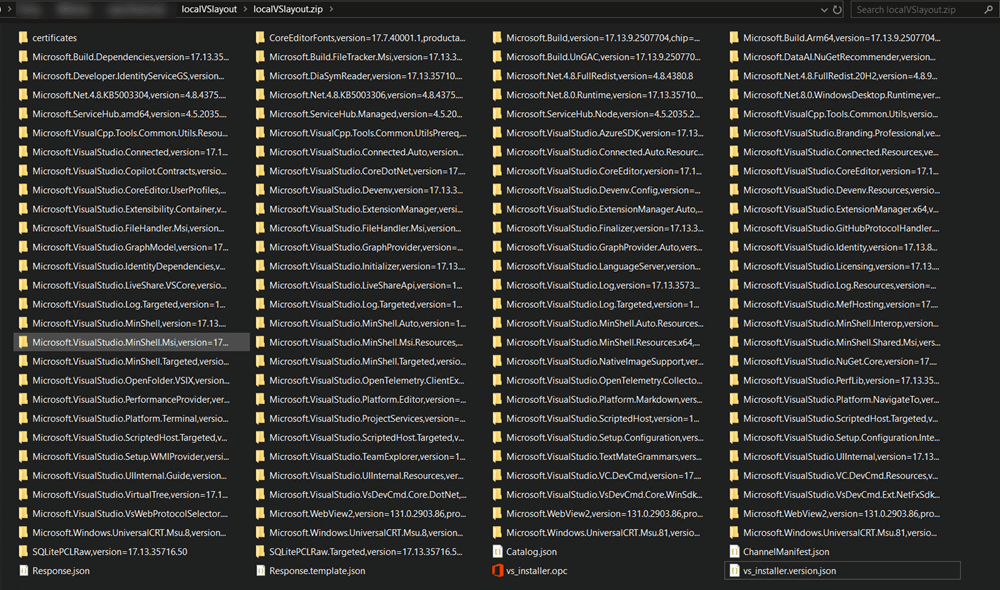
The compressed zip file should contain the following files and folders (the exact files and folders will vary depending on the edition you used and the workloads you specified in your layout).
Copy Link
The localVSlayout folder should now only contain localVSlayout.zip and vs_setup.exe
Create the Custom AppCopy Link
We now have the necessary files to create the custom app in Patch My PC Cloud.
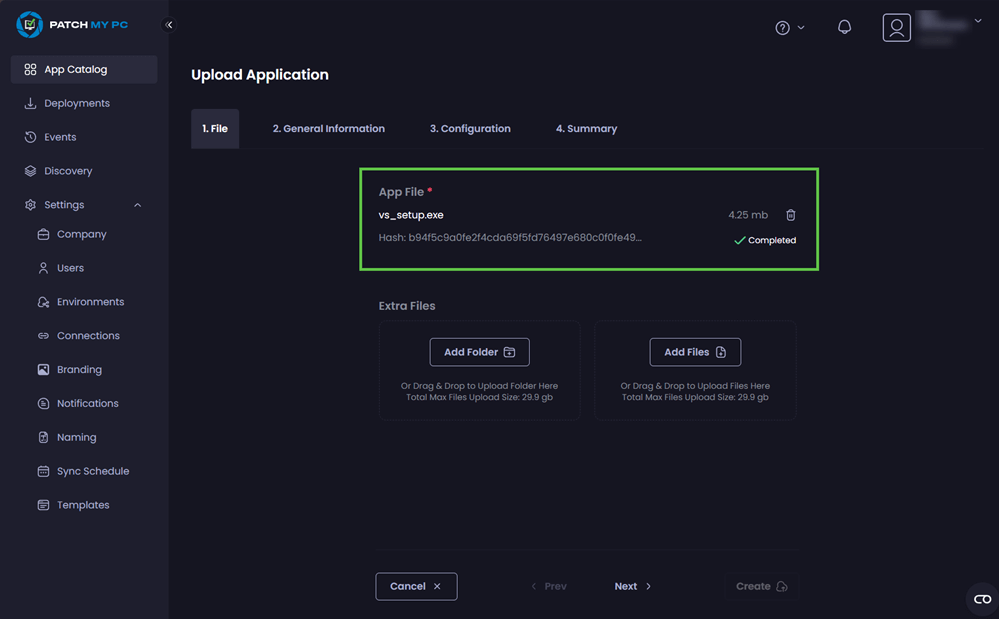
Click Add Primary Install File and select vs_setup.exe.
Click Add Files and select localVSlayout.zip (The zip file is quite large so may take a short while to upload, you can still proceed through the wizard during the upload).
Click Next.
On the General Information tab, enter the following information:-
Field
Data
App Icon
Provide a suitable icon for the app
App Name
Visual Studio Community 2022
Vendor
Microsoft Corporation
Description
Visual Studio Community 2022 is Microsoft’s free, fully-featured IDE for students, open-source contributors, and individual developers. It offers a comprehensive development environment for building applications across platform
Click Next.
On the Configuration tab, enter the following information:-
Field
Data
Install Context
System
Architecture
64-bit
Version
17.3.1
Language
English
Apps & Features Name
Visual Studio Community 2022
Conflicting processes
devenv.exe
Silent Install Parameters
––quiet ––wait ––norestart
Click Create. (You may not be able to click Create if the localVSlayout.zip has not finsihed uploading yet).
Important: You must use the correct Apps & Features Name and Version for the edition and version of Visual Studio 2022 you are creating as a Custom App. If you do not, the application will fail to be detected after it has installed.
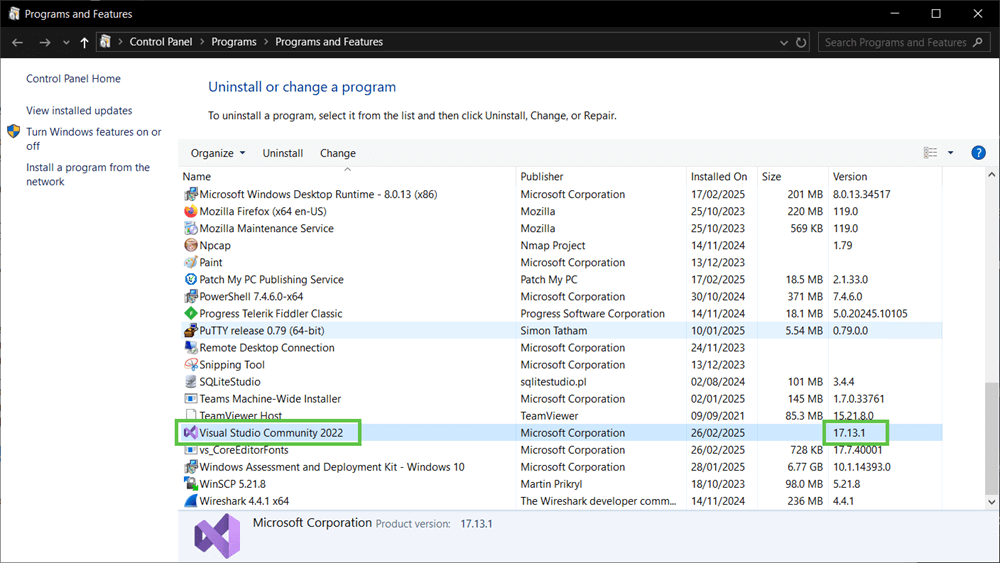
Patch My PC recommends to manually install Visual Studio 2022 using the stub installer to visually check the Name and Version that should be used when creating the Custom App. This can be done very easily be examining the Name and Version in the Control Panel.
Deploy Visual Studio 2022 with Patch My PC CloudCopy Link
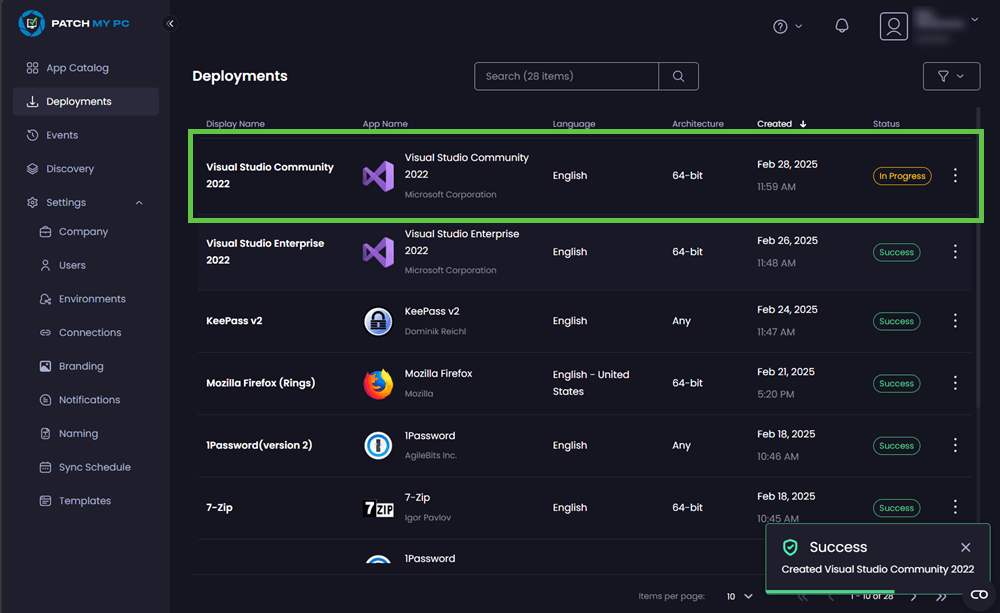
Once the Custom App has been created, it can be deployed using Patch My PC Cloud to Intune.
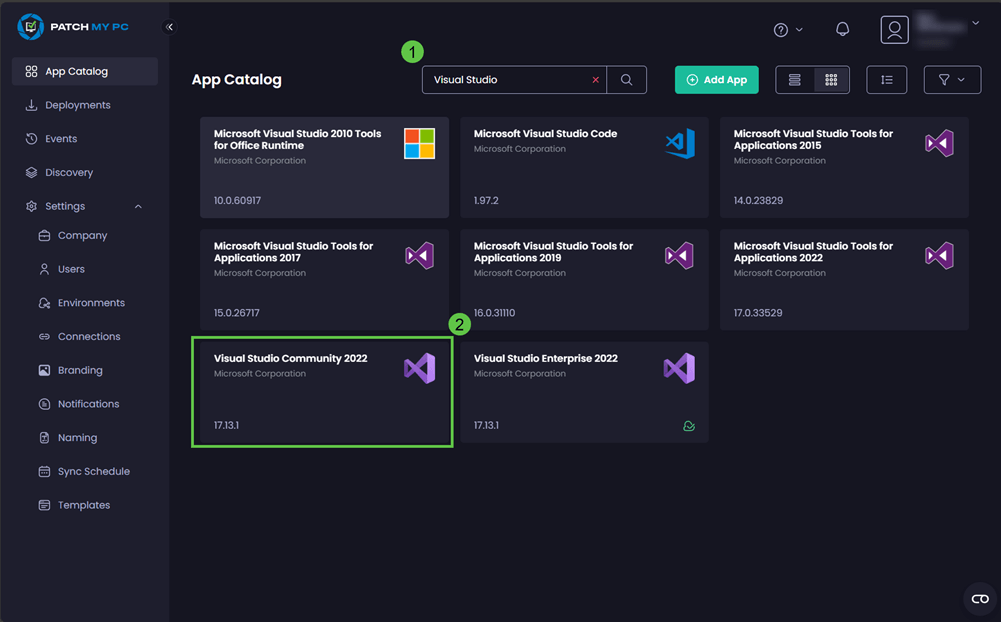
Search for Visual Studio and select the Custom App that was created for Visual Studio.
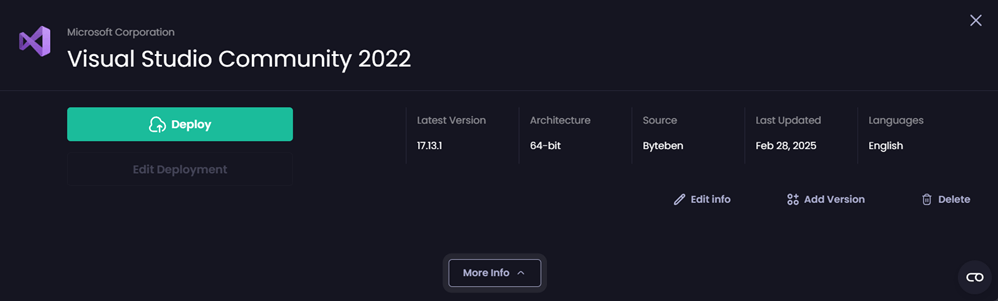
Click Deploy.
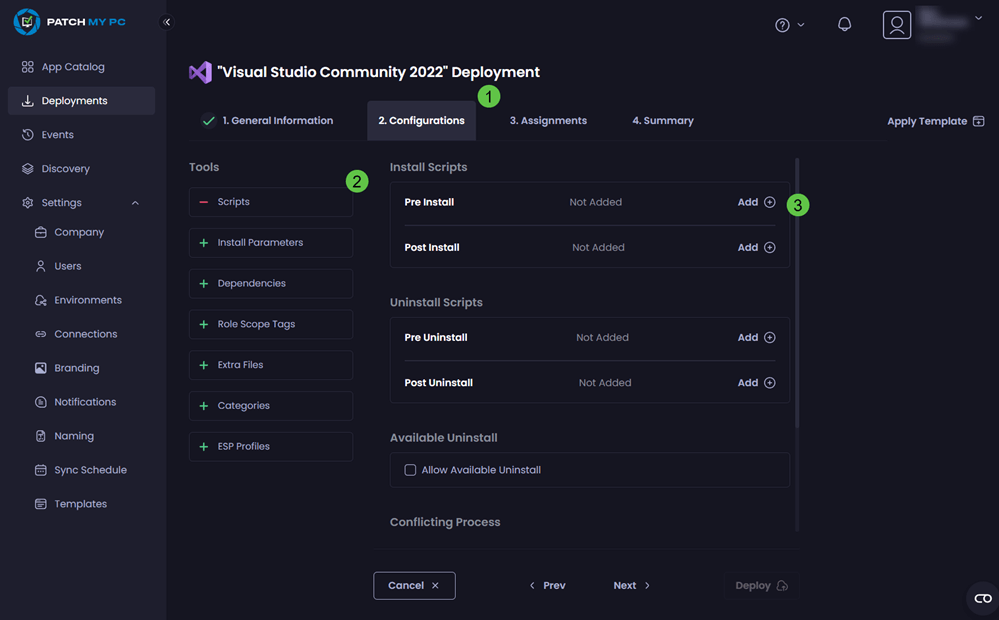
On the Configurations tab, select Scripts and click Add + to add a Pre Install script.
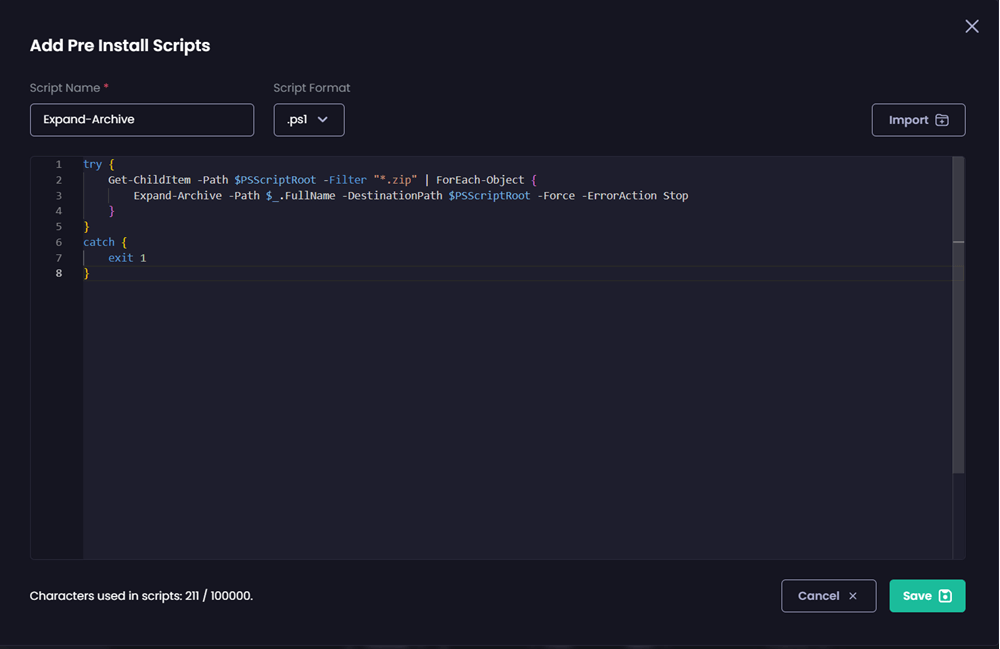
The pre-script is going to expand the zip archive so all the required files and folders are accesible for the main installer file vs_setup.exe. Paste the following script block into the script body window, name the script Expand-Archive and click Save.
Publish Visual Studio 2022 with Patch My PC PublisherCopy Link
Once the Custom App has been created, it can be Published using Patch My PC Publisher.
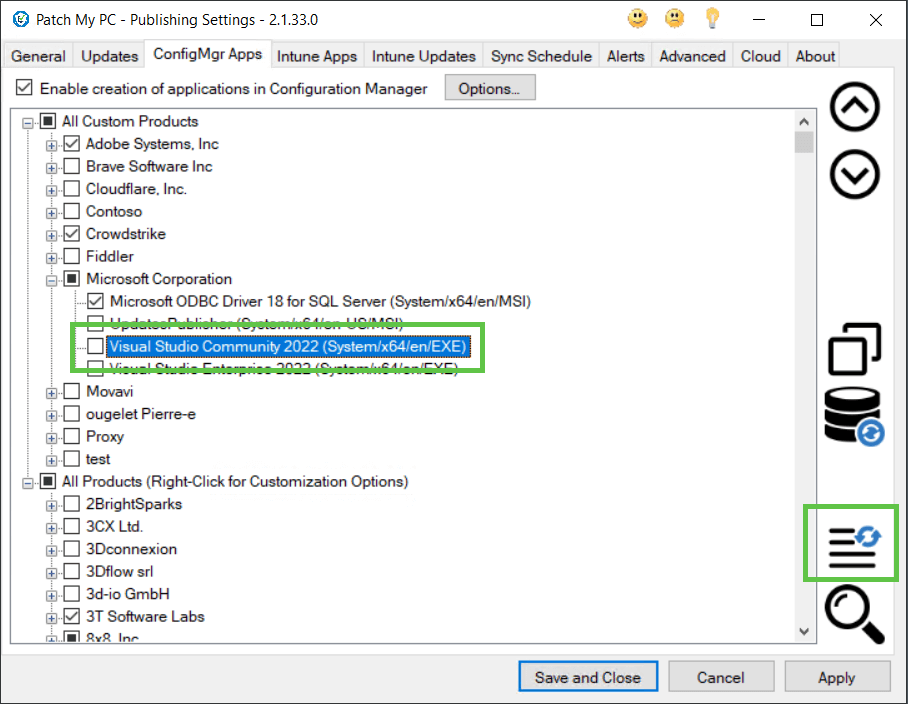
Open Patch My PC Publishing Settings.
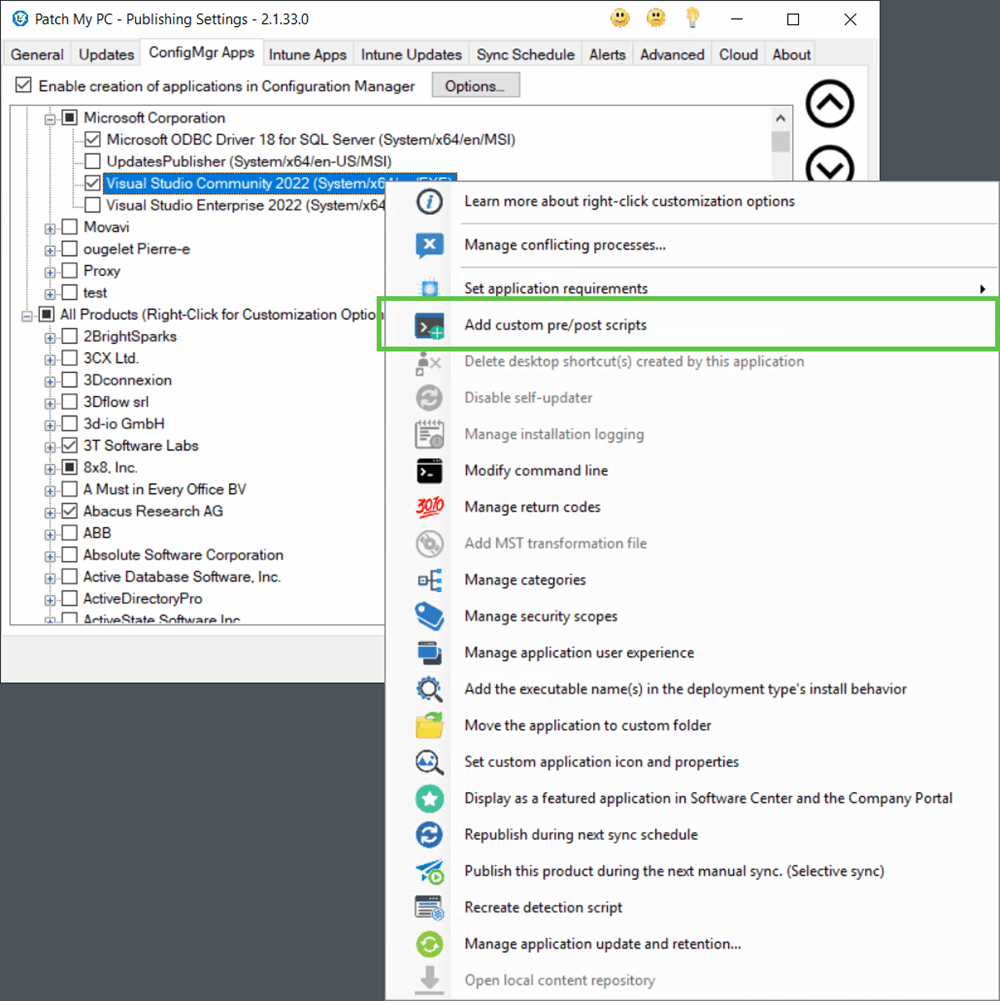
Select either the ConfigMgr Apps, Intune Apps or Intune Updates tab and find the Custom App (You may need to click the “Refresh the list of products” button indicated below).
Select the check-box beside the app to enable it for publishing.
Right-Click the app and click Add custom pre/post scripts.
A pre-script is required to expand the zip archive so all the required files and folders are accesible for the main installer file vs_setup.exe
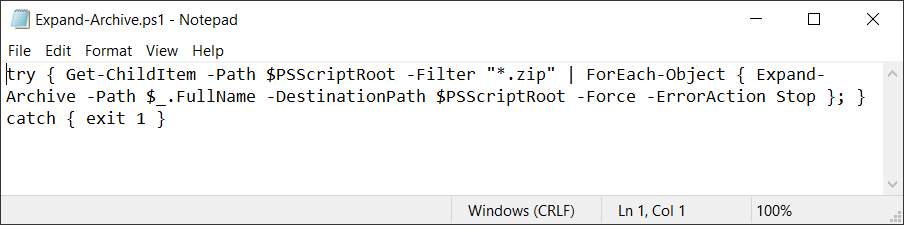
Copy the following code into a file and name the file Expand-Archive.ps1. try { Get-ChildItem -Path $PSScriptRoot -Filter "*.zip" | ForEach-Object { Expand-Archive -Path $_.FullName -DestinationPath $PSScriptRoot -Force -ErrorAction Stop }; } catch { exit 1 }
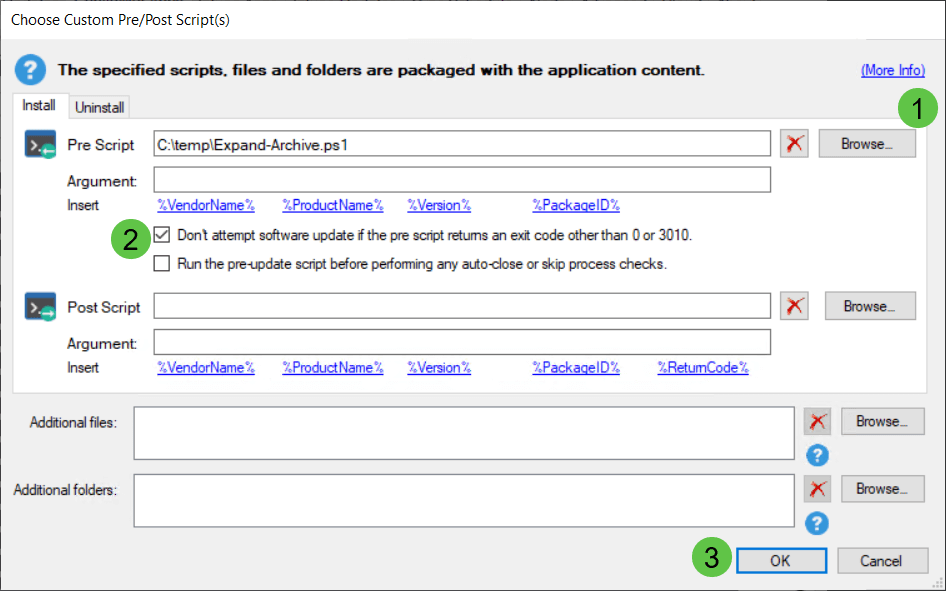
Click the Browse button for the Pre Script and select the Expand-Archive.ps1 file that we just created. Additionally, select the check box name Don’t attempt software update if the pre script returns an exit code other than 0 or 3010.