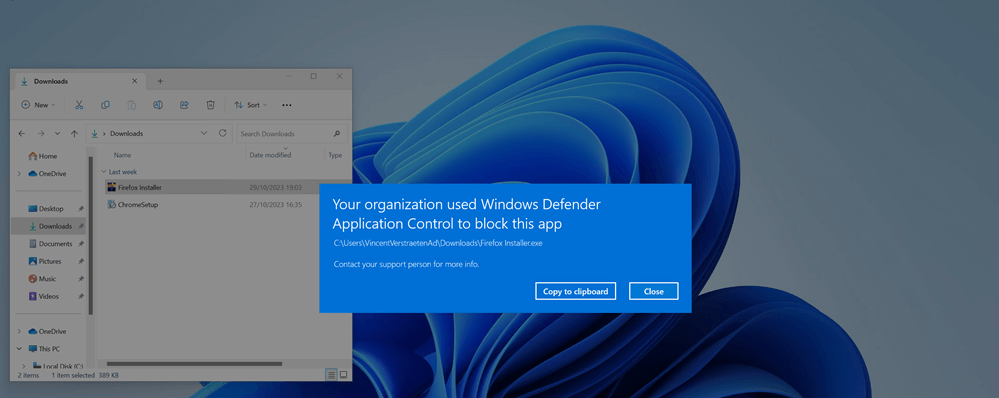
App Control for Business, the new name for Windows Defender Application Control (WDAC), is a security feature that lets you block unauthorized and harmful software from running on your devices. More importantly, it also comes with a new managed installer for Intune.
By combining this managed installer with Patch My PC or Scappman, you can effortlessly keep your software up to date while maintaining complete control over what is permitted to run within your environment. Your software will always be up to date while restricting application usage, preventing malware, and blocking side processes and malware, all at the same time! In fact, patching and Windows Defender Application Control is included in CISA’s #StopRansomware Guide and the Australian Essential Eight signals directorate. Overall, it’s clear that joining both technologies is a dream come true for those who are security conscious.
In order to show you how this works, in this blog, we will:
- Enable Managed Installer in App control for Business.
- Create a WDAC Base Policy.
- Enable App Control for Business Base policy.
- Create a supplemental policy for Patch My PC with PowerShell.
- Create a supplemental policy for Scappman with WDAC Wizard.
We will also use script enforcement in our WDAC base policy (Note: WDAC is a standard Windows component included on Windows 10, 11, and Windows Server 2016). This will help stop “living off the land attacks” based on PowerShell and improve your attack surface reduction policy.
Step 1: Enable Managed Installer
The Managed Installer Applocker policy makes the Intune Management Extension an authorized source for installing applications.
When the Intune Management Extension (IME) executes the application install, Windows actively observes the process and any subsequent processes it spawns.
Applocker pays close attention to any files created on the disk during this operation. As these files are written, they are labeled to indicate their origin as coming from a managed installer and tagged by the managed installer. Each application marked by the managed installer will then be permitted to execute.

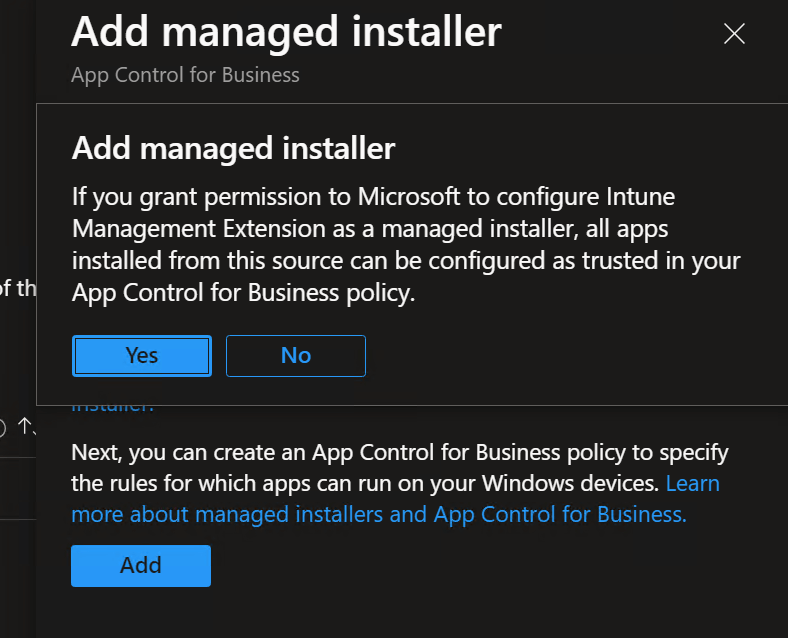
Enabling this option will deploy an AppLocker policy to all devices.

In case you missed that, let me repeat that enabling this policy in Intune will enable this tenant wide for all devices.
Note: If you don’t want to deploy to all devices, please read the extra note at the bottom of this section.
A few minutes after enabling, you will observe the following:

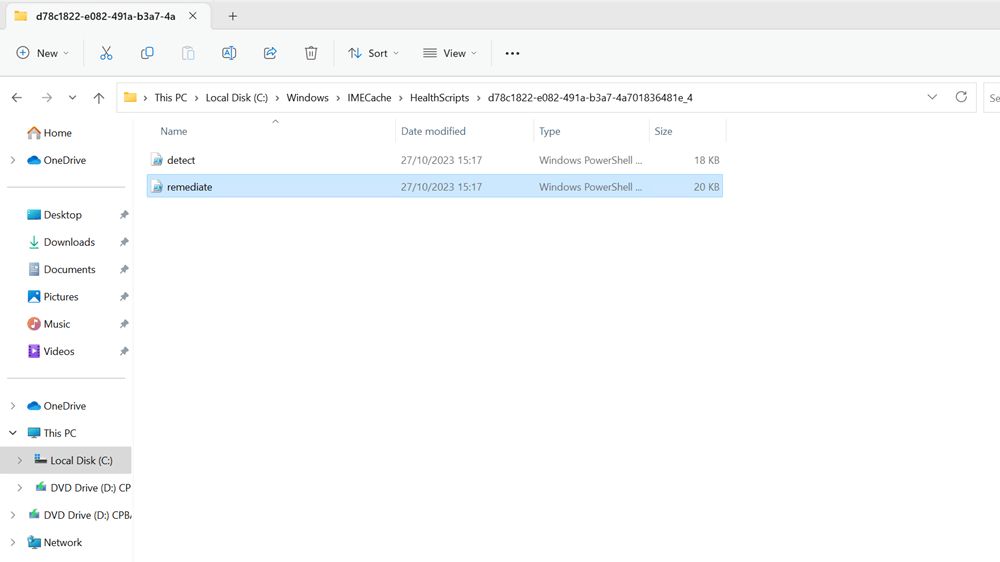
The Managed Installer Applocker policy deployment happens with a hidden pro-active remediation script. You can find the PowerShell code in C:\Windows\IMECache\HealthScripts
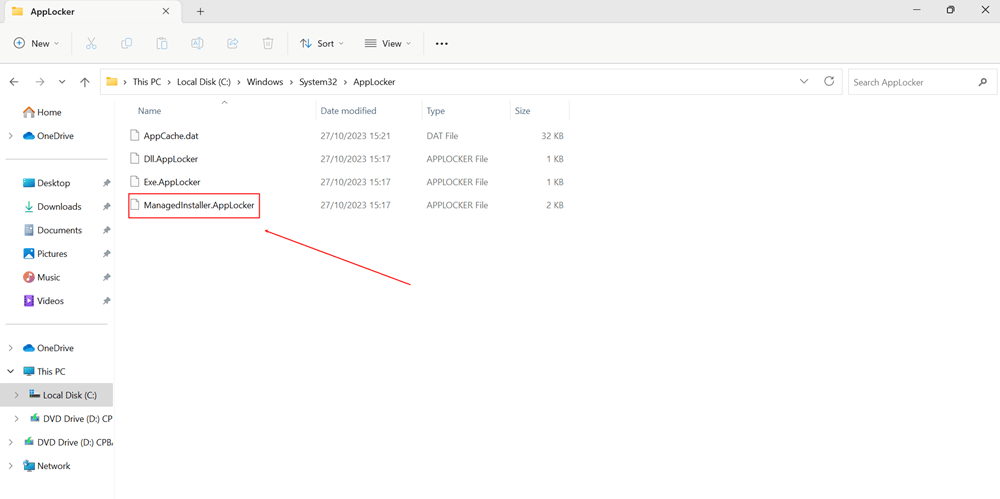
That proactive remediation script will place a ManagedInstaller.AppLocker file in C:\Windows\System32\AppLocker
Now, that extra note I was talking about earlier:
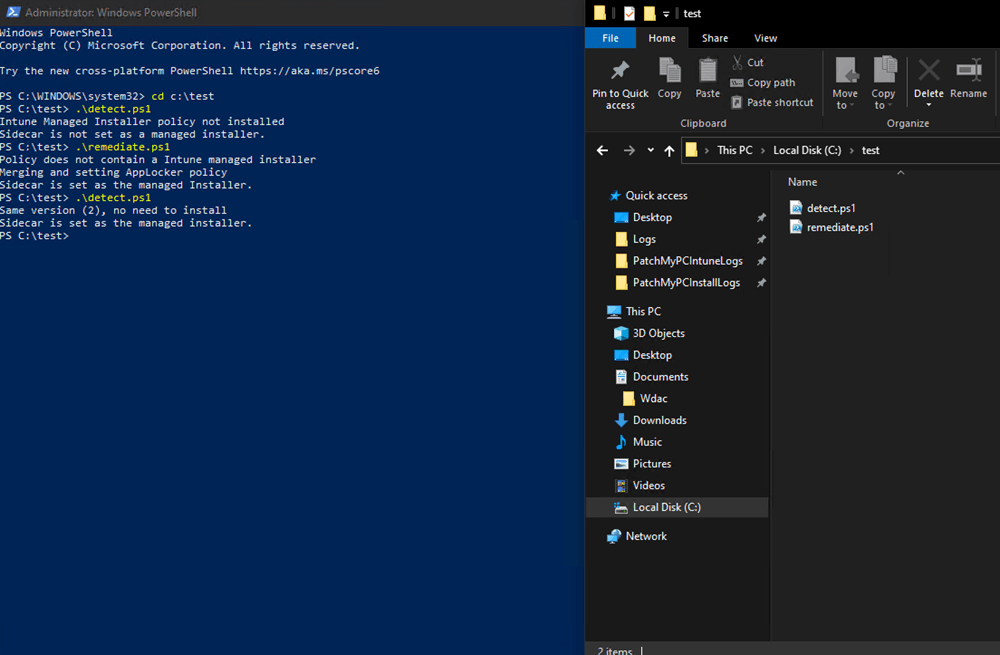
If you want to test without enabling the managed installer tenant-wide, you can manually run that script and choose not to enable the managed installer option in your Intune portal.
I have uploaded those scripts to my Github page here: https://github.com/vincentverstraeten/ManagedInstaller/
Step 2: Create a WDAC Intune Base Policy
Additionally, the managed installer needs a WDAC policy to work, so we’ll start by creating a WDAC base policy.
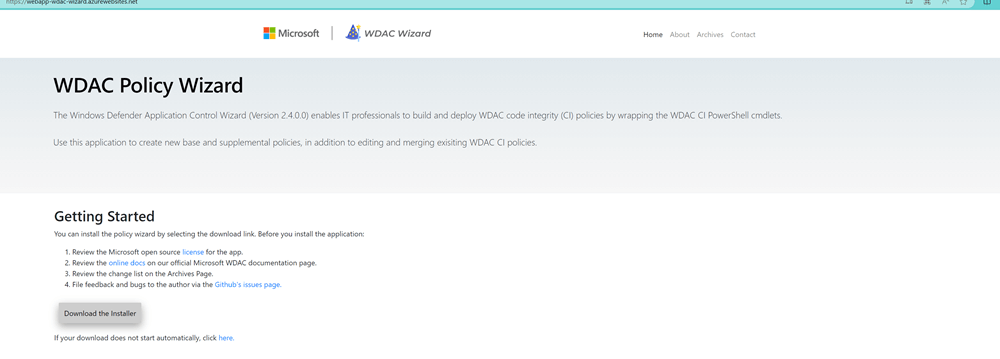
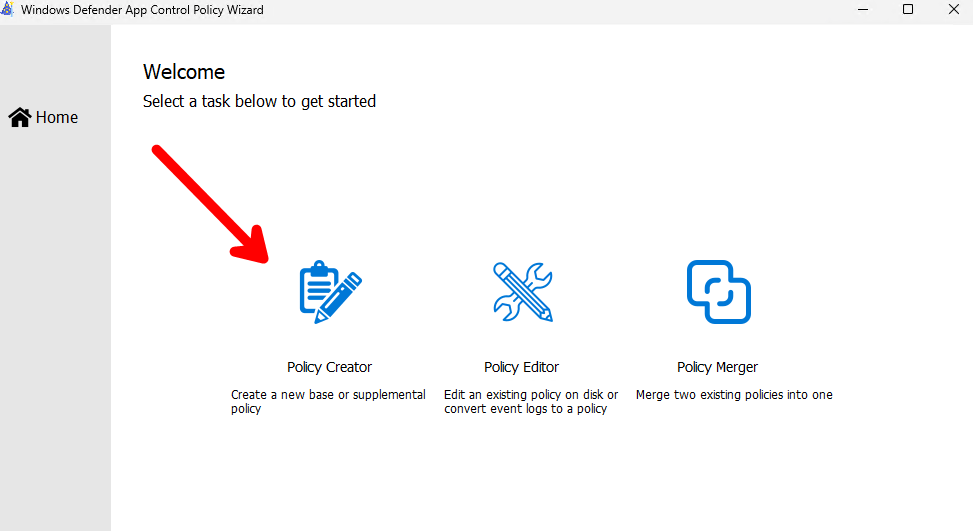
The easiest way to generate a new WDAC base policy is to use the WDAC Policy Wizard, which helps you generate the XML data you need for your application control policy.
You can download the WDAC Policy Wizard here.
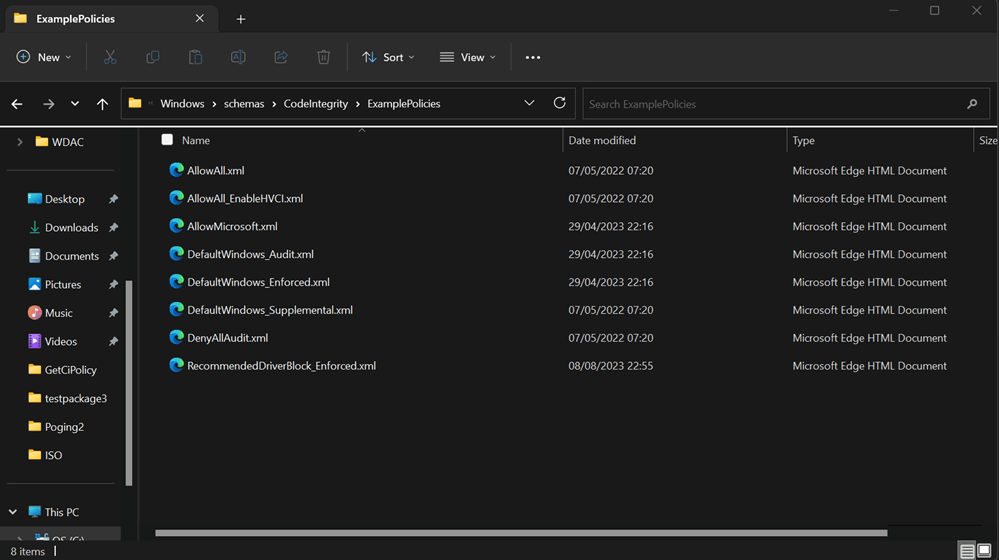
Alternatively, you can find example policies to start with in every Windows installation under this folder: %windir%schemasCodeIntegrityExamplePolicies
This guide will focus on the easiest way to deploy WDAC rules.
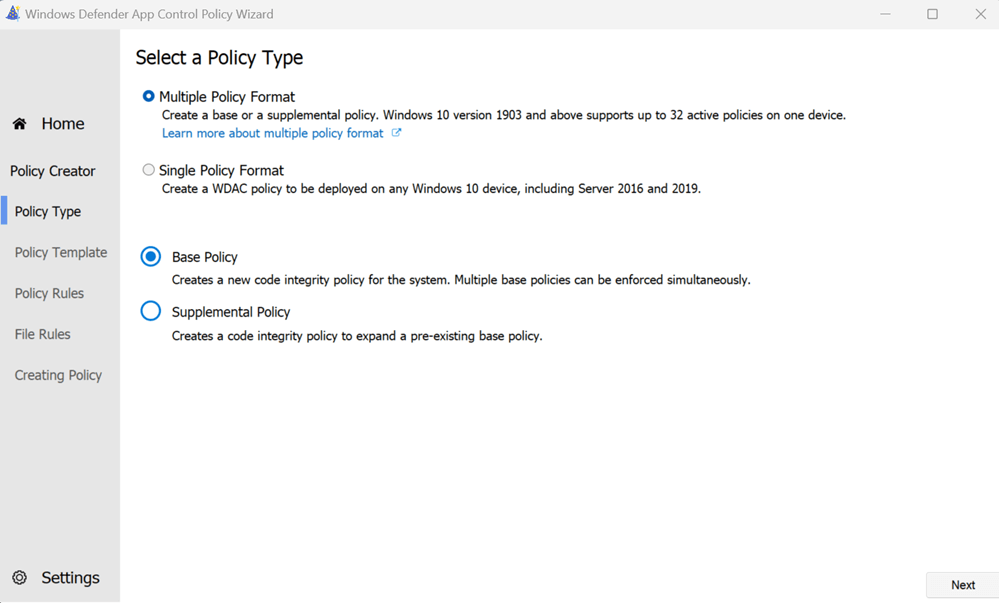
Select the Multiple Policy Format and opt for the Base policy (Note: We’re choosing the Multiple Policy Format because we plan to incorporate a supplemental policy later to designate Patch My PC and Scappman as trusted publishers). Then click Next.
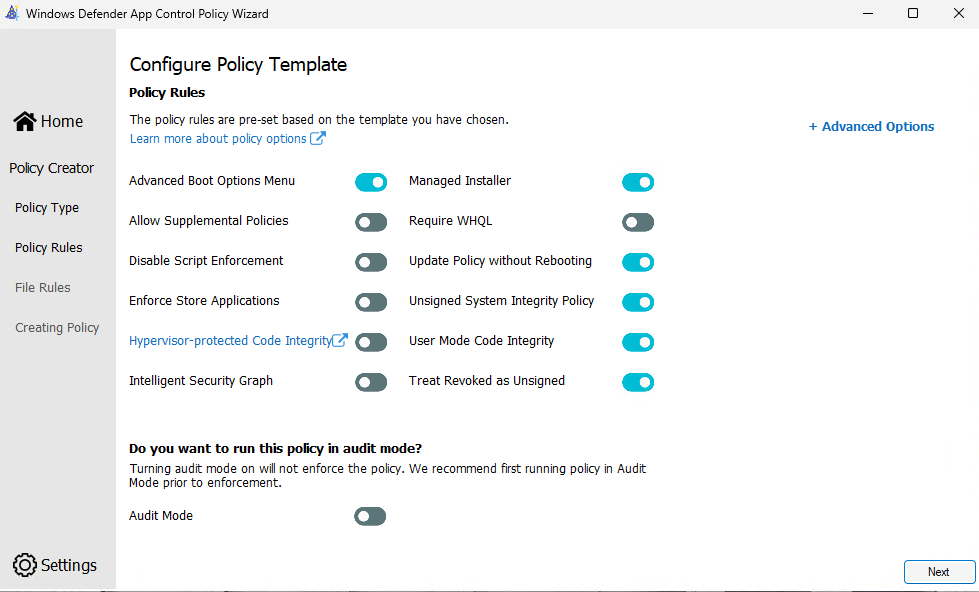
In the Configure Policy Template section, we will:
Enable Managed Installer
Set Audit Mode (since I am running this in a non-production environment, I am setting Audit Mode to off.)
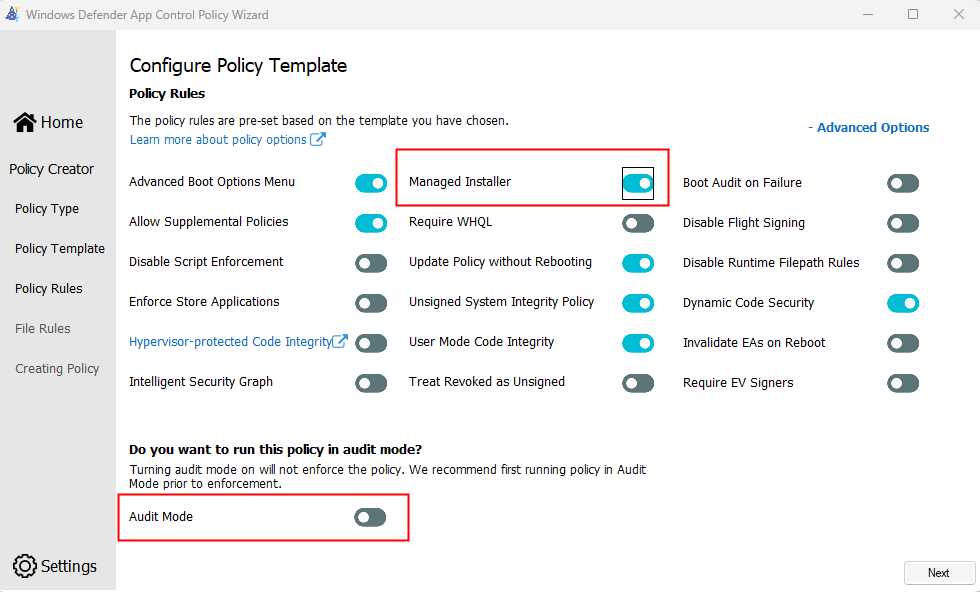
Click Next.
The WDAC Policy Wizard will then propose a set of Microsoft trusted Publisher rules. We won’t change anything here, so click Next.
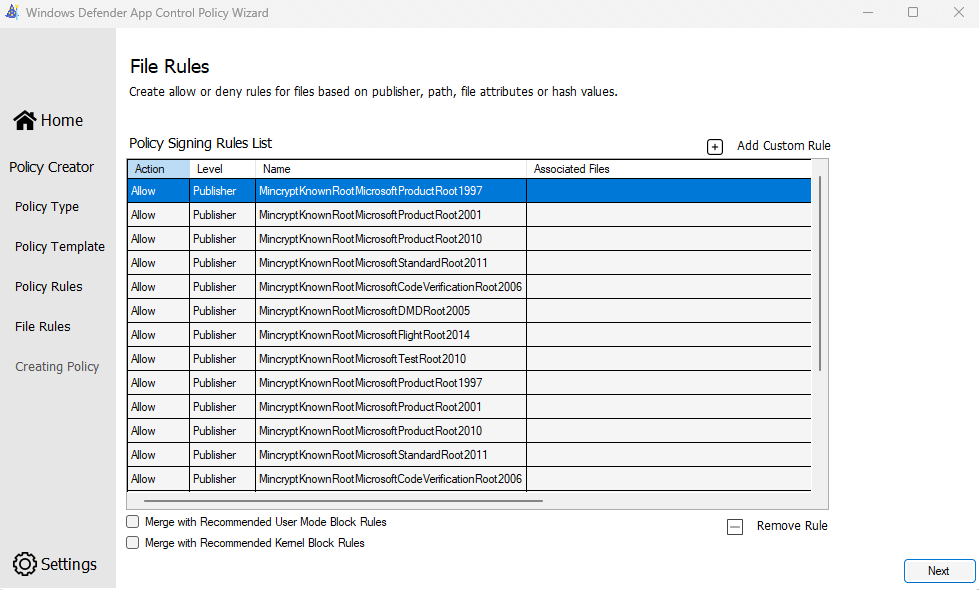
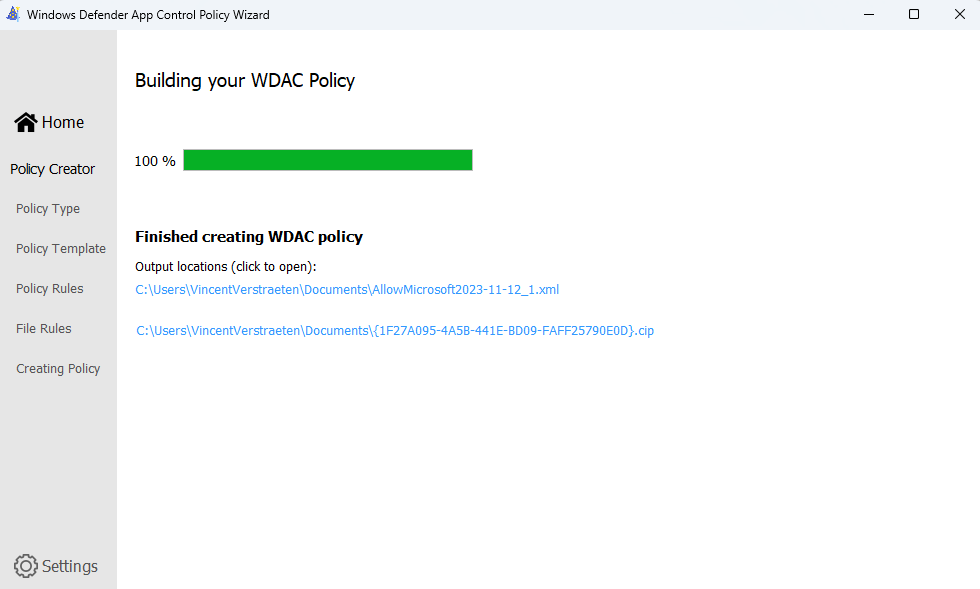
Then you’re done! You just created your first WDAC base policy.
Step 3: Configure Windows App Control for Business (Preview)
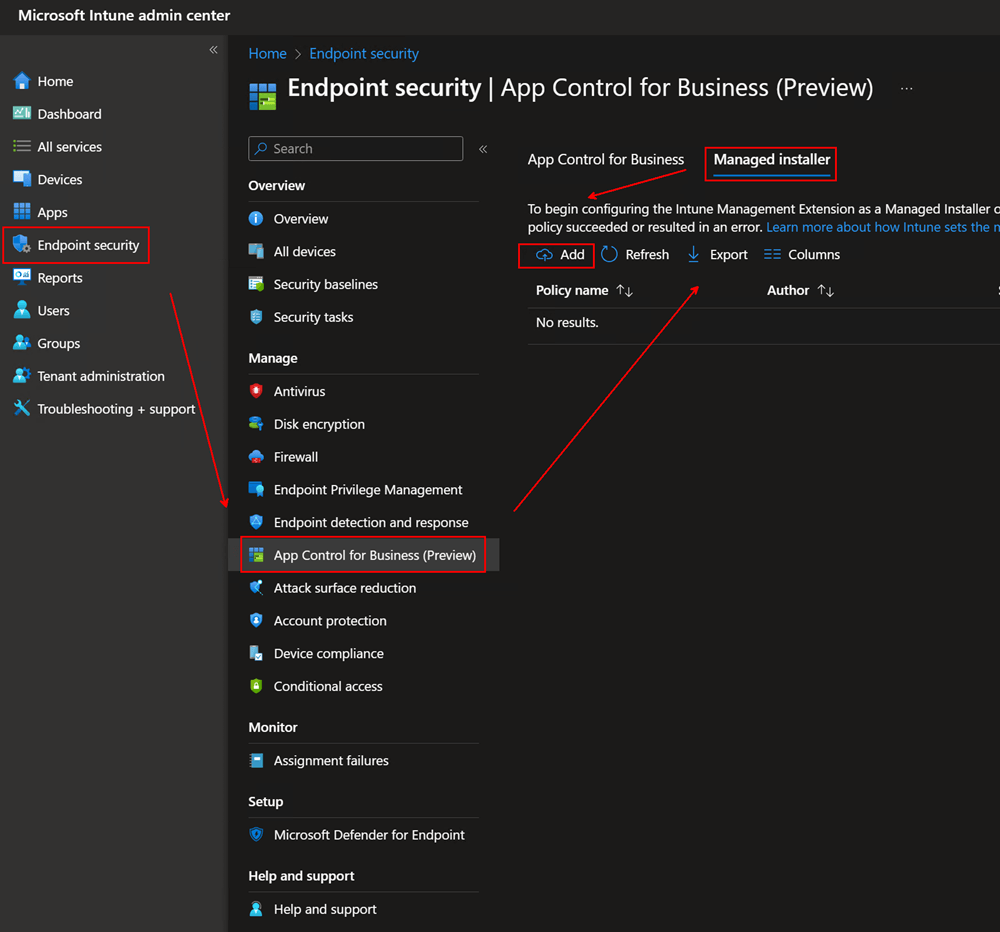
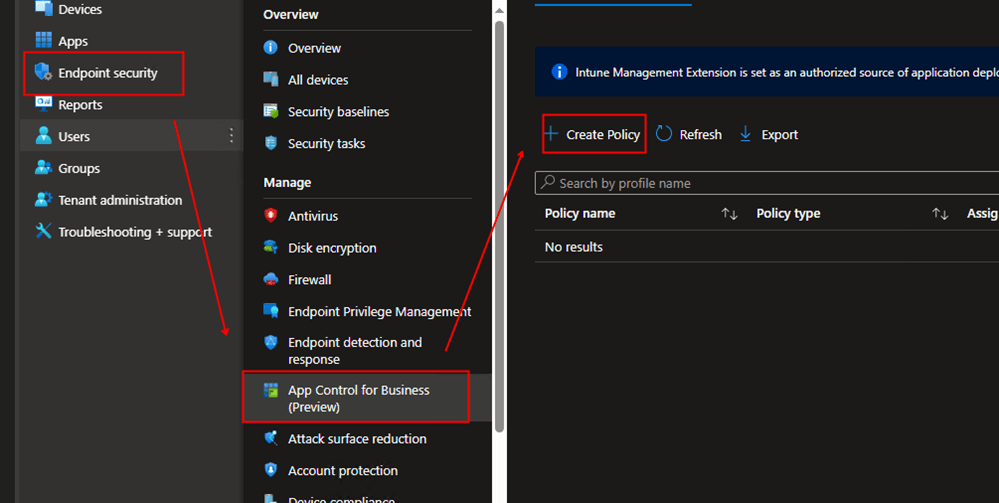
Create a device configuration in the Endpoint security Intune blade.
Go to Endpoint portal -> Endpoint security -> App Control for Business -> Create Policy
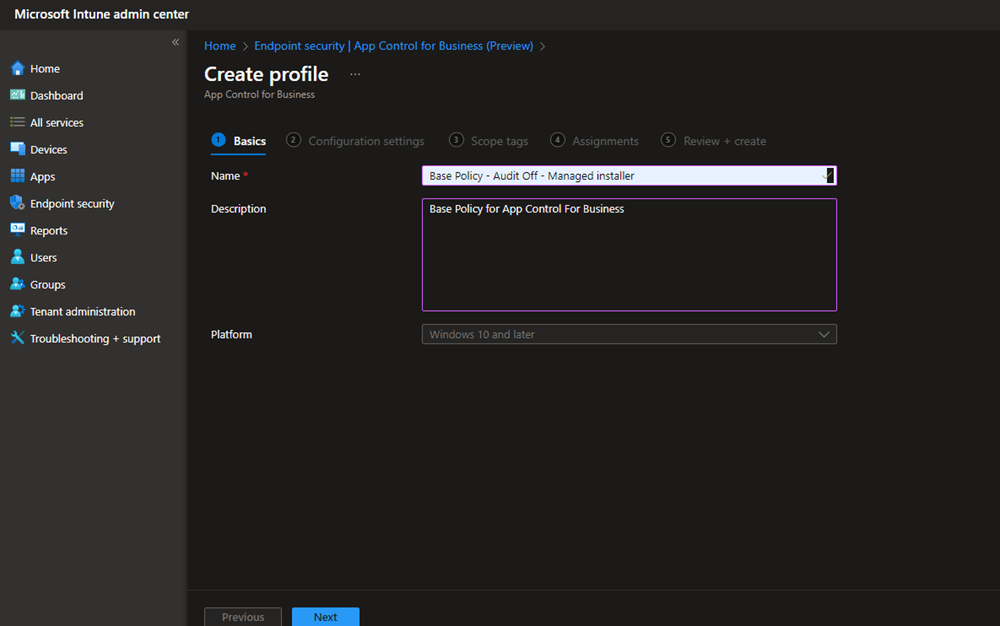
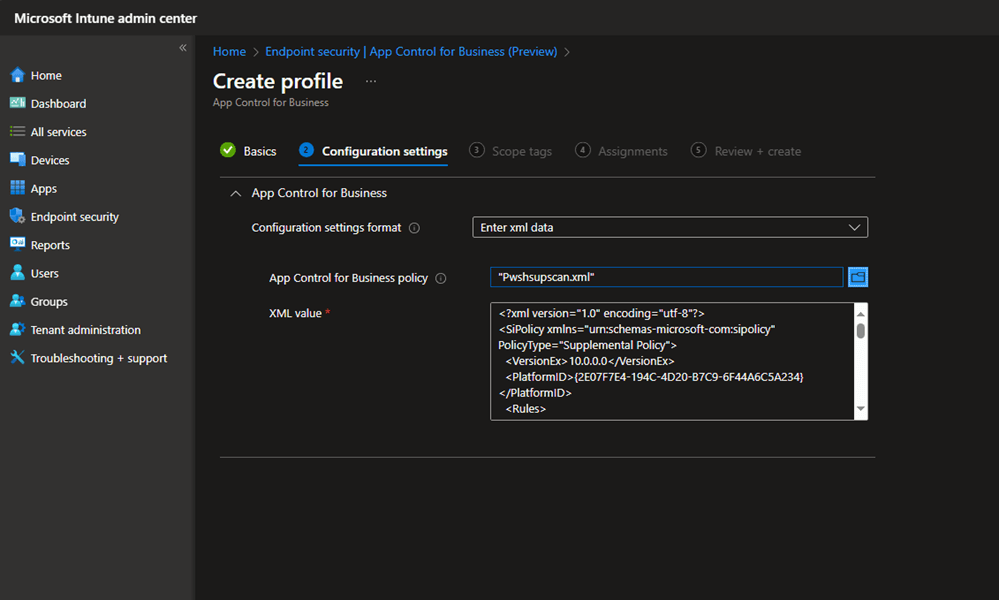
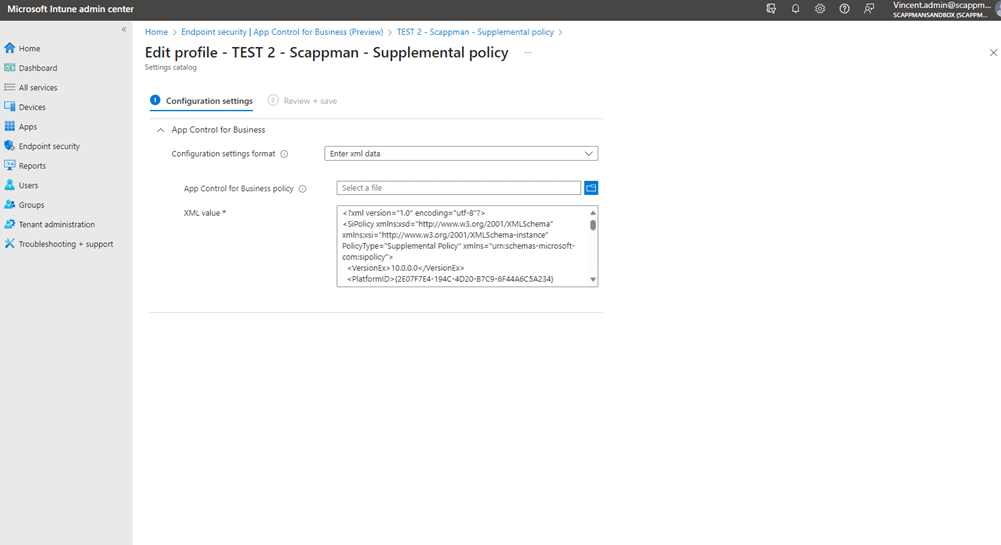
Name your App Control For Business Configuration setting.
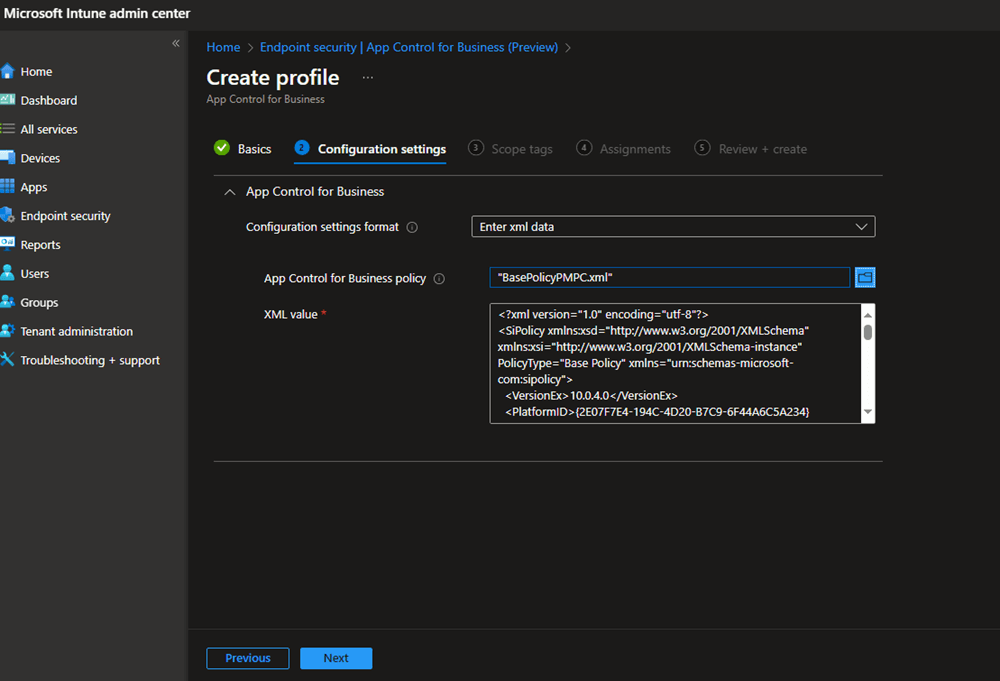
Select Enter xml data and select your Base policy created .XML file.
Create and assign a Security group with a device in it.
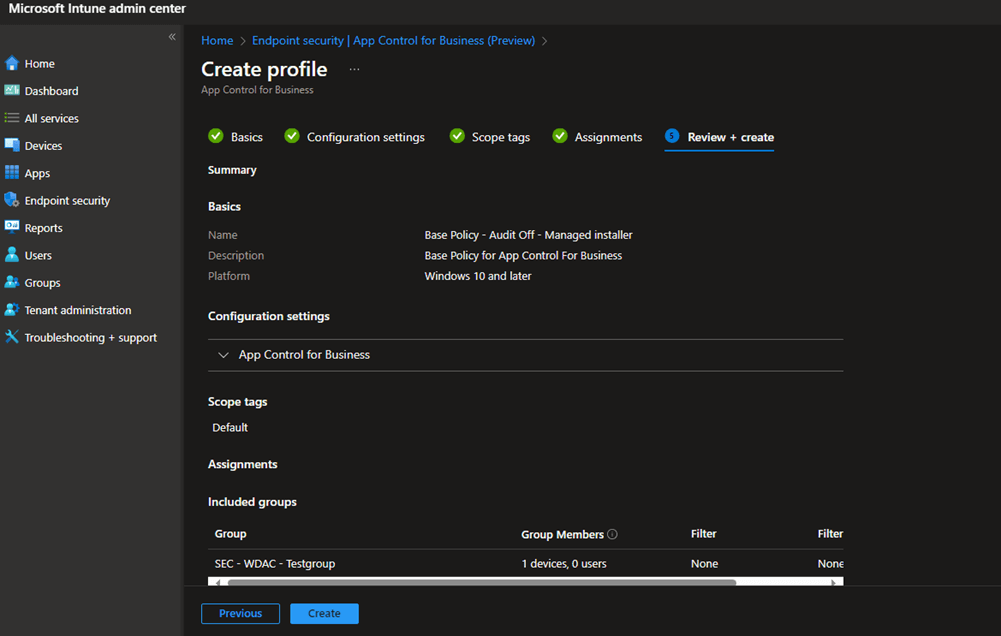
You now have a WDAC Policy with a managed installer!
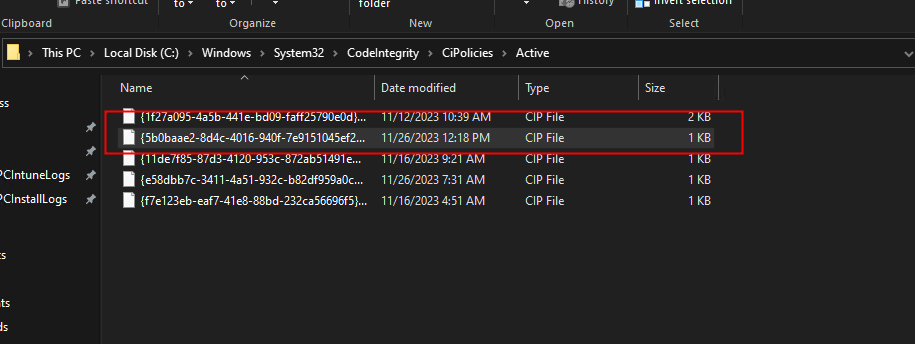
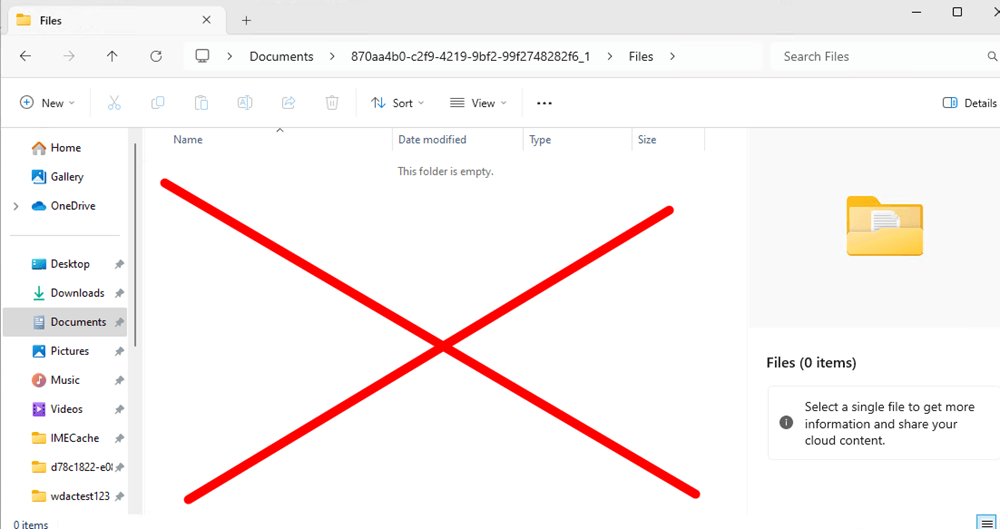
From here, we should start to see a code integrity policy in C:\Windows\System32\CodeIntegrity\CiPolicies\Active
Now wait till the policy gets pushed to your test device!
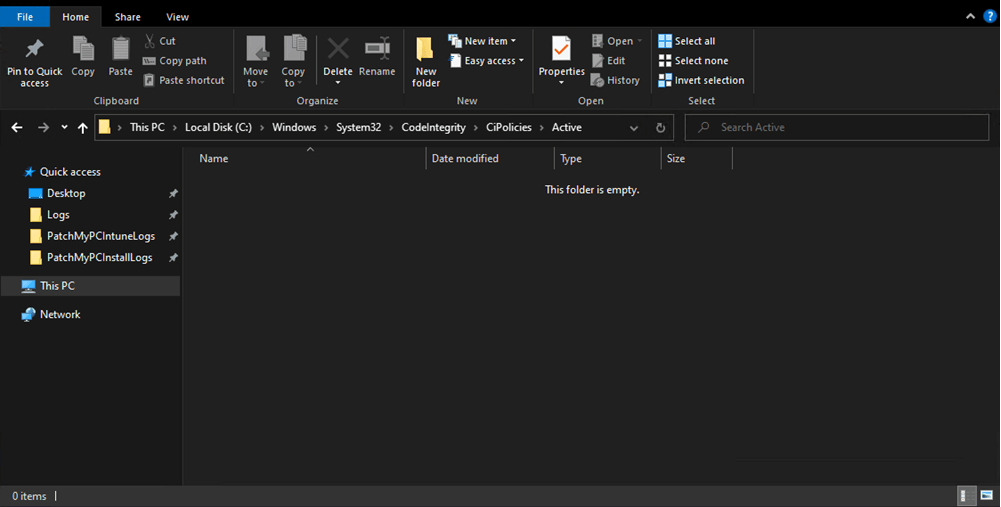
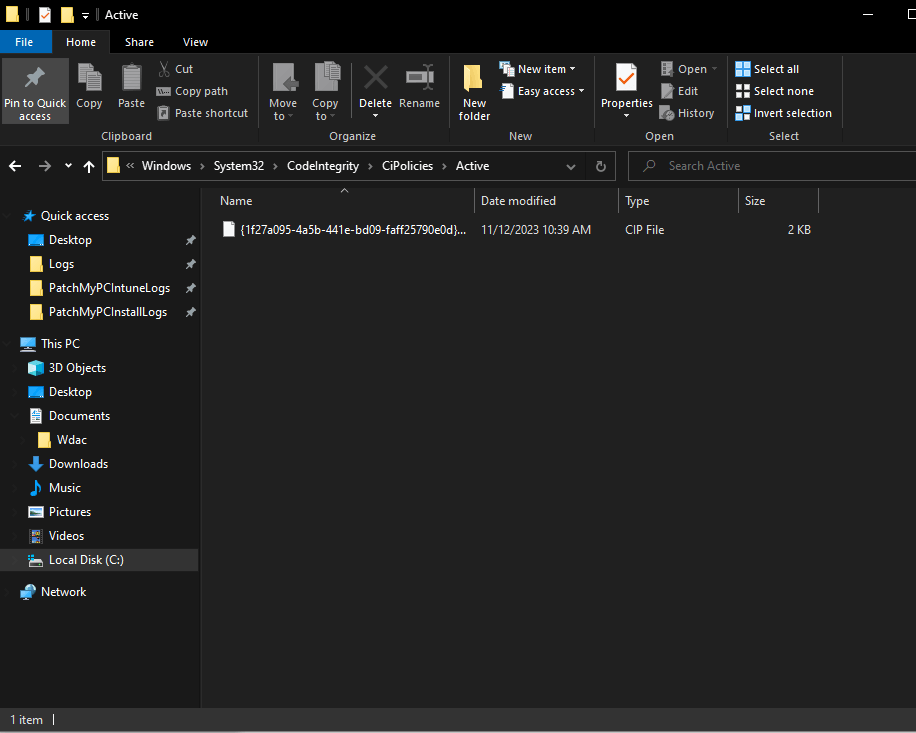
Right now, our folder is still empty, but after a few minutes, we will see that a new .cip codeintegrity file is placed in the folder C:\Windows\System32\CodeIntegrity\CiPolicies\Active. This shows that your base code integrity policy is delivered & activated, which means the process was successful.
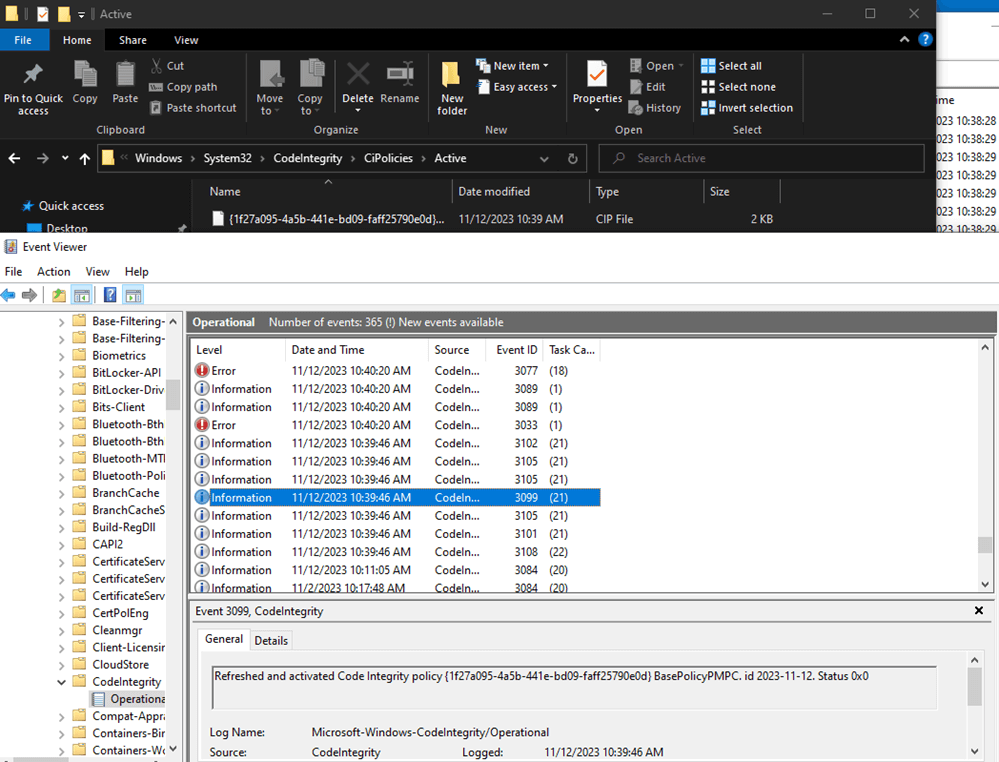
You can even see this happen live if you go into Codeintegrity (pathway: Event viewer -> Windows -> Codeintegrity)!
Refreshed and activated Code Integrity policy {1f27a095-4a5b-441e-bd09-faff25790e0d} BasePolicyPMPC. id 2023-11-12. Status 0x0
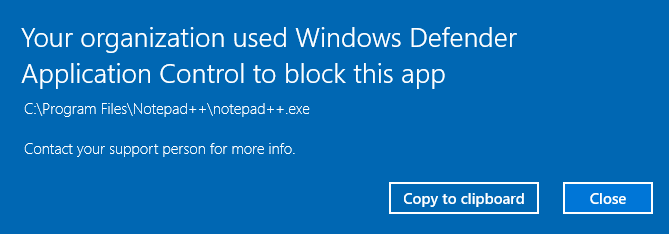
If we test this by running an existing “Non-Microsoft” application, let’s say Notepad++, we should see that WDAC blocks its execution. This shows that WDAC policy works.
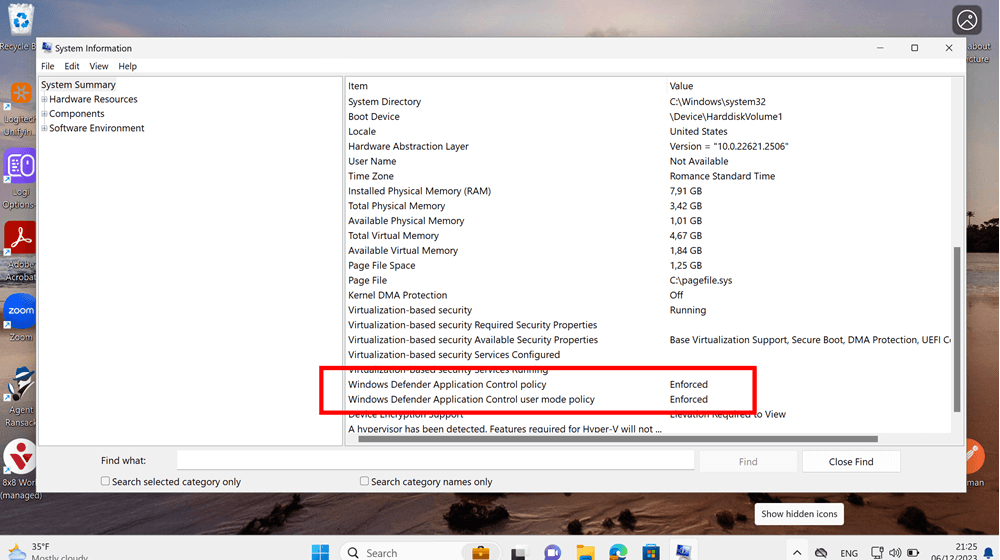
Under System Information, you can also verify if WDAC is enabled in audit or enforced mode.
Step 4: Make a Custom Supplemental Policy for Patch My PC
Note: Skip this part to continue with the Scappman implementation
Now, let’s make additional policies with PowerShell instead of the WDAC Wizard.
I quickly grabbed an install package from the IME cache folder and copied it over to another location in my OneDrive. I will now scan the install package from Patch My PC with PowerShell. Here are the steps:
1. Create a new policy:
New-CIPolicy -ScanPath 'D:\GetCiPolicy\testpackage' -UserPEs -FilePath .\FilePolicy.xml -Level Publisher
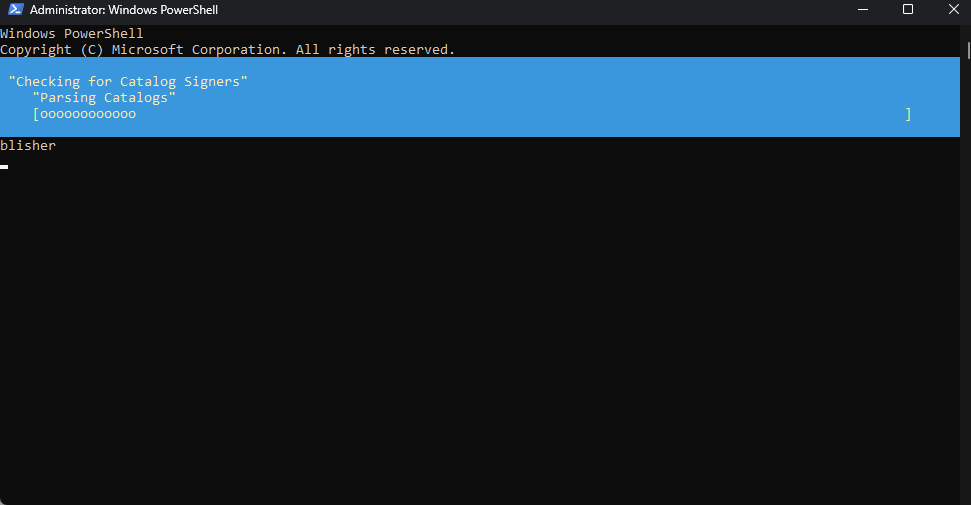
The PowerShell New-CIPolicy creates a new Code Integrity policy (WDAC policy) as an .xml file (Note: I had to add the parameter -UserPE to include user-mode files. Otherwise, you will end up with an .xml that has no information in it!).
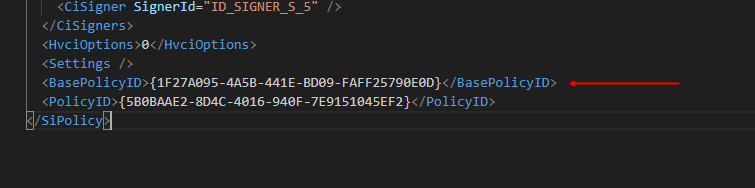
2. Now change this to a supplemental policy with the “Set-CIPolicyIdInfo” command.
Set-CIPolicyIdInfo -FilePath "C:\Users\VincentVerstraeten\OneDrive - Patch My PC\WDACPMPC\Pwshsupscan.xml" -BasePolicyToSupplementPath "C:\Users\VincentVerstraeten\OneDrive - Patch My PC\WDAC\PMPCBasePolicyPMPC.xml"You can now check in your supplemental policy if the Base Policy ID is added like the picture below. Be aware that this could take some time after you run the PowerShell command.
3. Now add the supplemental policy .xml file to your App control for Business Configuration settings page.
We can spot when the new code integrity policy is created in the folder C:\Windows\System32\CodeIntegrity\CiPolicies\Active
You can also spot a new WDAC policy getting deployed when you see the 3099 event ID in event viewer.
Step 5: Create a Supplemental Policy for Scappman with WDAC Wizard.
Now let’s make WDAC and the managed installer work with Scappman!
We will need to create another supplemental policy for Scappman. This time we are going to do this without PowerShell and do it again with the WDAC Wizard so you’ll be able to see examples of using both tools.
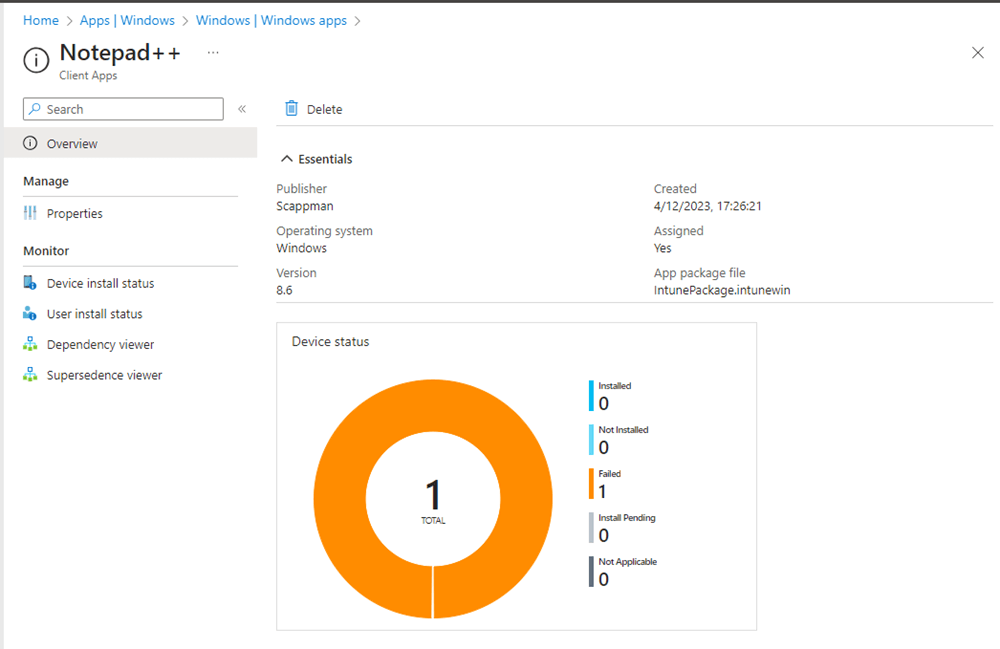
Let’s make the app Notepad++ available with Scappman.
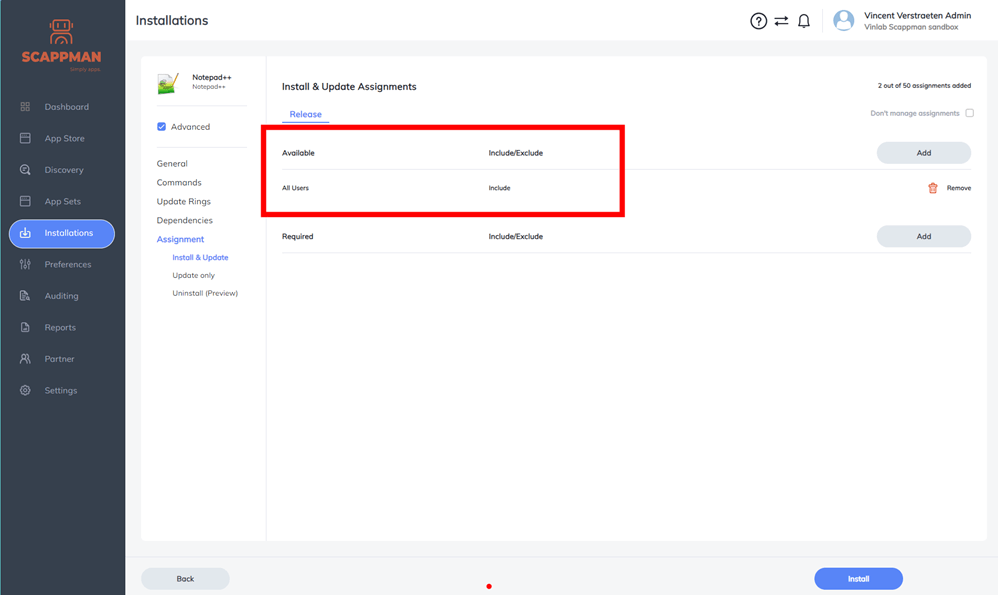
We need to scan the app package with WDAC Wizard before we can install it. To do this, we have to copy the install package from the folder C:\WindowsIMECache as soon as it appears there. You must be quick, because it will not stay there for long!The app installation will fail the first time because we have not added a supplemental policy for Scappman. This is normal and expected. Windows App Control For Business (WDAC) will block the installation until we scan the package and create a policy.
After we copy the installer file to another location, we can delete all the files in the original folder because we no longer need them. We don’t need to scan the actual installer packages, either. The managed installer Applocker policy will sign every file that the application writes to disk for us.
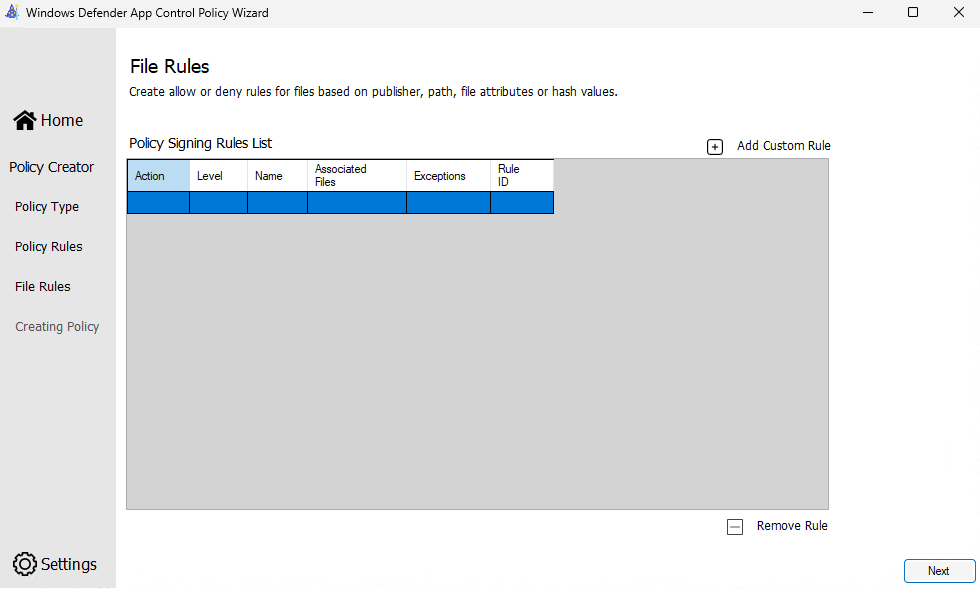
Now open the WDAC Wizard tool and scan the installer package folder with the following steps:
Select Policy Creator
Add a new Supplemental Policy Name and select your previous Base Policy ID (Note: When you select your Base Policy .xml the WDAC Wizard Tool will automatically extract your Base Policy ID.).

Just completely skip the Configure Policy Template page, since it is only useful when you create a Base Policy. Click Next.
Create a new policy rule.
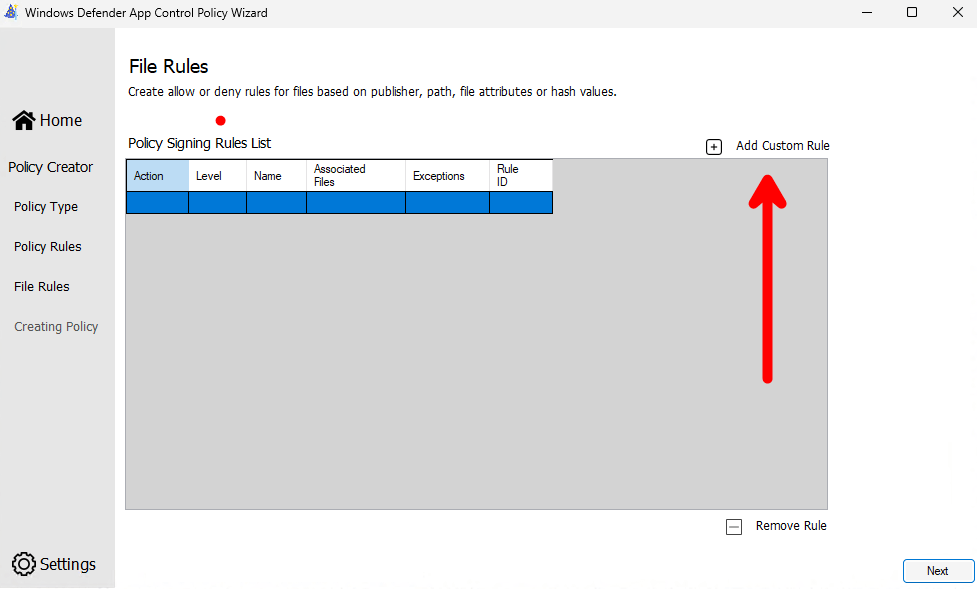
- Add the rule scope Usermode Rules / Rule type: Folder Scan /Scan Rule Level Publisher. Click create rule (and if a popup with a warning appears, just click Yes).
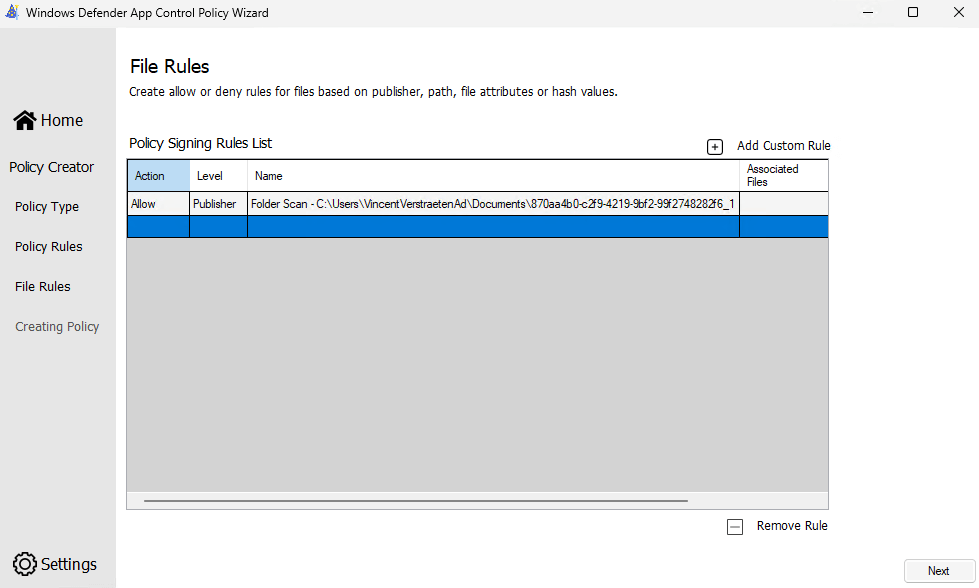
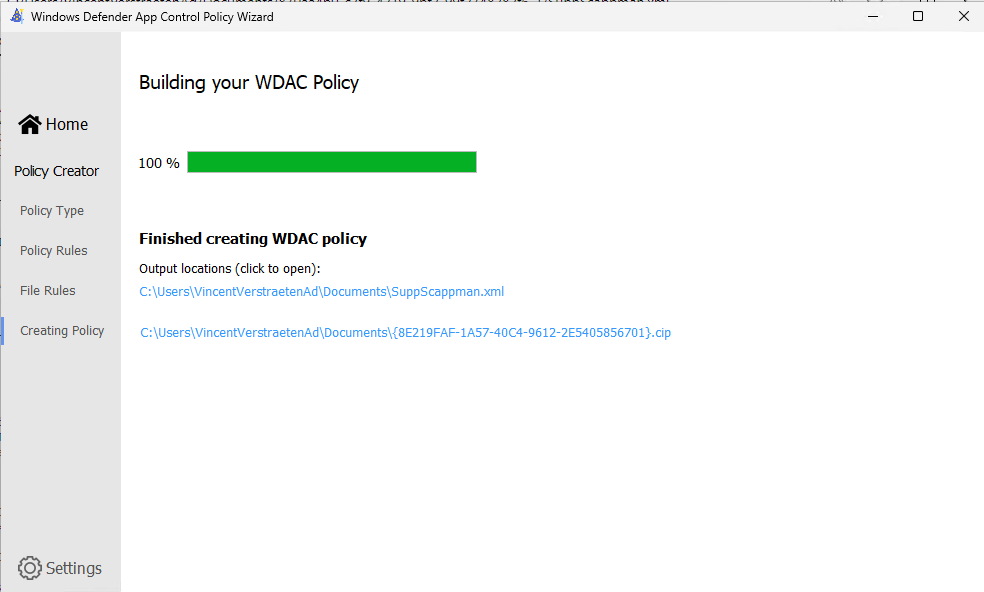
Done! Your Supplemental Policy will be created and saved in the location of your choosing.
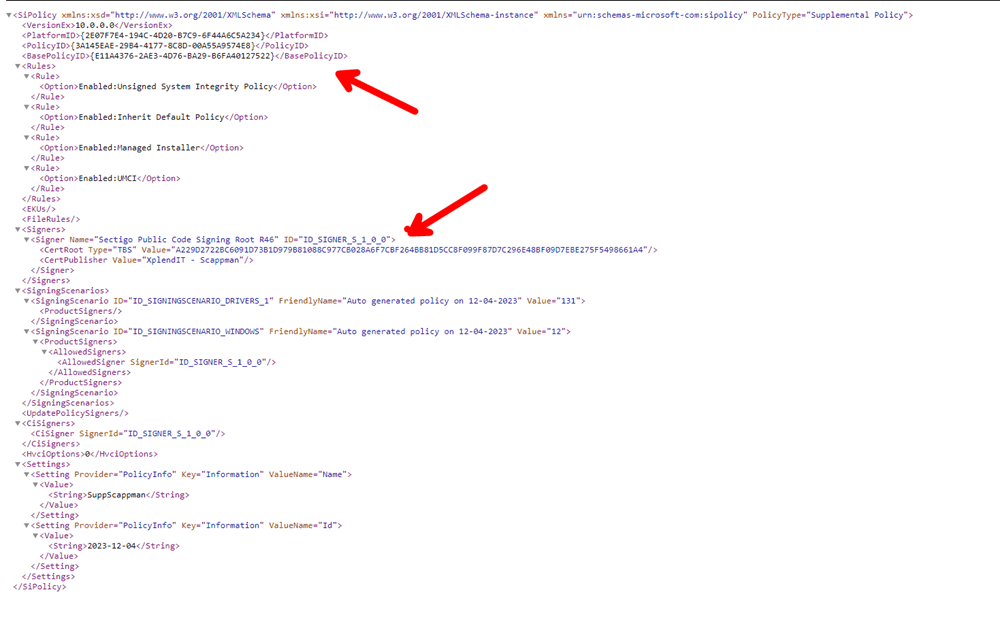
Let’s check what is in your created supplemental policy. In the picture below, we can spot the Basepolicy ID that links the Base Policy and the Scappman Signature.
Now, enter the XML data as a supplemental policy in the App Control for Business Configuration page.
In order to run PowerShell in full-language mode, we need to add the Scappman PowerShell certificate to the local machine certificate store (note: PowerShell scripts need to be codesigned and trusted in the root certificate store). You can download the Scappman PowerShell Certificate here: Scappman PowerShell Certificate—Scappman Support Center.
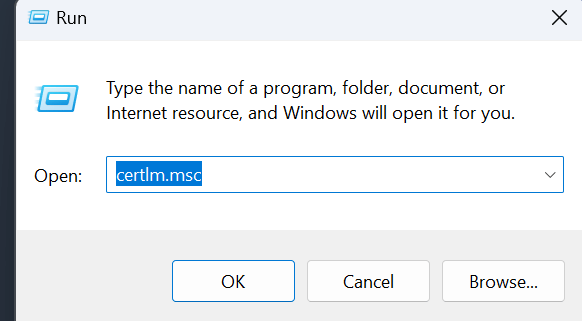
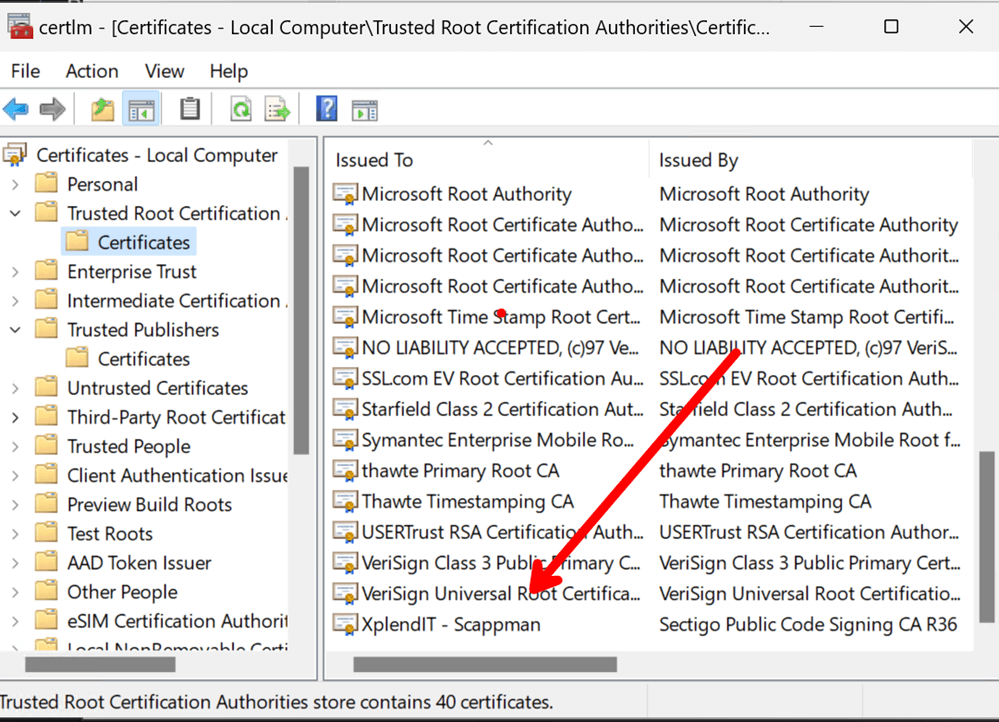
Run certlm.msc
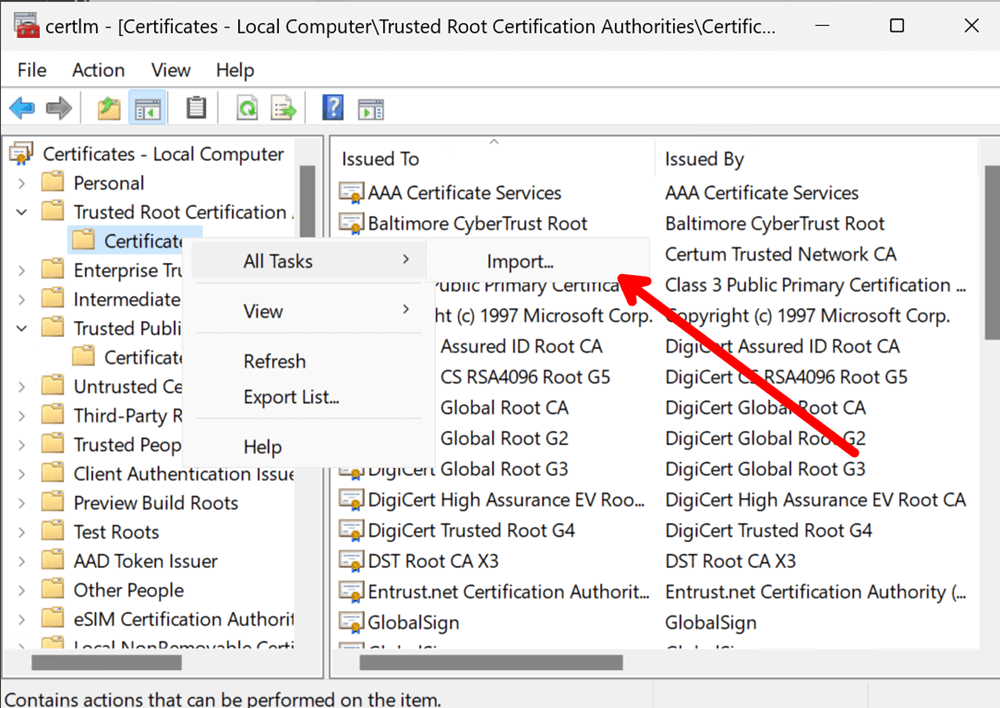
We will need to add the Certificate to the Trusted Root Certification.
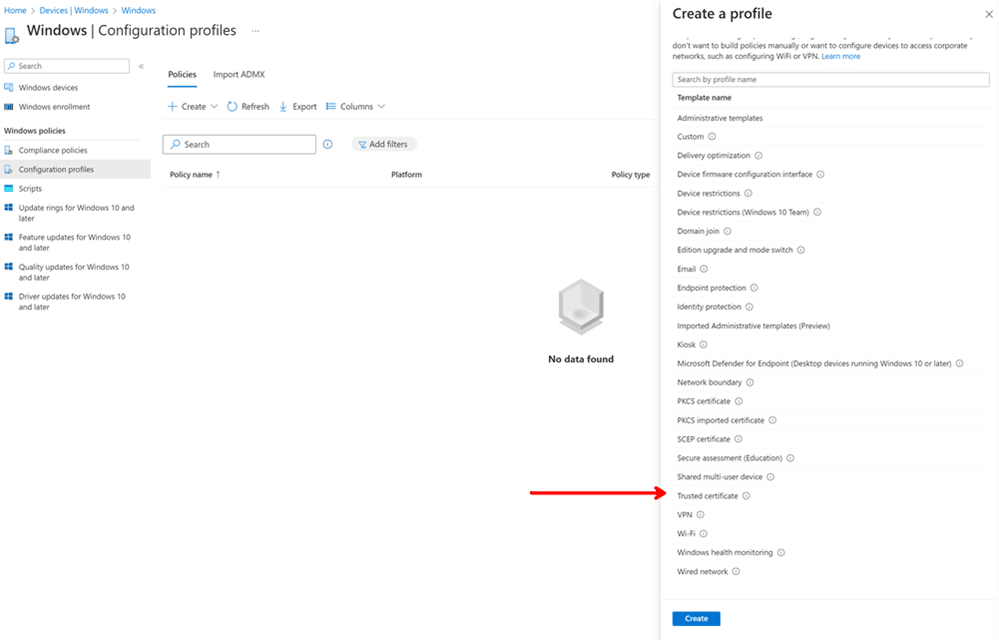
- There is also a configuration template in Intune to deploy your certificate.
- After the import, you should see the Scappman Certificate here.
- Yes, we’re almost finished, but if you try to run your install script now it will fail! Why? Because of Dot sourcing!
Dot sourcing a script means running the commands in the script as if you entered them into the console. This puts the script in interactive mode, which is restricted by WDAC if you have enabled script enforcement in your base policy. This restriction applies even to signed scripts.
Using the -file parameter to run a script, such as powershell.exe -file ./yourscript.ps1, also puts the script in interactive mode and under WDAC restriction.
However, if you omit the -file parameter and run a script like this: powershell.exe ./yourscript.ps1, the script runs in non-interactive mode and full-language mode. This allows the PSADT script to use all the features of PowerShell.
So we will change our Notepad++ install command to the following:
powershell.exe -ExecutionPolicy Bypass .\configure.ps1 -SilentPostponeDelay 0 -MaxDefers 3 -CloseAppsCountDownSeconds 5400 -NotificationStyle 2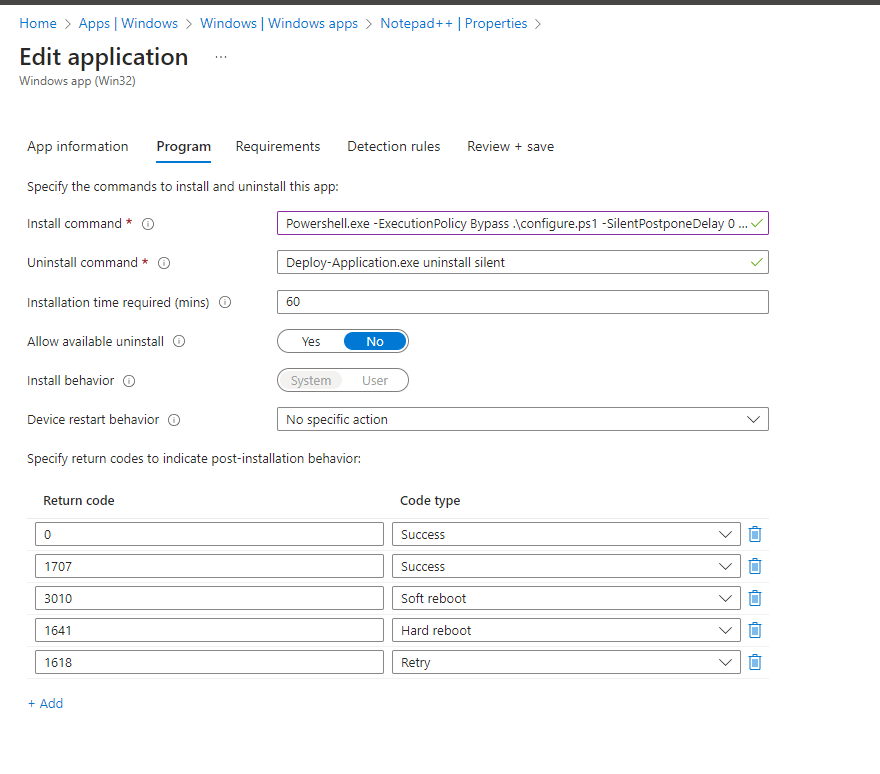
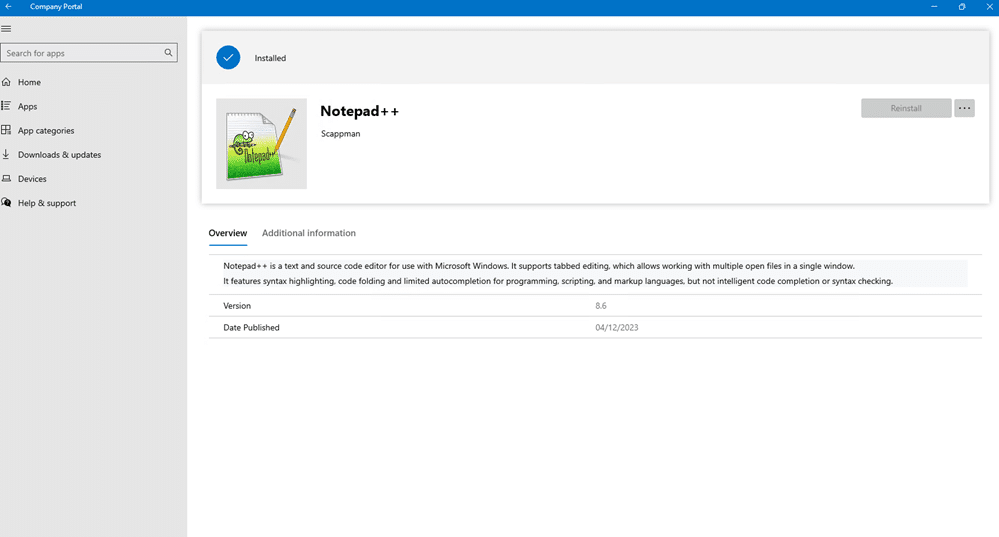
Now, your application will deploy with both Windows Defender Application Control (WDAC) and the managed installer.
Well done!
Conclusion and Best Practices
In this guide, I didn’t utilize Audit mode as I used my personal WDAC Intune lab environment to test and deploy the apps. However, in a real-world enterprise scenario, starting with Audit mode and disabling Script enforcement is crucial.
The best way to start is to install a device with all the existing allowed software and drivers that you need (a “golden image,” if you will), then scan that device with the “New-CIPolicy -ScanPath” or WDAC Wizard tool.
You then begin whitelisting based on the warnings observed in your event viewer logs or log analytics logs. This process is not straightforward and can be quite labor-intensive in existing environments. Implementing and deploying WDAC in your Windows Defender stack requires a collective effort from your team, including all employees and decision-makers. It’s a task that demands significant work, but it’s well worth the commitment!
I also want to emphasize that you have the flexibility to create multiple custom Windows Defender Application Control (WDAC) policies. I recommend creating separate policies for drivers, PowerShell scripts, and applications. This approach allows you to add more rules in the future by merging them with an existing policy.
There is also the option to sign your WDAC policies to prevent tampering. For more information, you can read more on policy signing here: Use signed policies to protect Windows Defender Application Control against tampering – Windows Security | Microsoft Learn.
I also didn’t touch upon the Microsoft Intelligent Security Graph (ISG) in this guide. ISG enables apps with a good reputation to gain trusted status automatically. However, since we don’t know which apps are included in this list, utilizing this technology can feel like taking a shot in the dark.
That said, store apps are automatically allowed with the base policy we deployed, but Windows line of business apps will not work. Since they are not deployed through the managed installer, they must be whitelisted in additional rules.
Lastly, I recommend deploying the Windows recommended blocklist for Windows Defender Application Control. This is a list of known drivers with vulnerabilities that Microsoft updates twice a year. You can read more info here: Microsoft recommended driver block rules—Windows Security | Microsoft Learn. With all of these practices in mind, you can make the most of App Control for Business in your environment.