
Review the Doc article on managing conflicting processes in Patch My PC — https://docs.patchmypc.com/patch-my-pc-cloud/cloud-deployments/deploy-an-app-using-cloud/cloud-configurations-deployment-tab#conflicting-process
In this video, we introduce the Conflicting Process feature in Patch My PC Cloud. Some applications can’t be updated while they’re running or when they share processes with other apps. This tool lets you decide what happens in those scenarios.
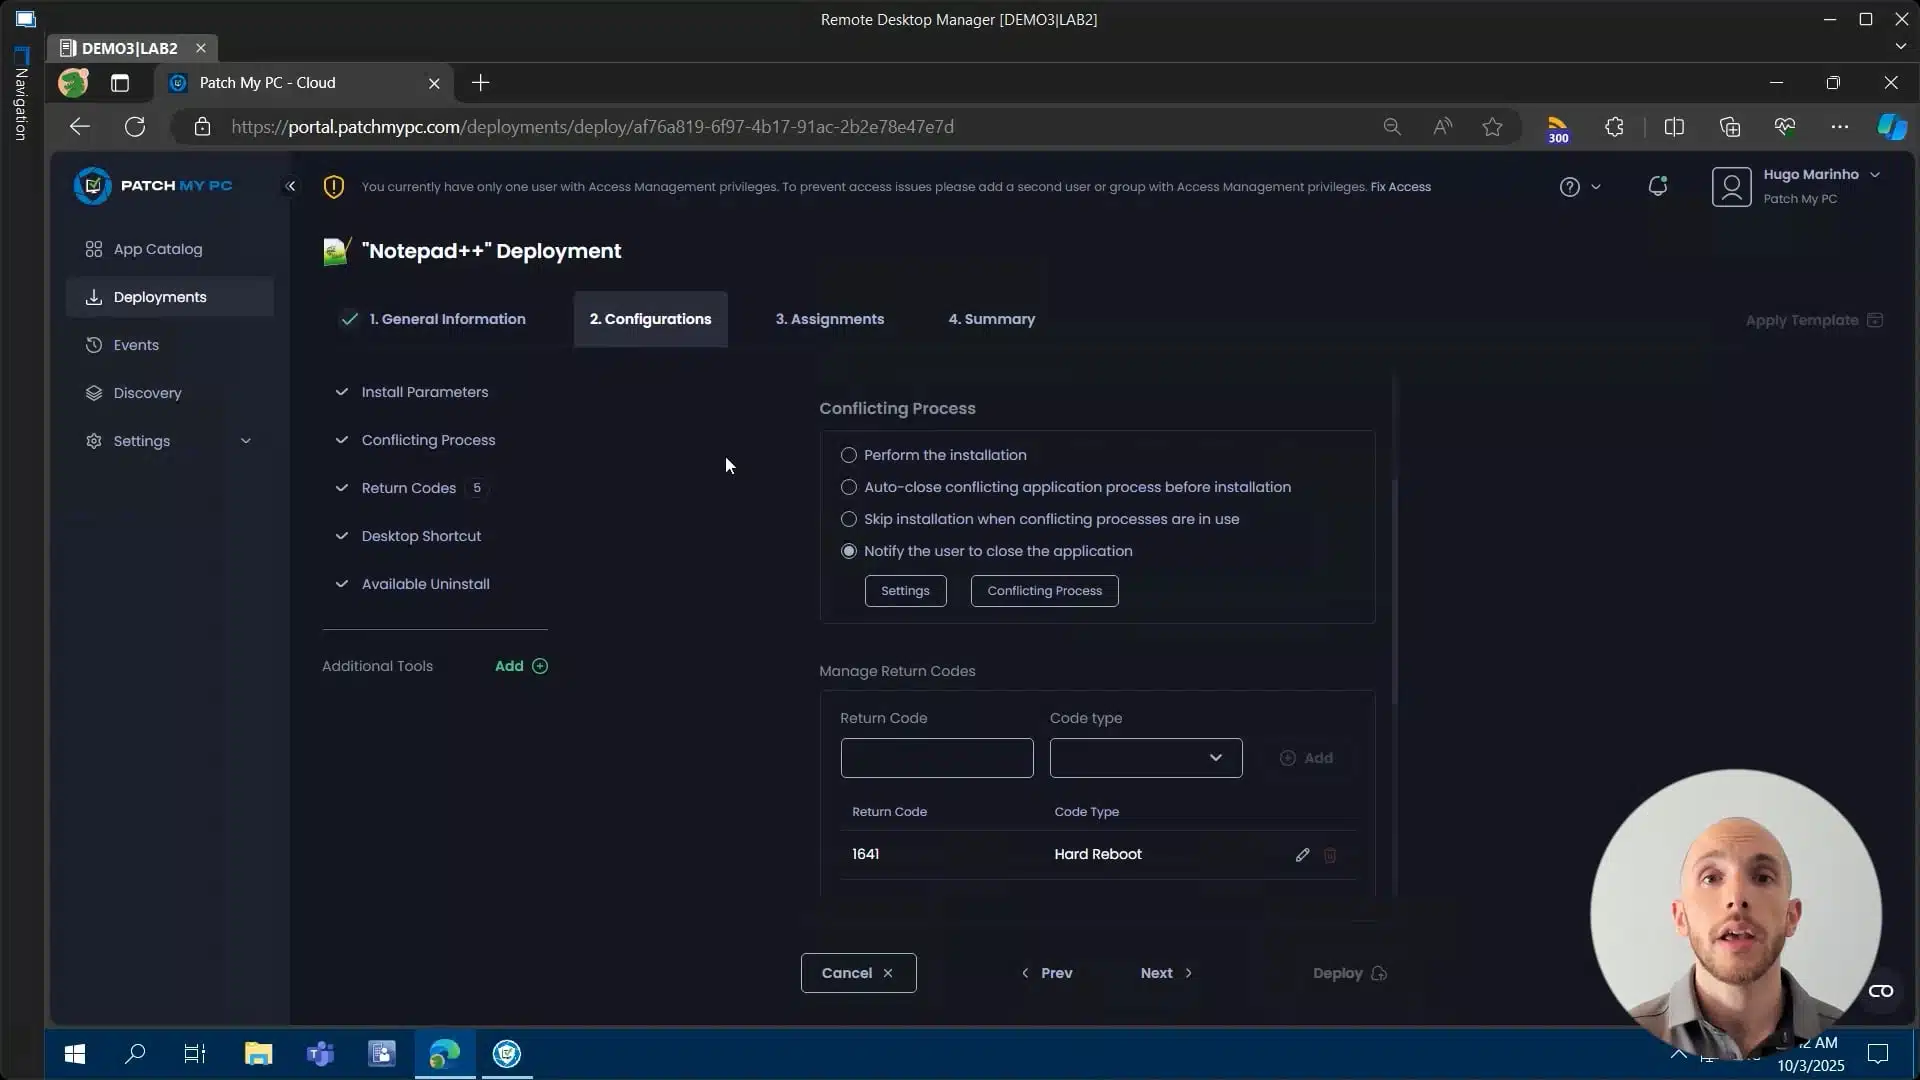
You’ll learn how to:
- Notify users to close an app
- Skip installation until the app is closed
- Automatically close the app
- Force installation regardless of conflicts
We’ll also cover advanced options like deferral policies, notification timeouts, and preventing apps from reopening during updates, giving you full control over how conflicting processes are handled.
Hi there, my name’s Hugo. I’m a customer engineer here for Patch My PC. And today I’m going to be talking to you about the conflicting process feature. And what is this? Basically, this is a way that you have as a user to customize the behavior for your employees if an application needs to be updated and is actually still running. So there are usually two types of software here. There are those that can actually be running and it’s totally fine. The application will still be updated.rnrnAnd there are then other ones which do in fact require it to be closed in order for the update to be successful. But don’t worry, you don’t have to know exactly which ones you are using because we are well aware which ones do need to be closed and which ones don’t. So any application that does not need to be closed, we will always default that to performed installation. So it will still actually follow through. And any other application which does in fact require it to be closed, which is the case here with Notepad++ that I’m showing you today. rnrnWe will always default that to actually notify the user that they have something running that basically needs to be shut down so that the update can actually proceed. And you, as the IT admin, actually have a choice of configuring this as well. For example, to choose if they actually have the option to postpone this or not, how many times they can do that. But we’ll get to that in just a quick minute. For now, let’s just go over these four options here on the screen.rnrnSo in addition to being able to go ahead with installation and to notify the user, you can also actually forcefully shut down the application on behalf of the user’s employee, as you can see here. So auto close the conflicting application, and this will actually terminate the process and it will force the updates to go through. But for the end user, just be aware that this might not really be the best experience because to them it might seem as if the application just crashed. Okay, so just something to keep in mind.rnrnAnd the other option that you can also enable is this one to basically skip the installation entirely if the actual application that needs to be closed is running and just try again the next time that Intune actually decides to sync. Okay, so you do have a couple of options here on how you would like to handle these scenarios. Now, going a little bit back to that option of notifying the user, as I mentioned before, you can actually click on the settings here and you can see some of the other advanced settings that we have.rnrnSo the first thing you can actually customize is a timeout. How many minutes the employee actually has before the notification times out. And by default, this will be five minutes. You can increase this or decrease this if you’d like. Let’s say 15 minutes should be more than sufficient. Then we also have here notification policy. So this basically, again, actually controls the behavior for the notification itself. And if a lot of your employees are using focus assist,rnrnso they’re not disrupted from their work because of unwanted notifications, you can choose to respect that simply by discarding the actual notification. You can actually choose to overwrite that behavior by always show notification regardless if they have that setting enabled or not, or only show it if your own deferral policy has been reached. So it depends on what you actually want to configure here.rnrnAnd talking about your own deferral policy, you actually have two choices on this one as well. You might not even allow for any user deferrals. So as soon as the timer actually expires that we set above, the application will shut down and the update will continue. Or you might actually allow the employee to postpone the installation. And if you do so, you can allow them to do that indefinitely, which is usually not recommended just because a lot of users, they tend to skip updates forever if they can you can choose a X amount of times or a X amount of days. rnrnThen we also have this option here, which basically allows you to configure what actually happens if the timer does expire and the user does not take any action. So you can either A, use up one of the deferrals, okay, and this will just count minus one on behalf of the user. Or if you want to be a little bit more aggressive with your update strategy, you can just forcefully shut down the application and proceed with the update.rnrnWe also have this last option here to prevent the application from being open while updating. This is not really recommended to be enabled. We also have a little warning here, okay, that says exactly that. Just because this basically creates registry keys that if for some reason there’s a internet blip, right, maybe the network fails momentarily, it might cause that the end user has some registry keys stuck in there and then the application will not open until they are manually deleted. So not really recommended just for very specific edge cases.rnrnSo for now, let’s just save. And then let’s talk about this conflicting process button that we have on the side. So these are the actual processes or applications which do in fact basically collide with the update that we are trying to push and that they need to be closed. And once again, you do not need to worry about choosing exactly which ones because we are well aware which ones they are and we will always list them here by default. So you don’t have to add anything unless of course you do want to add your own which if that’s the case, let’s say we would like to add here, for example, Outlook. If you wanted Outlook to be closed, you could just add it to the list and add your own processes as well. Not really what I wanna do here. So let’s just go with the default, hit save, and there you go. And this is our conflicting process application.rnrnAnd this is our conflicting process feature, how it actually works. Hope the video was helpful to you. Just leave a comment with your thoughts below. Thank you so much for your time and have a great day.