
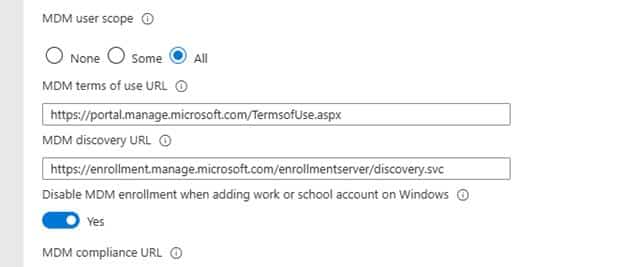
You have probably seen the new option in the Intune portal that lets you disable MDM enrollment when a user adds a work or school account. It looks like a simple switch. Flip it, and the prompt disappears. But what actually changes under the hood? In this post, I am not guessing. I am proving it step by step with a Fiddler trace, showing exactly how the Windows broker and Entra ID decide whether the MDM management prompt is rendered.
What Actually Happens Behind the disable MDM enrollment
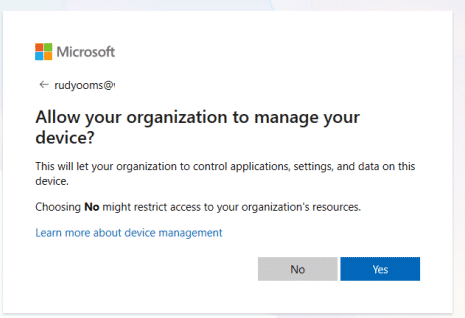
In the previous blog, we explained how to control whether the “Allow your organization to manage your device” prompt appears.
That article focused on the tenant configuration and showed how adjusting the right setting changes the MDM enrollment experience. That blog post answered the administrative question. This blog will answer the technical questions.
- What actually happens when a user adds a work or school account in Teams or in an Office application?
- Where does that management prompt come from?
- Who decides that MDM enrollment is required?
- And what changes internally when you enable the setting that disables MDM enrollment when adding work or school account on windows?

The answer is not a simple Intune toggle. It is a brokered authentication flow between Windows and Entra, and you can see every step of it in a network trace using Fiddler (youtube video).
The Disable MDM enrollmentFlow
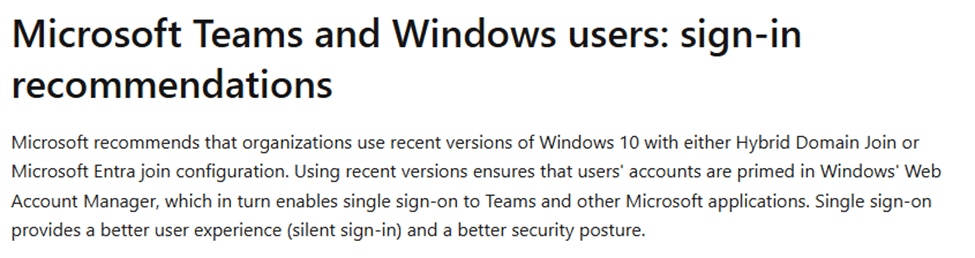
When a desktop app like Teams or Outlook needs to authenticate a work or school account, it does not talk directly to Intune or Azure AD on its own. Instead, it hands the request to Windows. Windows uses Web Account Manager, or WAM, as the authentication broker. WAM is responsible for handling the sign-in process and managing tokens for work and school accounts on the device.
WAM then forwards the request to the Azure AD BrokerPlugin, which communicates with Azure AD on behalf of the operating system.


From that moment, the application is no longer in control. Windows drives the entire flow. The BrokerPlugin sends an authorize request to Azure AD and waits for a response. After the user signs in, Azure AD returns an HTML page that is rendered inside a WebView hosted by the broker.
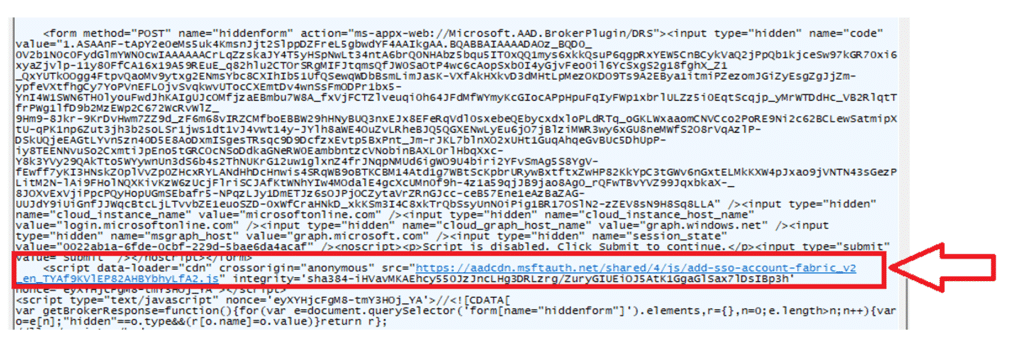
That page is not a native Windows dialog. It is web content delivered by Azure AD and displayed inside the Windows authentication framework. That page always loads the same Fabric shell and the same JavaScript files, and it also contains a configuration object called $Config.
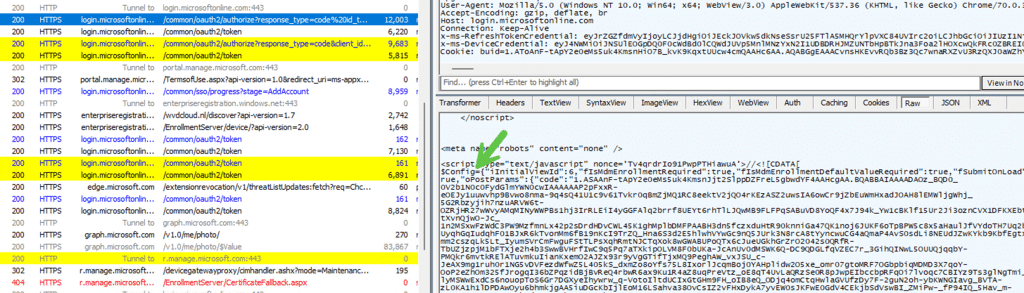
That configuration object is exactly where the decision is made to disable MDM enrollment when adding a work or school account on Windows.
How Azure AD Decides Whether to Show Management Prompt
Azure AD always returns the Fabric shell page after authentication. The difference is in what it places inside the $Config parameter. If MDM enrollment is enabled in the tenant and the user is in scope, Azure AD includes values such as fIsMdmEnrollmentRequired in $Config.
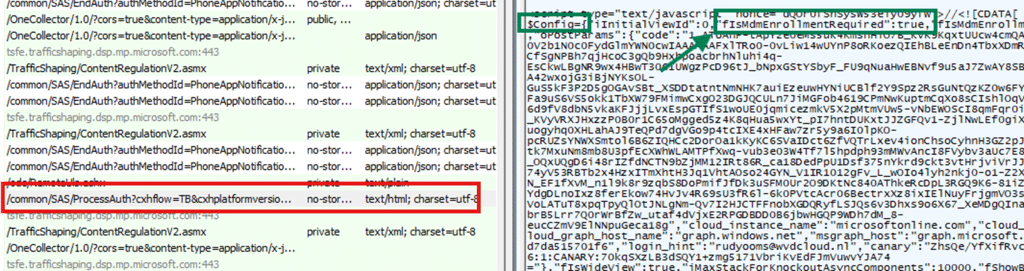
When that value is present, the JavaScript inside the page renders the “Allow your organization to manage your device” screen.

If MDM enrollment is not required (disable MDM enrollment), those values are simply not included/added to the $config parameter.
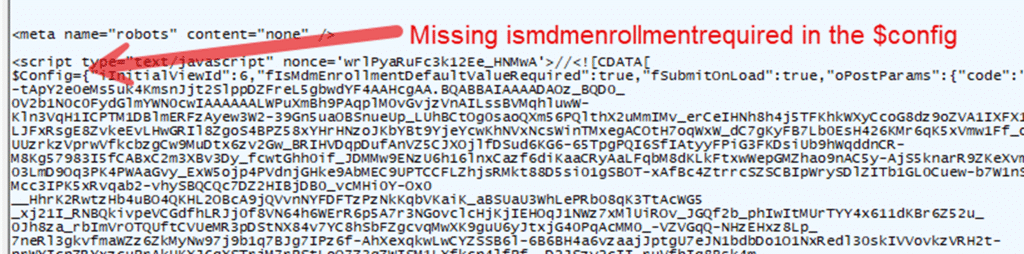
The page continues without asking the question to “allow your organization to manage your device“, and with it, the device will not become MDM managed. The page itself does not change. The configuration inside it changes. That is the key distinction.
What Happens After the User Clicks Yes
If the management screen appears and the user clicks Yes, the web page posts the result back to the BrokerPlugin using a custom URI that starts with ms-appx-web://Microsoft.AAD.BrokerPlugin. At that moment, control returns from the web content to native Windows code.
The broker receives an authorization code and exchanges it for tokens. Because the enrollment path was activated, the broker requests a token that allows it to contact the enrollment service at https://enrollment.manage.microsoft.com.
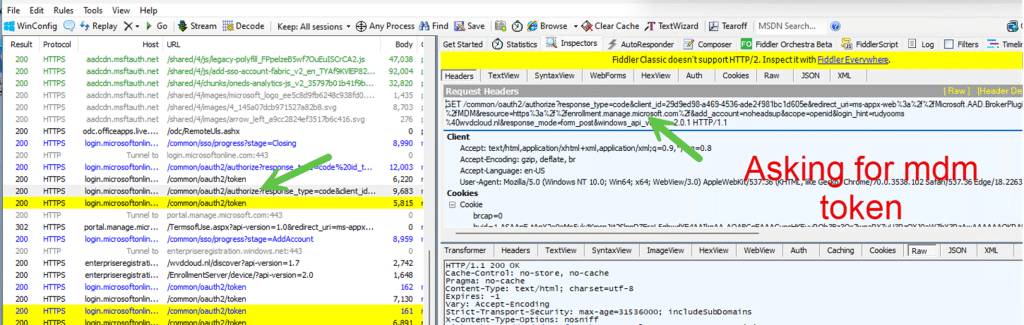
Once that token is obtained, the broker contacts the enrollment service, and device MDM enrollment begins. If the user clicks No on the “allow my organization to manage your device”, this token request never happens. The sign-in completes, the account is added, and enrollment does NOT occur (disable MDM enrollment).
The Complete Flow at a Glance
The Disable MDM Enrollment When Adding a Work or School Account on Windows sequence below reflects the full behavior, including where the decision happens.
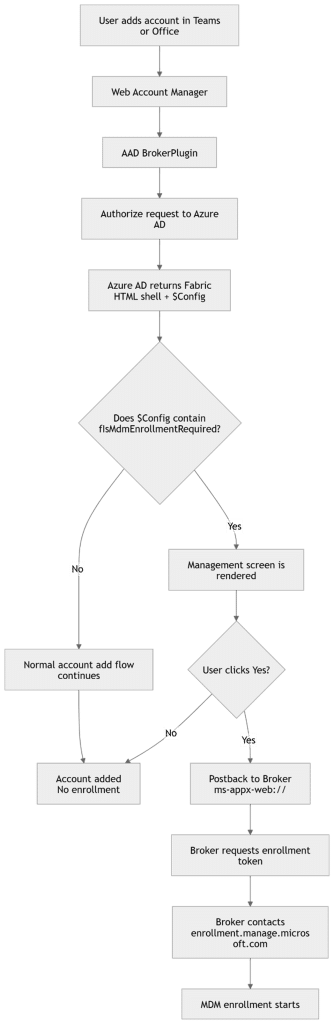
This diagram shows that the Disable MDM Enrollment When Adding a Work or School Account on Windows decision is driven by what Azure AD includes in $Config. If the MDM values are not present, the management screen does not appear, and enrollment does not start.
Why This Matters
The “Allow your organization to manage your device” prompt is not a standalone Windows dialog. It is part of a web driven authentication flow controlled by Azure AD. The device simply renders what Azure AD instructs it to render based on the configuration it receives. When you disable MDM enrollment during account addition, you are not hiding a prompt.
You are changing the negotiation between the broker and Azure AD so that the enrollment requirement is no longer included in the configuration returned to the device. Once you understand that, the behavior is no longer surprising; it becomes predictable.