You can deploy the same app with different configurations using Patch My PC (PMPC) Cloud.
**Important**
For this to work, you must use a different **Display Name** for the deployment. If you don’t, you will receive the [deployment with the same name already exists](../cloud-troubleshooting/troubleshooting-cloud-deployments/a-deployment-with-the-same-name-less-than-deployment_name-greater-than-already-exists-error-when-dep.md) error.
To deploy the same app with a different configuration:
- Sign in to the portal at https://portal.patchmypc.com/.
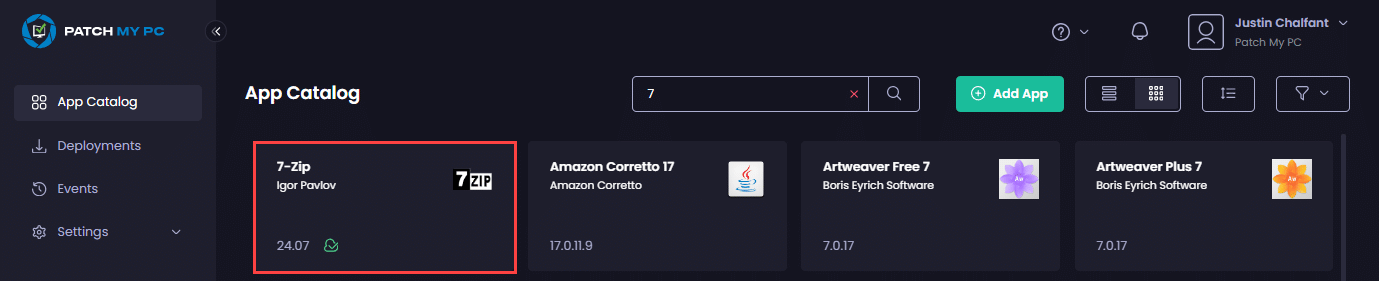
- Locate the required app on the App Catalog page.
**Tip**
Use the **Search** field to help you locate the app.
**Note**
The green cloud icon beside the version number tells you this software has already been deployed using PMPC Cloud.
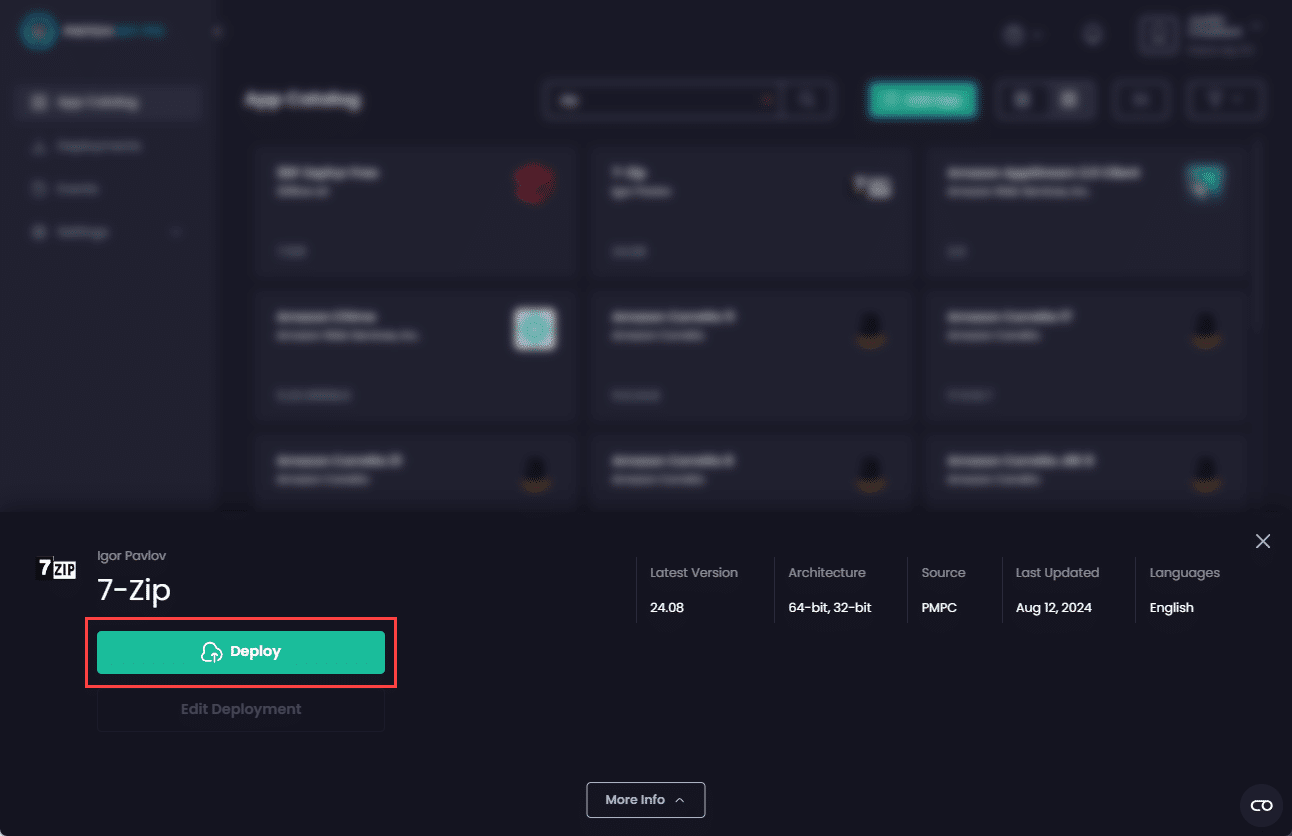
- Click the app to open its properties, then click Deploy to start the Deployment Wizard.
**Note**
See the [Deploy an App](deploying-an-app-using-cloud/) for more details. You can also apply a deployment template to this deployment by clicking **Apply Template** and following the [Use a Template in Deployments](use-a-template-in-cloud-deployments.md) process.
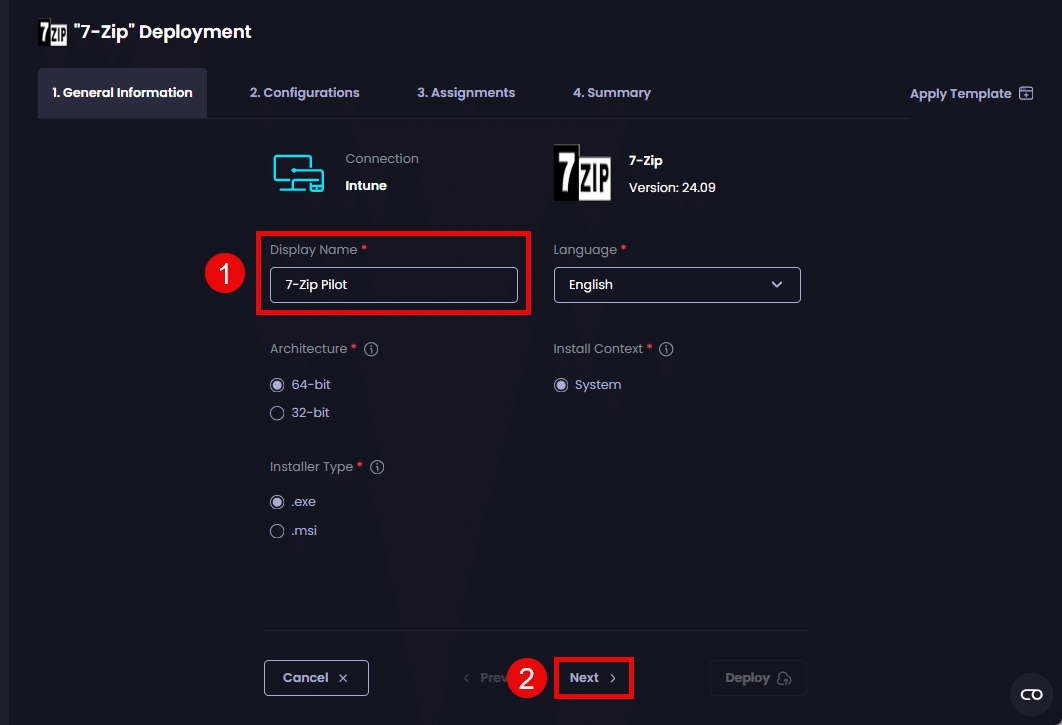
- On the General Information tab, in the Display Name field, enter a unique name for this deployment, then click Next.
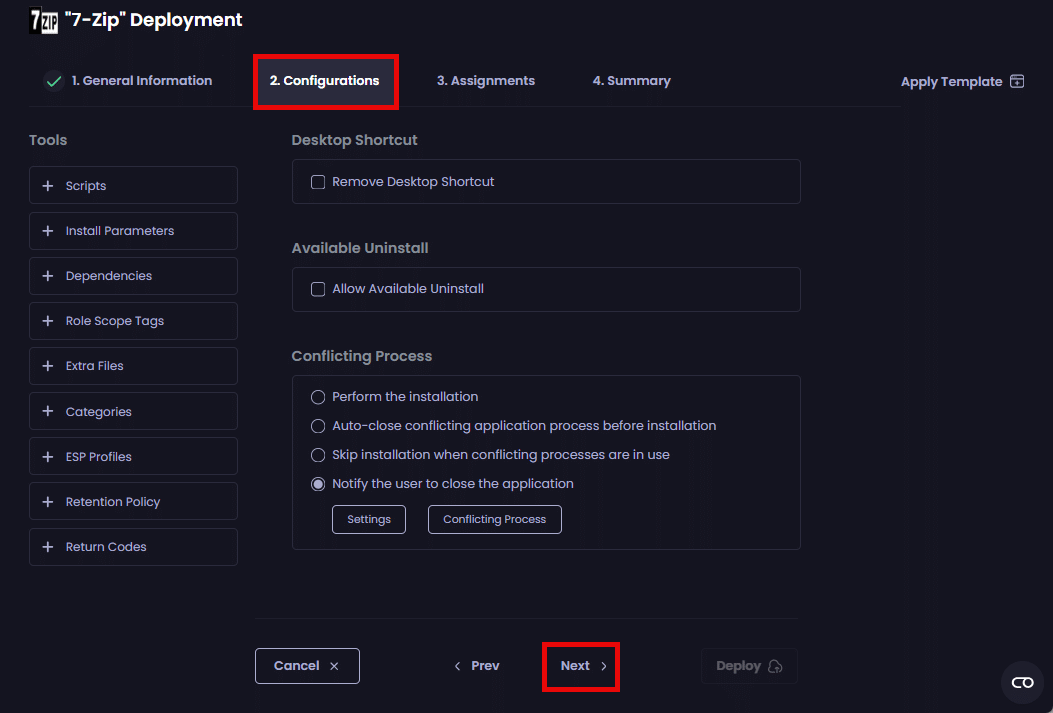
- On the Configurations tab, configure the settings to add any required scripts or additional installation parameters, then click Next.
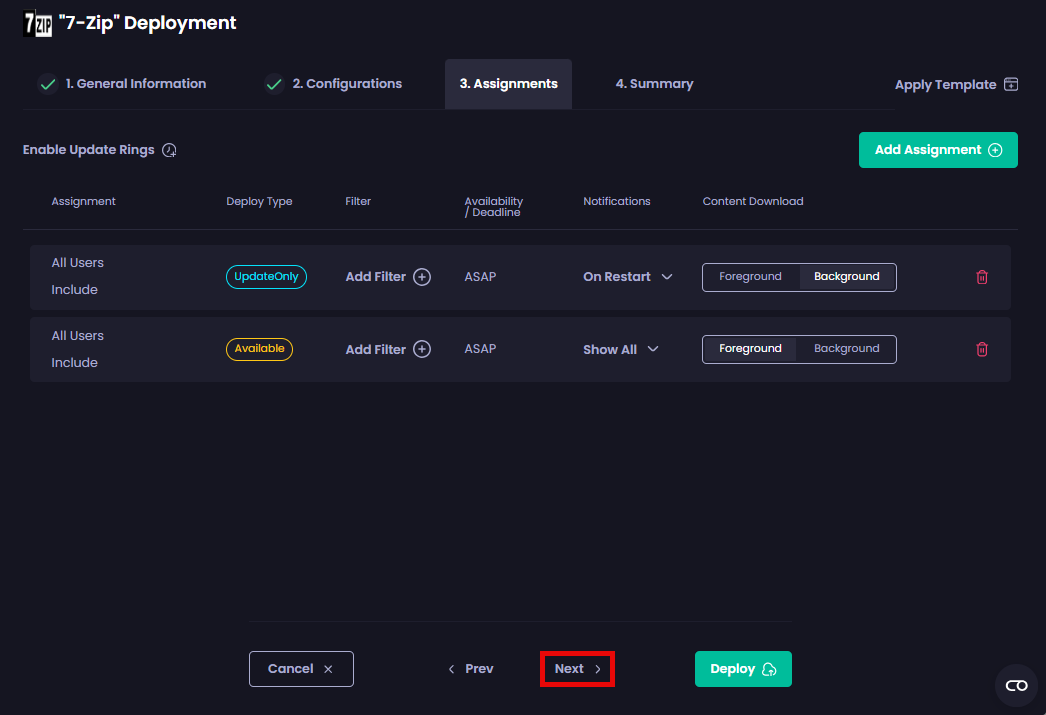
- On the Assignments tab, click Add Assignment, then select the assignment type you want to add for this deployment.
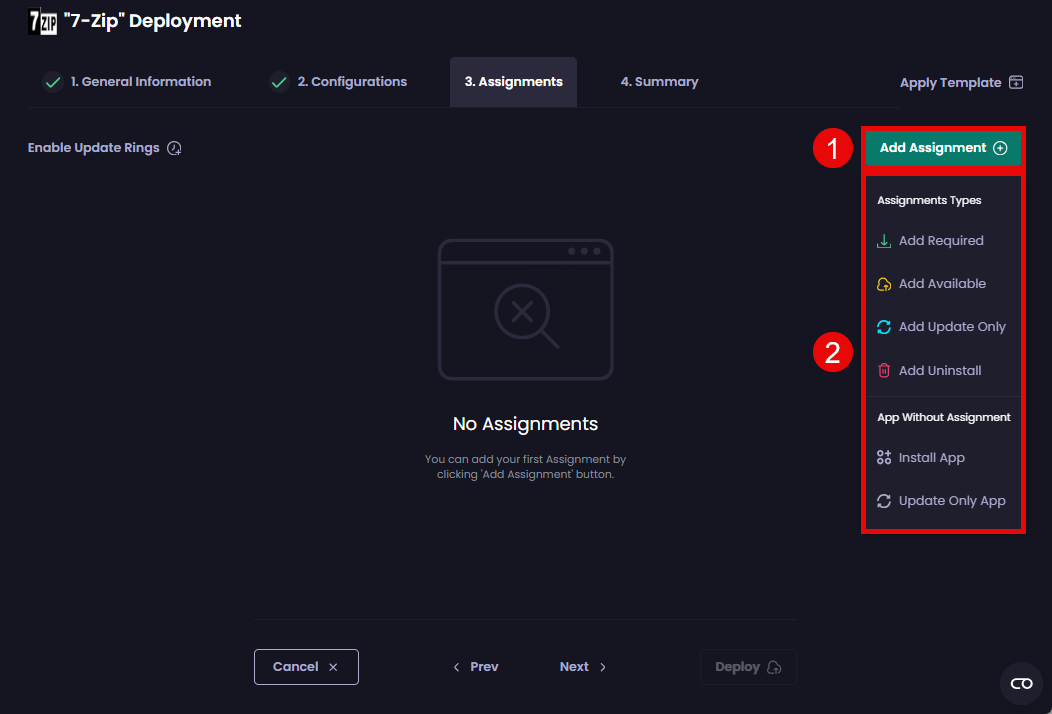
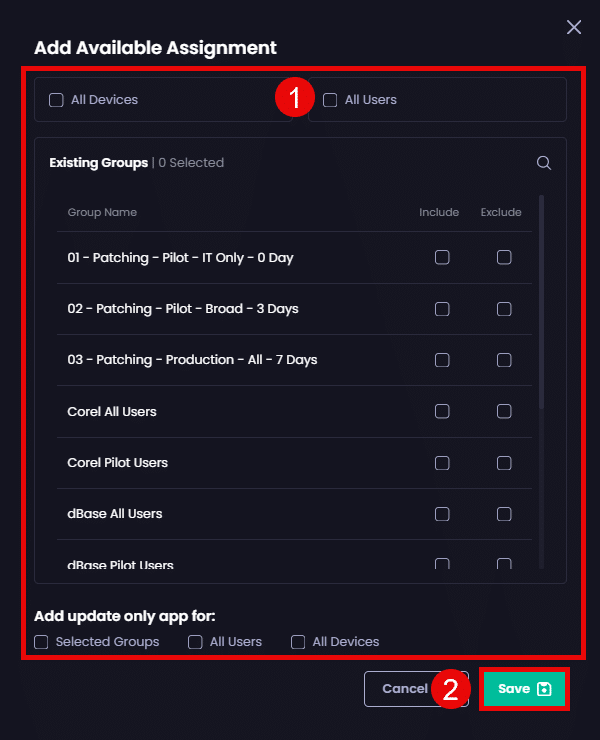
- On the Add <assignment_type> Assignment page, select the relevant options, then click Save.
**Note**
If you add an available assignment, as shown below, we recommend selecting the same options in the **Add update only app for** section. Doing this will automatically make the current version of the app and any updates (current or future) available.
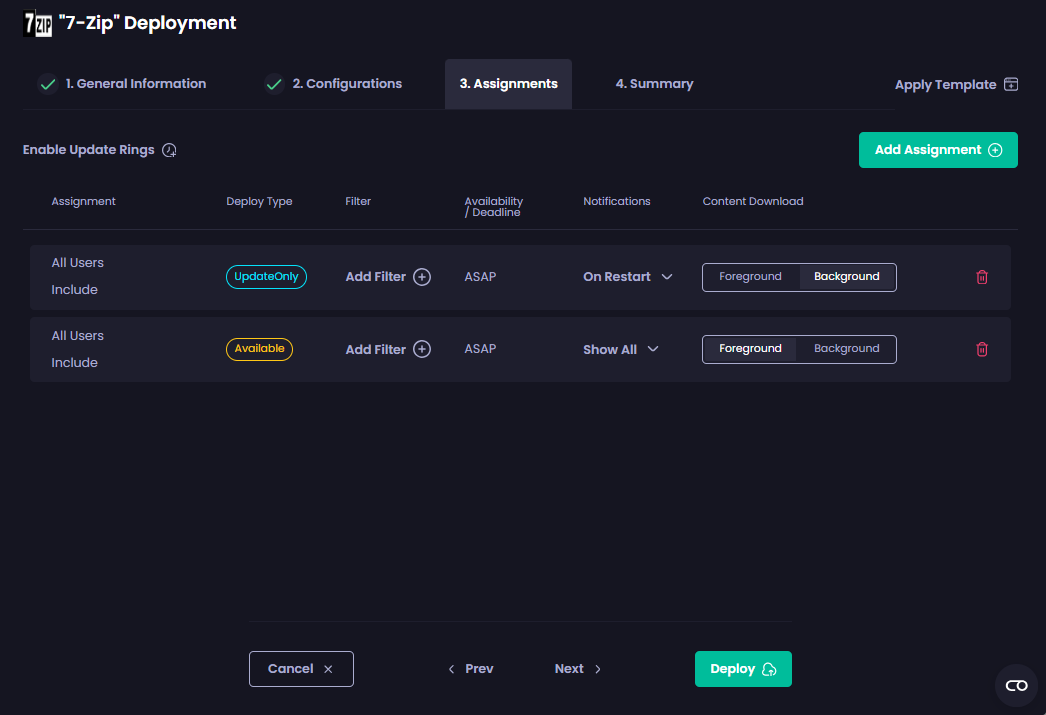
The Assignments page updates to show the newly created deployment.
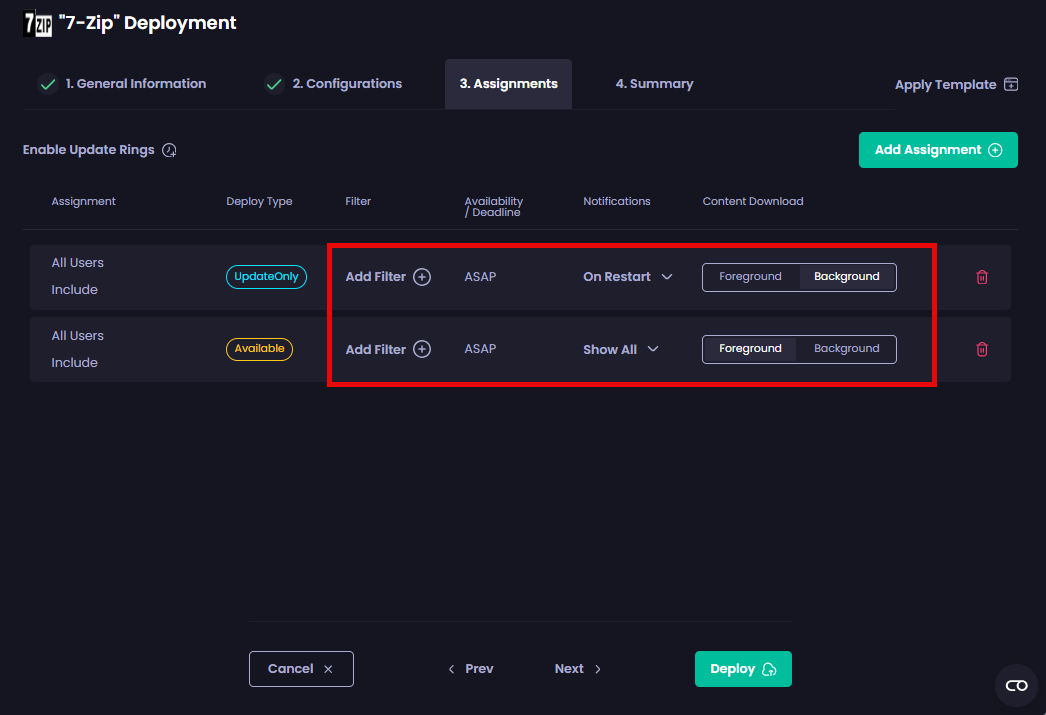
- Configure the settings for deployment, if required.
**Note**
We automatically configure these settings based on our experience and best practices, but you can modify certain settings if necessary.
**Tip**
You can click **Deploy** on this page if you don’t want to add additional assignments or see the **Overview** page, which allows you to double-check the settings you’ve configured for this deployment.
- Add any additional assignments for this deployment by clicking Add Assignment and repeating Steps 6 to 8, then click Next.
- Review the deployment summary shown on the Summary page.
If you are happy, click Deploy.
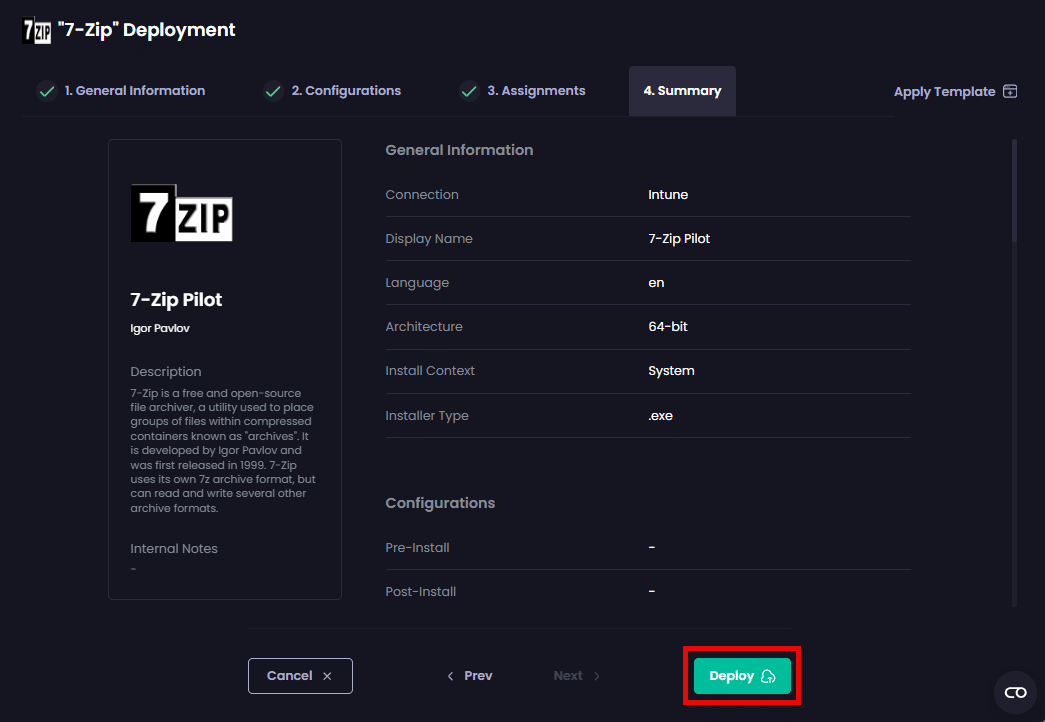
If you need to change something, click < Prev to backtrack through the Deployment Wizard to the relevant setting. Make the change, then step back through the wizard to this page. If everything is now correct, click Deploy.
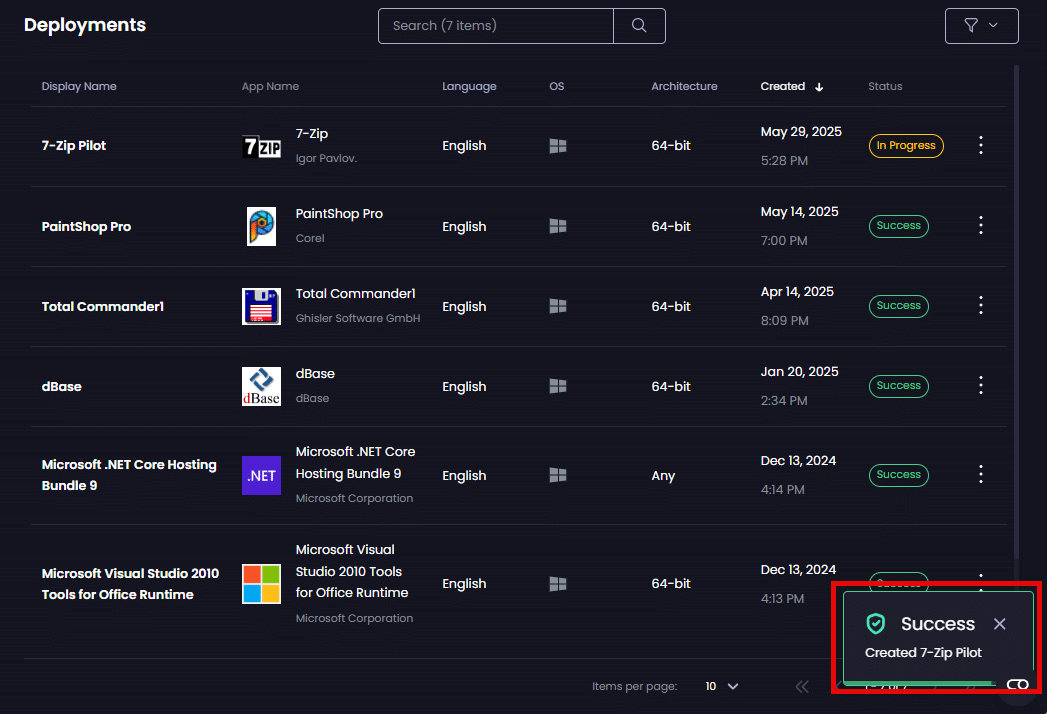
The Deployments page is displayed along with the Success – Created <deployment_name> notification.
**Note**
By default, the installation logs for an app will be created in the following folder regardless of the installer file type:
`%ProgramData%PatchMyPCInstallLogs`
The only exception is for EXE files, where the specified value for the **loggingSwitch** variable will be used if it is not null or empty.