To create Update Rings for a new Deployment in Patch My PC (PMPC) Cloud:
- If you are unfamiliar with creating a deployment, follow the Deploy an App process until Step 7.
-
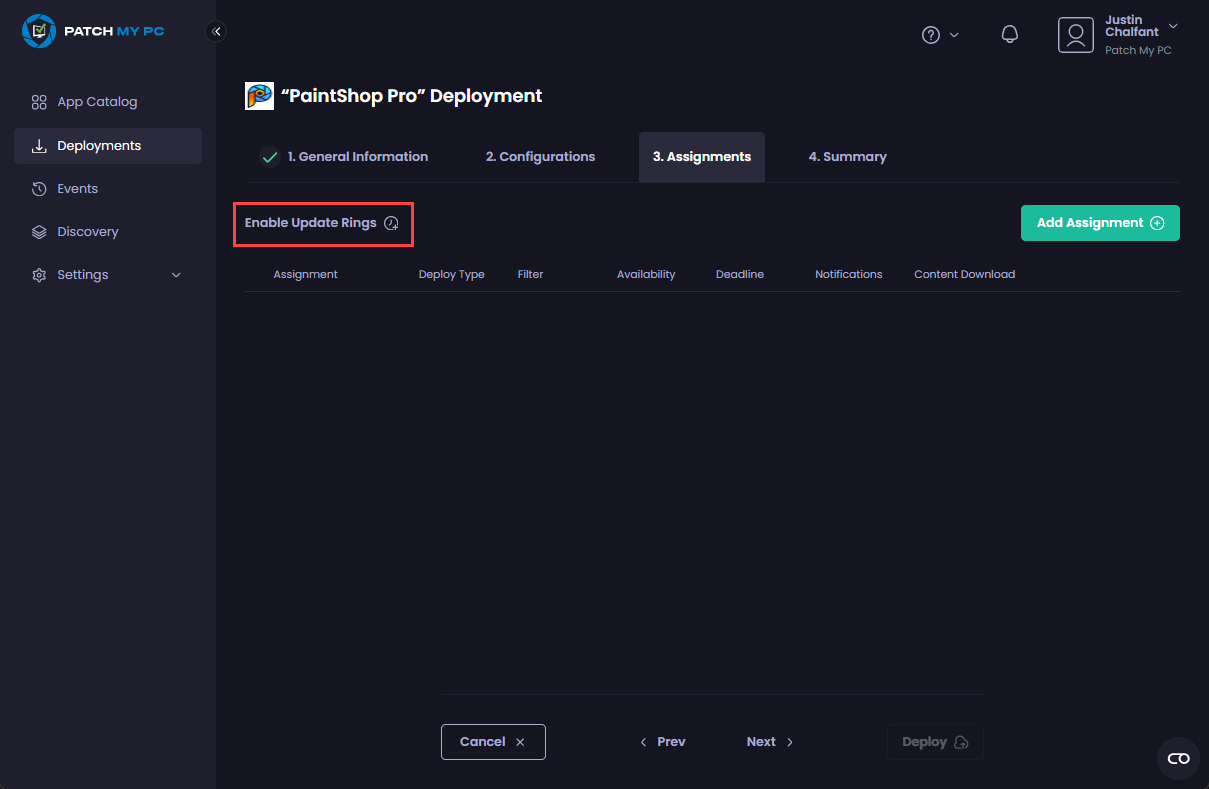
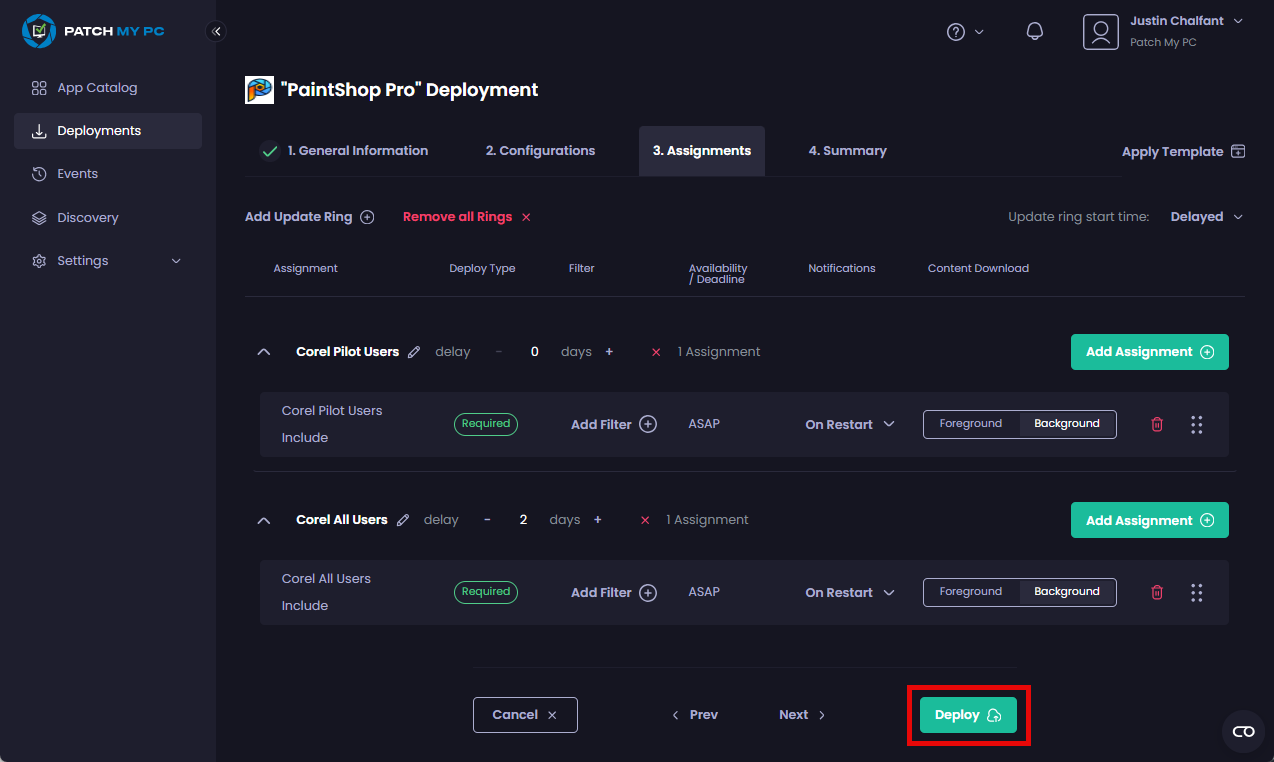
On the Assignments page, click Enable Update Rings.

- From the Update ring start time dropdown, choose how you want your Update Rings to handle the start times for their assignments:
• Delayed
• Immediate
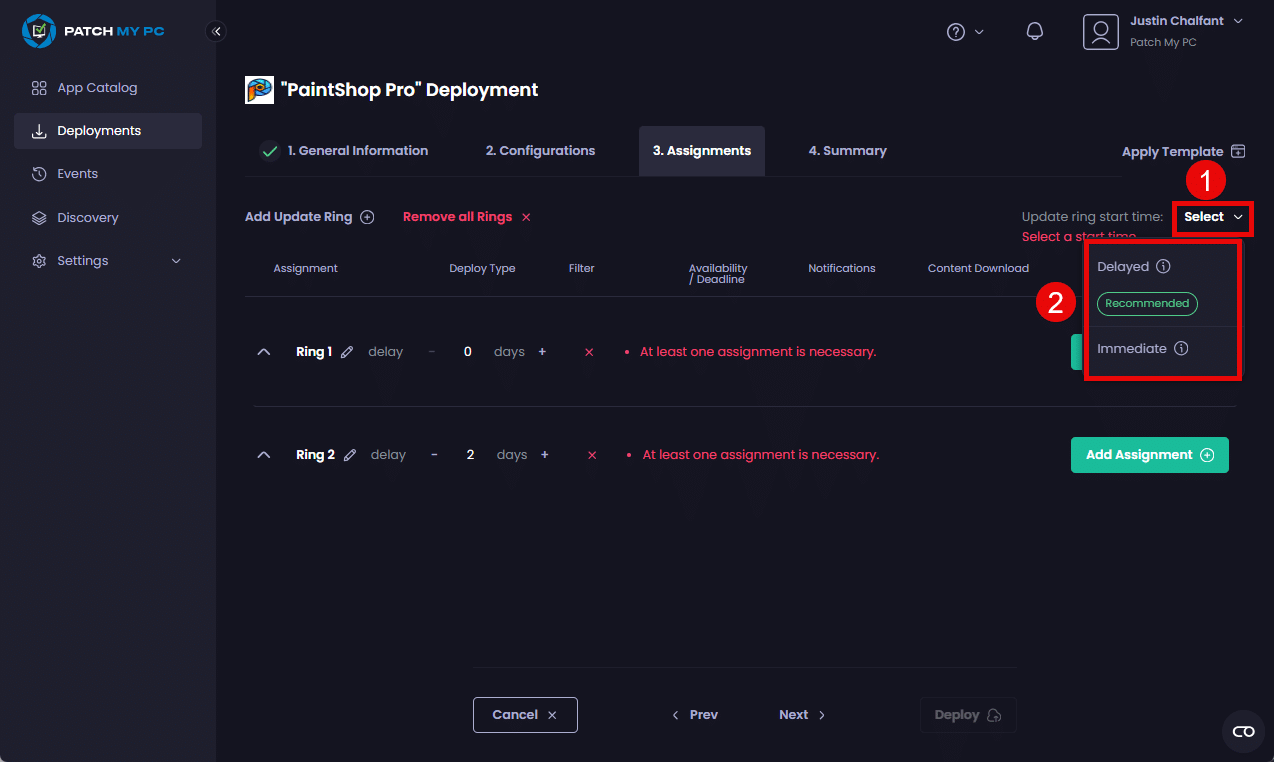
By default, two Update Rings are created with a two-day delay between them.
- If you do not want to add additional Update Rings, go to step 7.
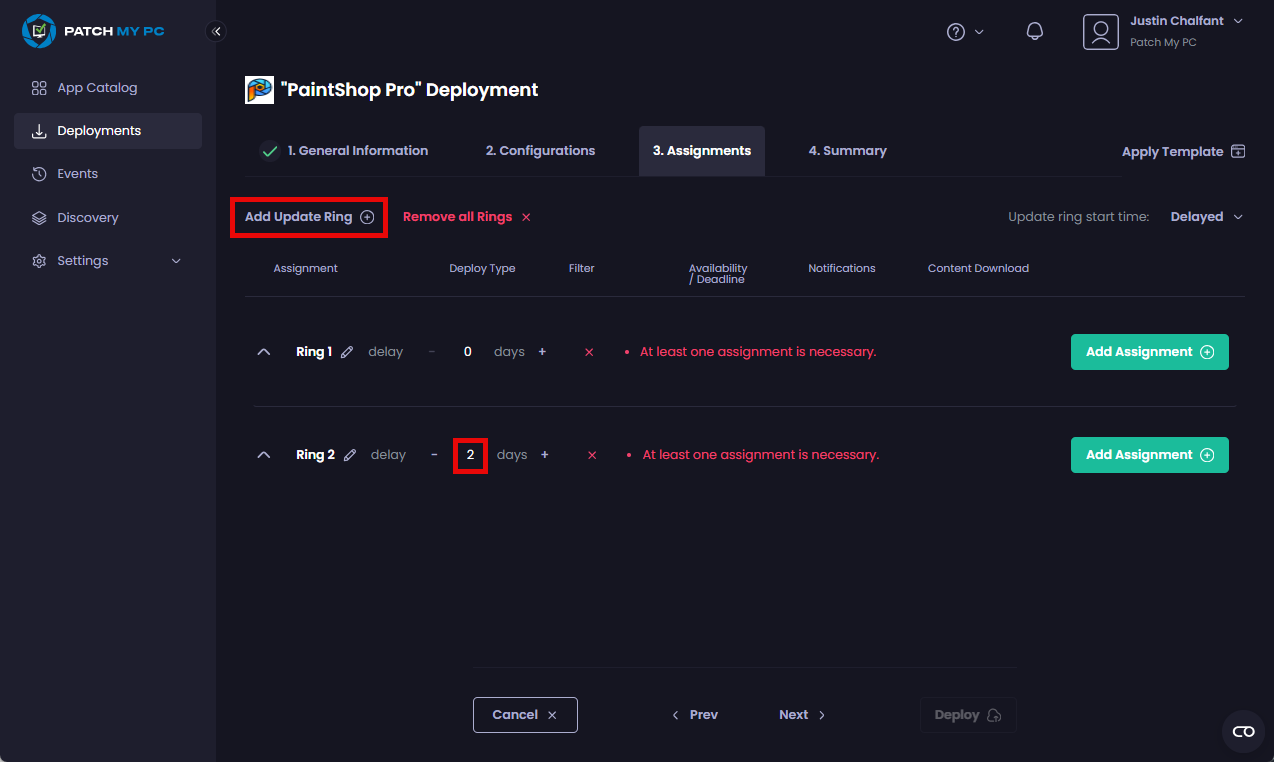
To add an additional Update Ring, click Add Update Ring.
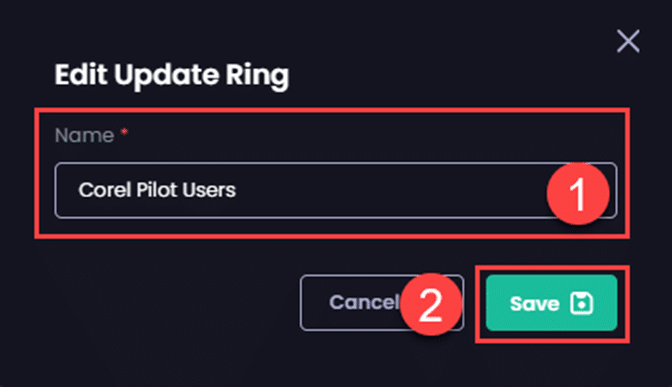
- On the Add Update Ring dialog box, enter the name for the new ring in the Name field and click Save.
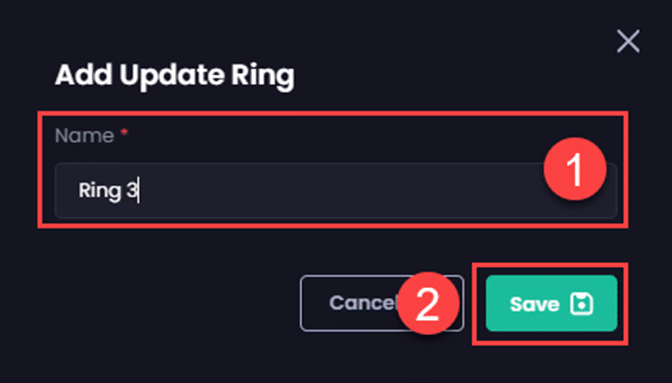
A new ring is added.
**Important**
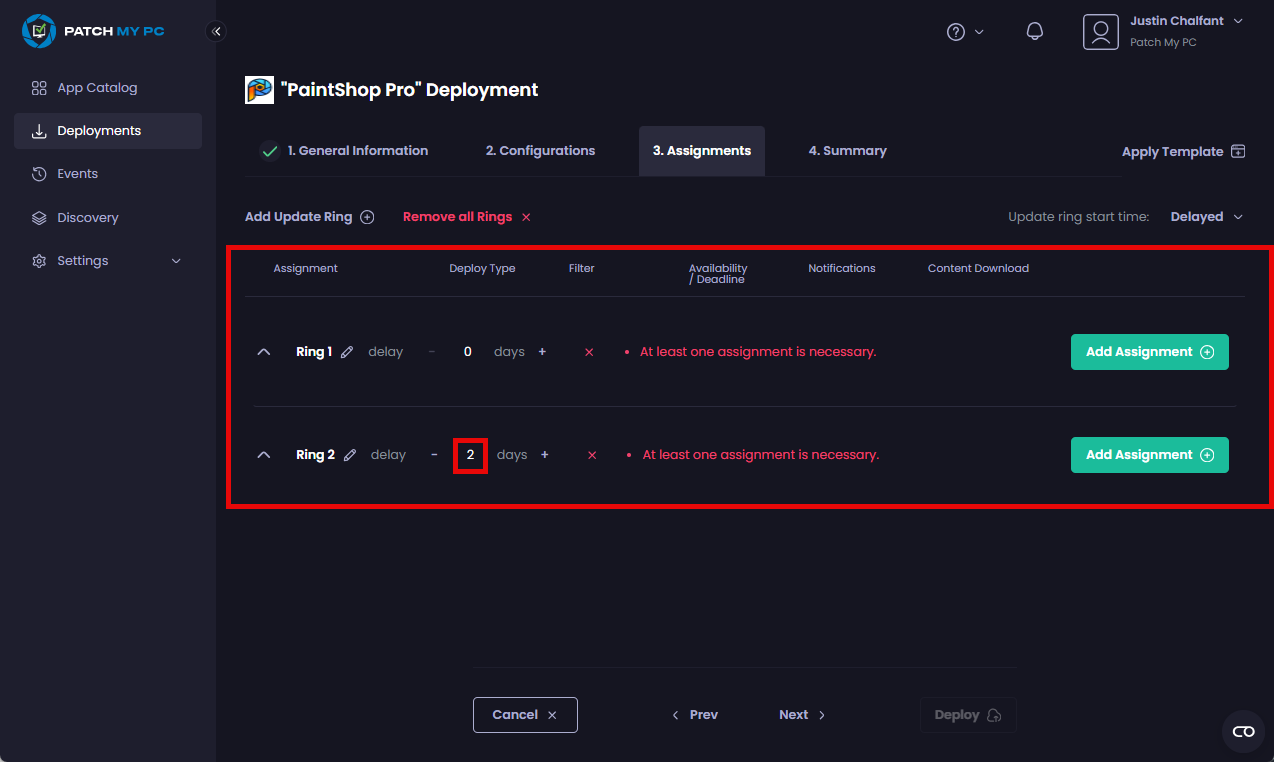
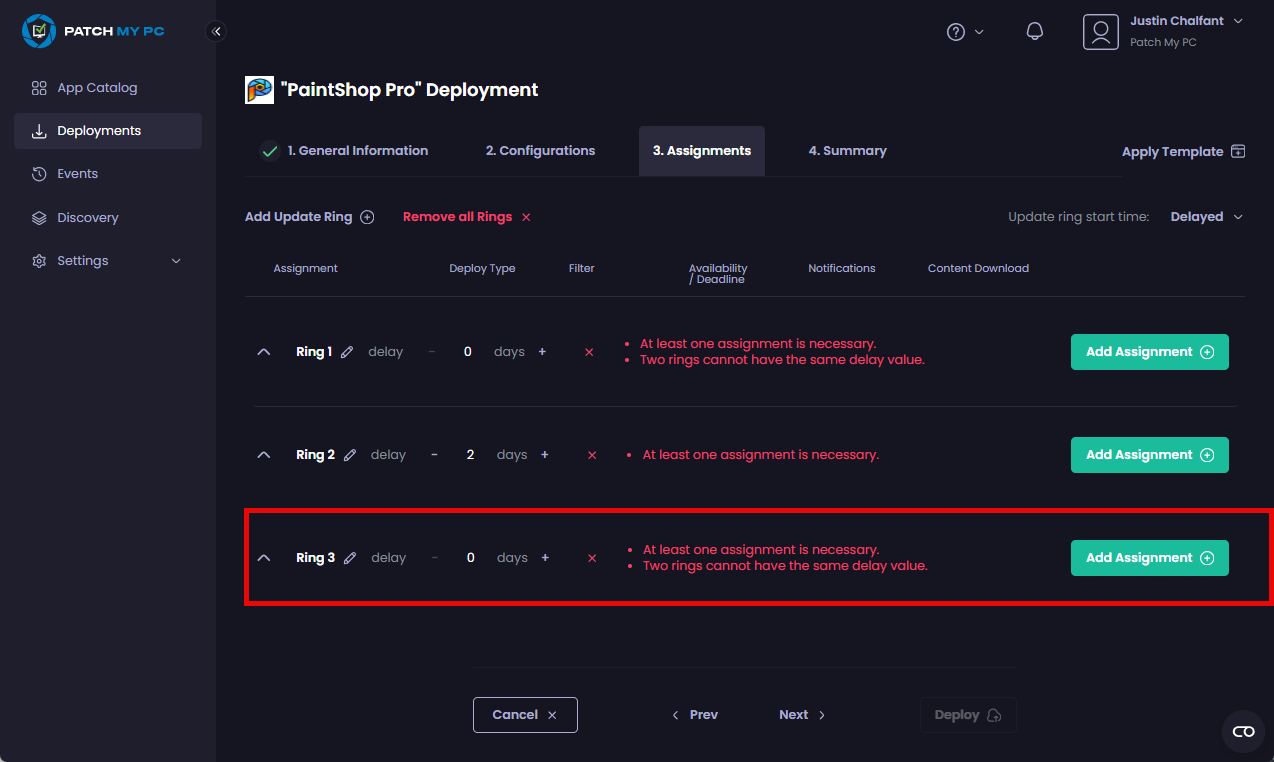
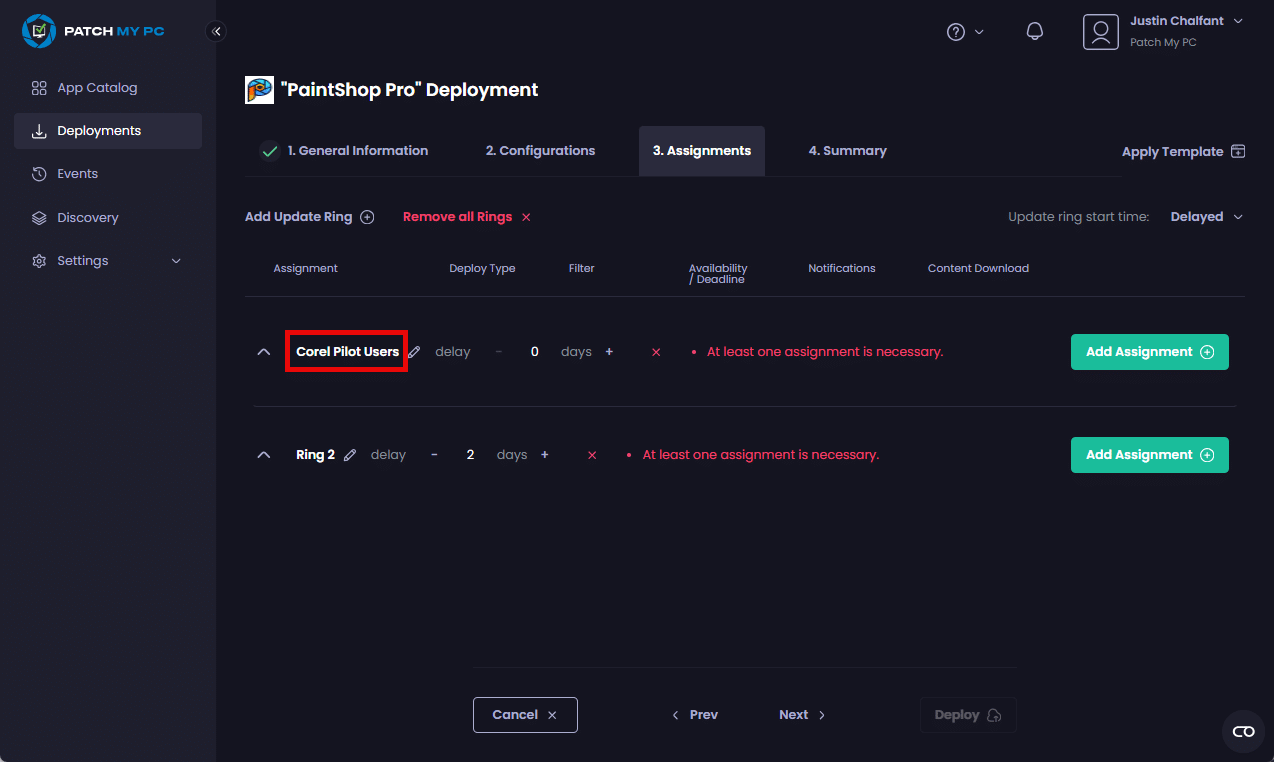
Whenever you add a new Update Ring, it is created with a default delay of **0** days, i.e. the deployment will be installed immediately on any targeted users/devices.
If you already have another ring with a default delay of 0 days, you will see the **Two rings cannot have the same delay value** message besides the second ring with the duplicate delay.
You should adjust the delays on your Update Rings to avoid duplicates.
Also, if your [Sync Schedule](../../cloud-administration/manage-the-sync-schedule-in-cloud.md) is configured for anything other than **Daily**, this will affect the delay you can configure between rings. For example, assuming you have your Sync Schedule configured for **Monthly**, when you add a new ring you will not be able to configure a delay between rings of less than 30 days as shown below.
- Repeat step 4 to add any additional Update Rings.
**Note**
You can add up to a maximum of 10 Update Rings per deployment.
- If you do not want to change the names of any of the rings, go to Step 10.
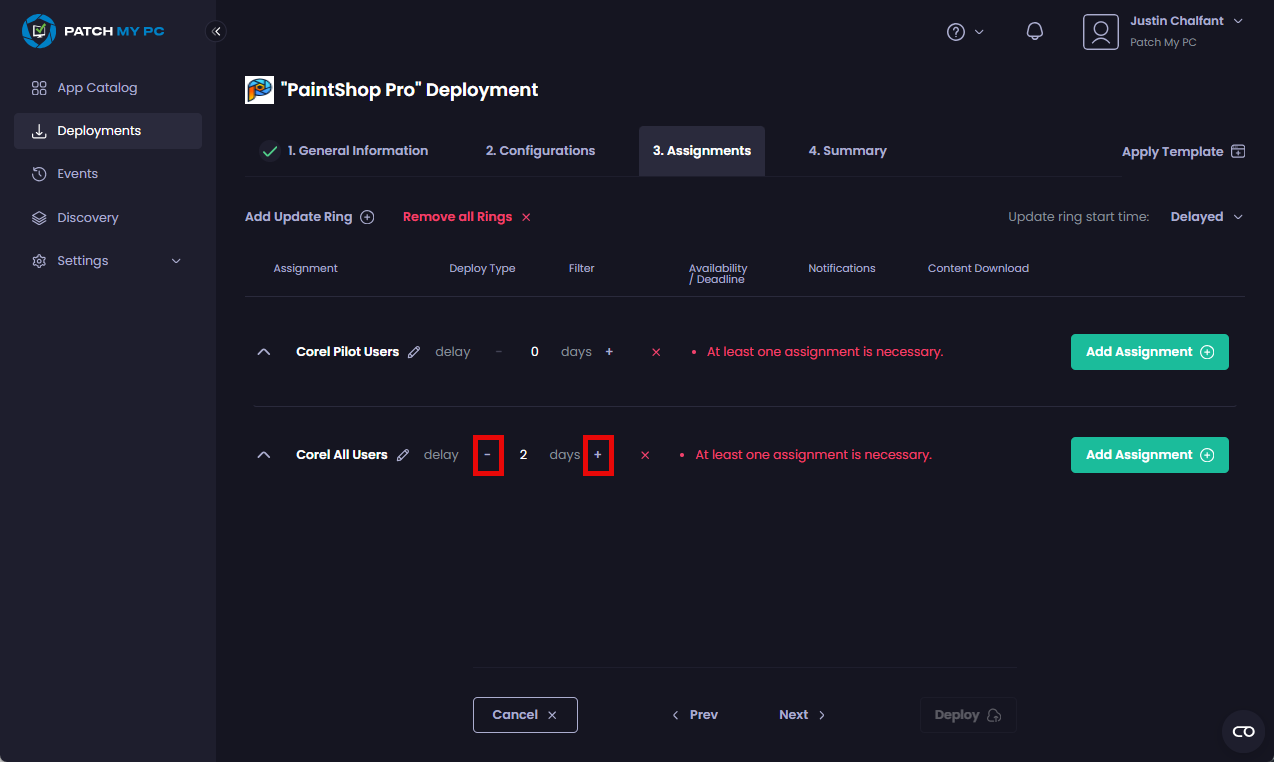
If you want to change the name of any of the rings, click the pencil icon (.png>)) beside the relevant ring.
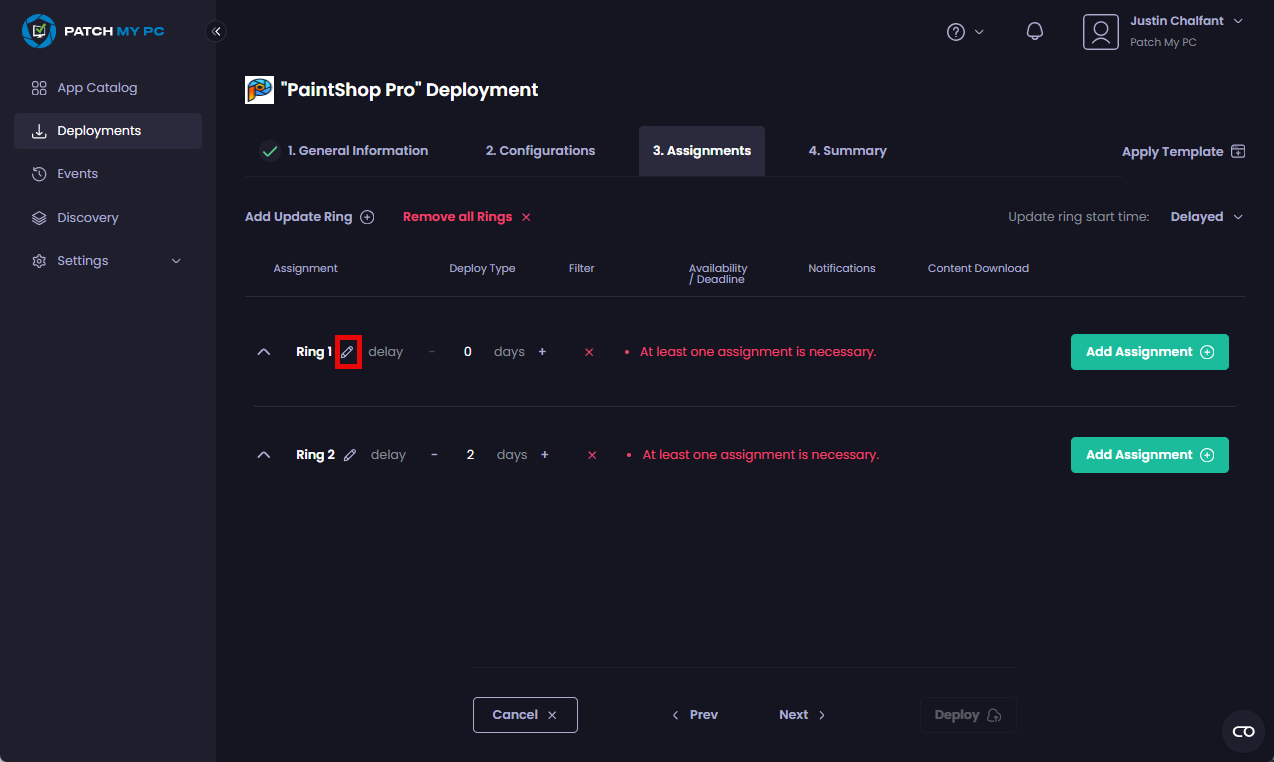
- Enter the ring’s name in the Name field of the Edit Update Ring dialog box, then click Save.
The updated name appears.
- Change the name of any other rings.
- If you do not want to change the delay for any of the rings, go to Step 11.
If you want to change the delay for a ring, click the plus (+) or minus (–) sign beside the relevant rings.
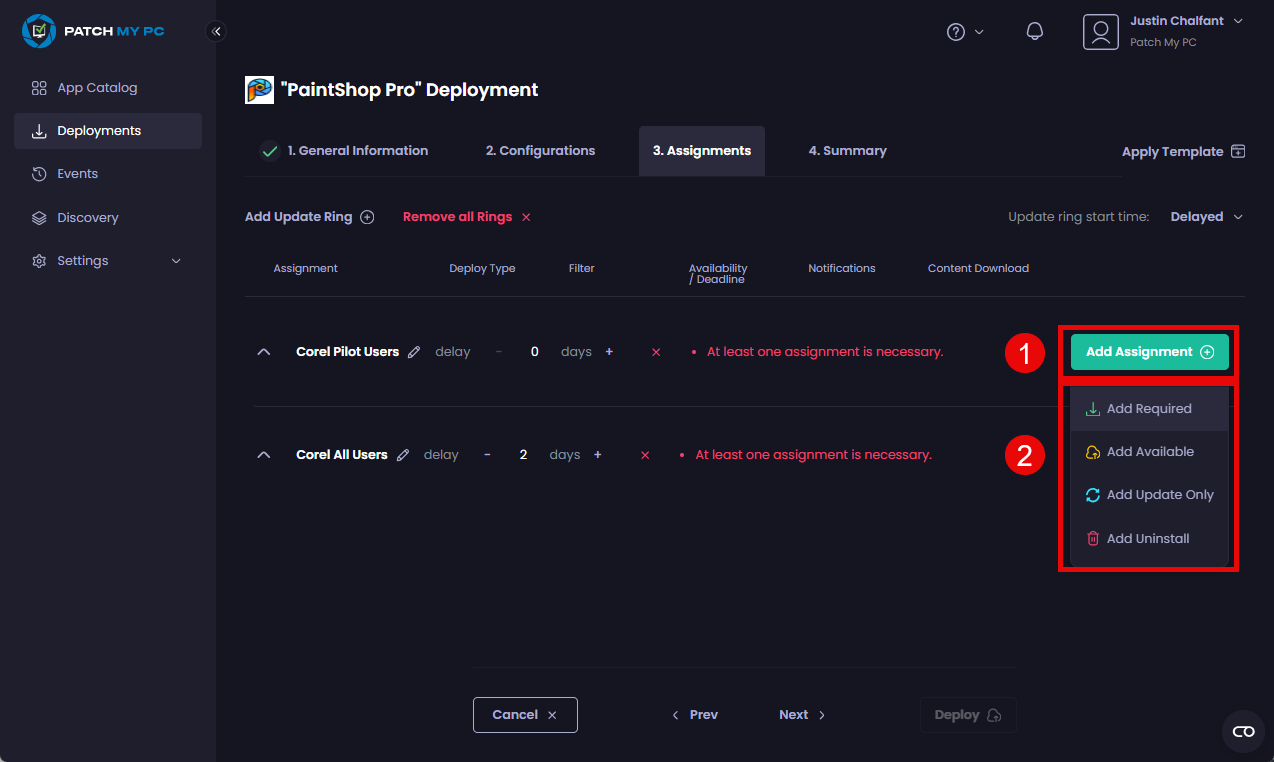
- Click Add Assignment and add the relevant assignments for each ring, configuring the settings for each assignment as required.
**Note**
See the [Assignments](../deploying-an-app-using-cloud/cloud-assignments-deployment-tab.md) section of the [Deploy an App](../deploying-an-app-using-cloud/) process for more information.
**Tip**
You can drag assignments between Update Rings by clicking the double ellipsis (.png)) beside the relevant assignment and dragging and dropping it to the relevant Update Ring.
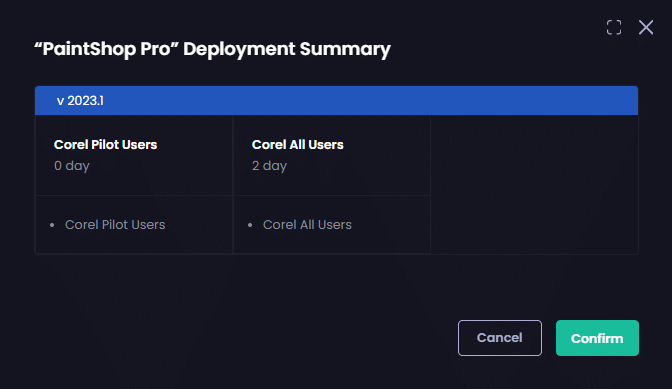
- Click Deploy.
The “<deployment_name>” Deployment Summary dialog box appears, summarizing what you are deploying, to which groups, and when.
**Note**
If your [Sync Schedule](../../cloud-administration/manage-the-sync-schedule-in-cloud.md) is set to anything other than **Daily**, the UI will warn you that some rings may not be evaluated as expected.
.png>)
This is why we recommend you set your [Sync Schedule](../../cloud-administration/manage-the-sync-schedule-in-cloud.md) to **Daily** if you plan to use Update Rings.
- Either click :
a. Cancel to return to the Assignments tab to make any changes (after which you need to click Deploy).
b. Click Confirm to continue.
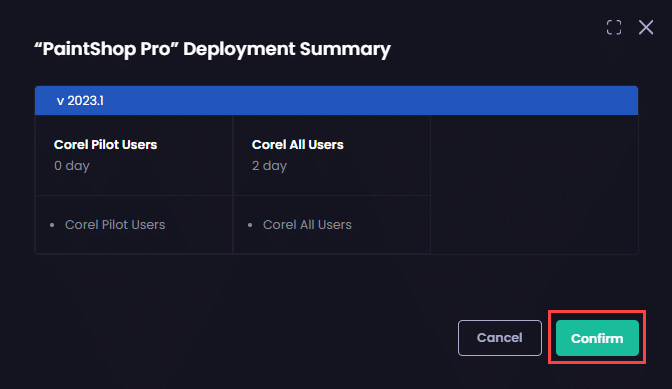
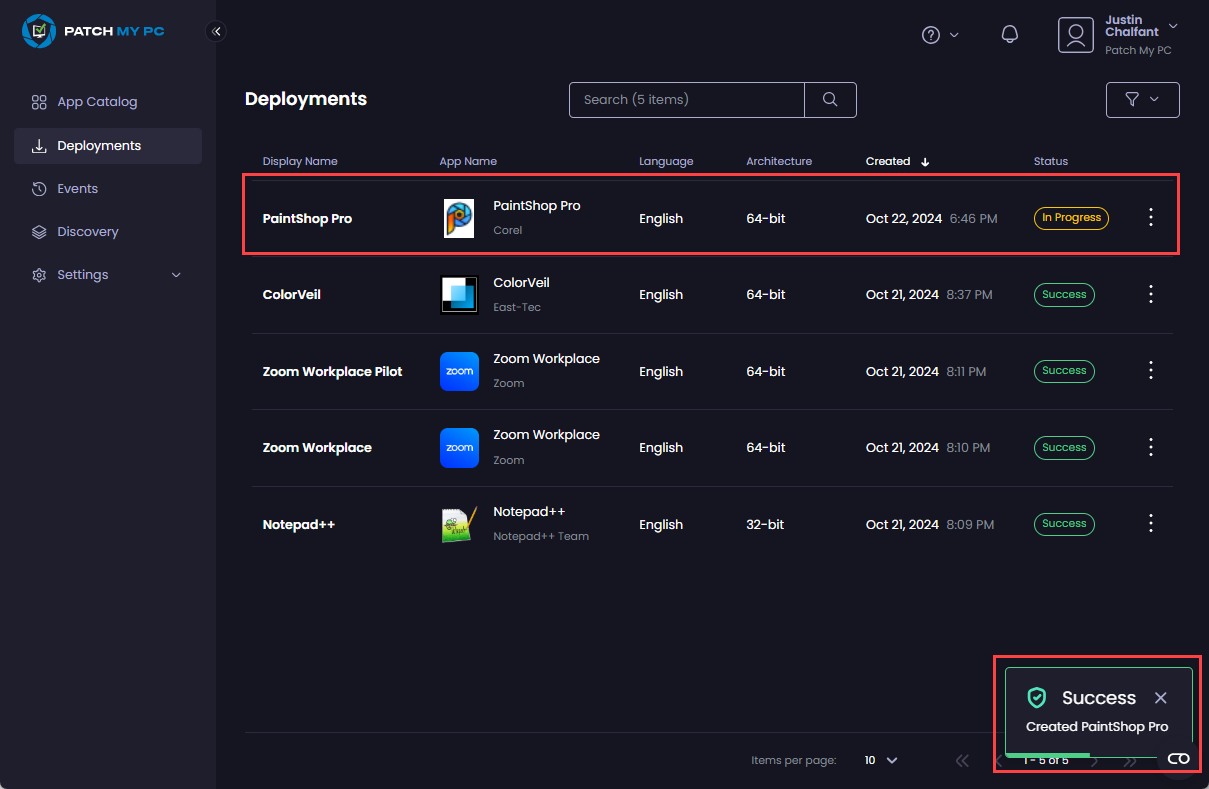
When you click Confirm, the Deployments node appears showing the deployment as In Progress and the Success – Created <deployment_name> notification.